Adding a Barracuda WAF to the Control Center
Steps to Add the WAF
Once you have the token, navigate to Advanced > Control Center in the WAF interface. You should see a page like this:

- Enter the token you obtained from the Control Center.
- Click Connect to Control Center.
- Enter your Control Center credentials.
- Enter the Control Center IP address:
51.140.24.220. - Click Save.
- You should see a confirmation message indicating that the WAF has been successfully connected to the Control Center.
If you would like to use the local admin account to connect to the Control Center, use these credentials:
username: admin
password: found in the vault at secret/terraform/mpd/wafcc_admin_password
Getting the Token from the Control Center
- Log in to the Barracuda Control Center.
- Navigate to the Connect Products page.
Copy the validation token.
Click on the WAF you want to remove and disconnect it
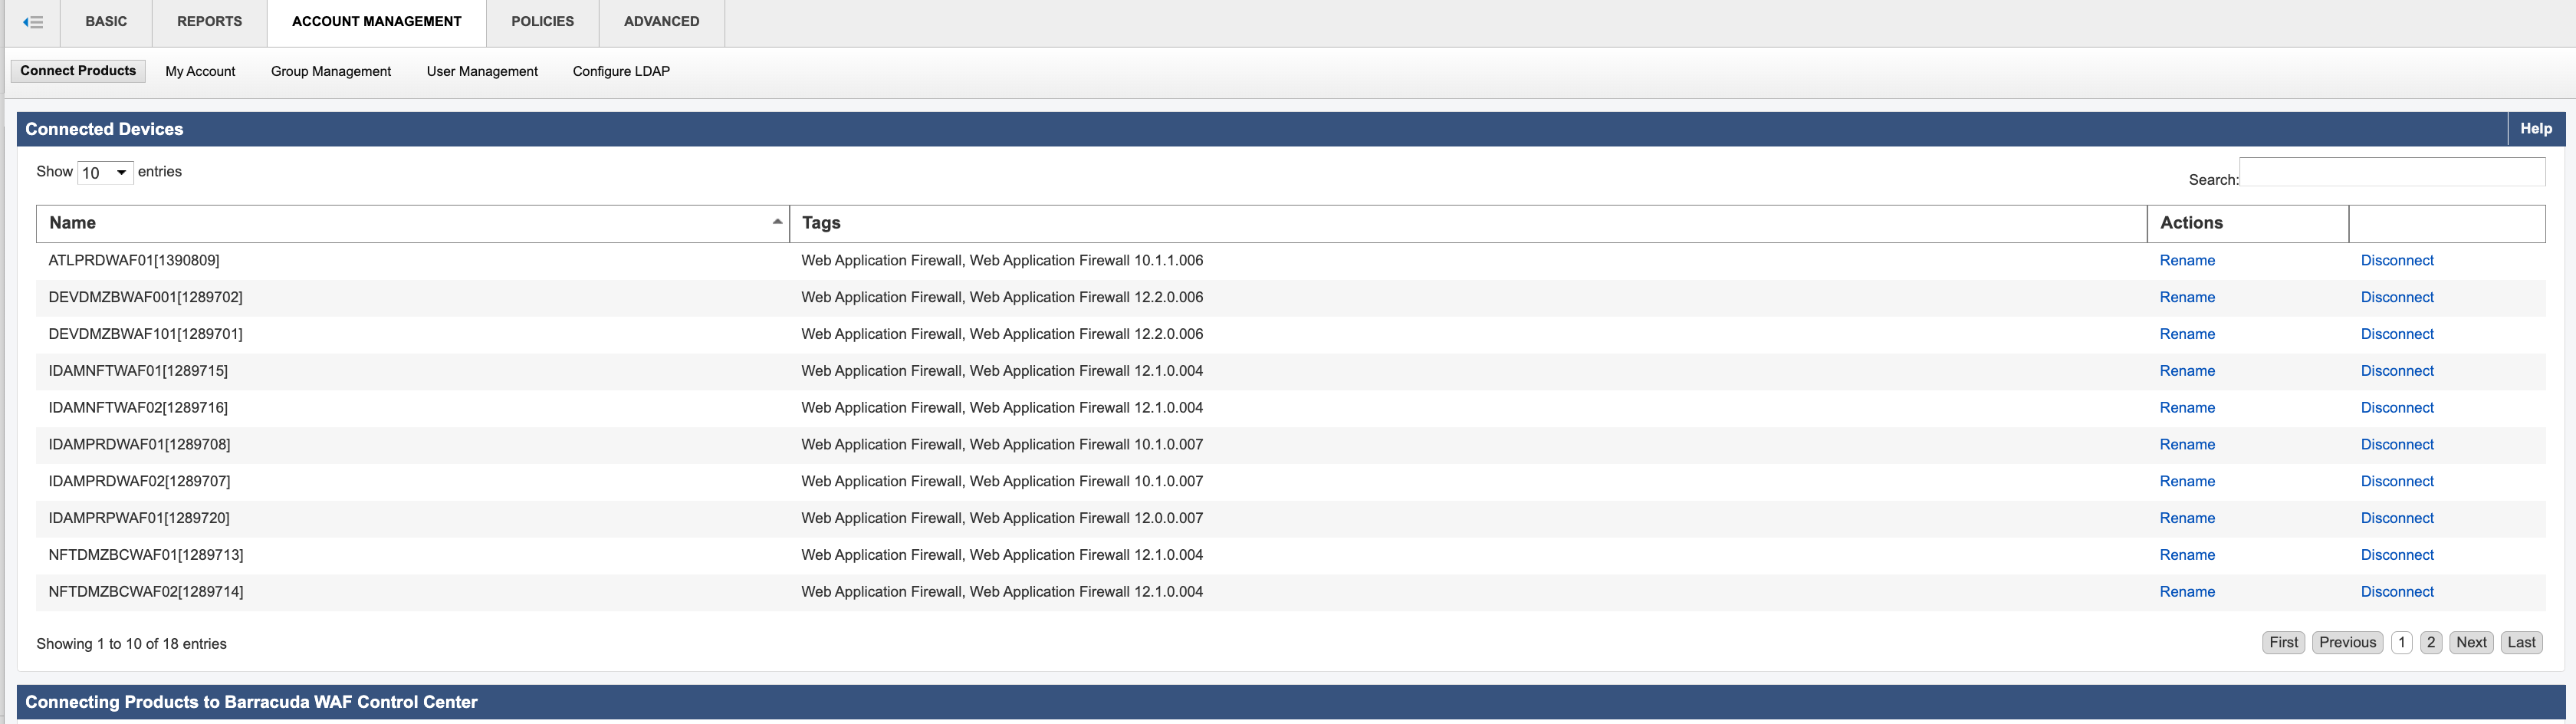
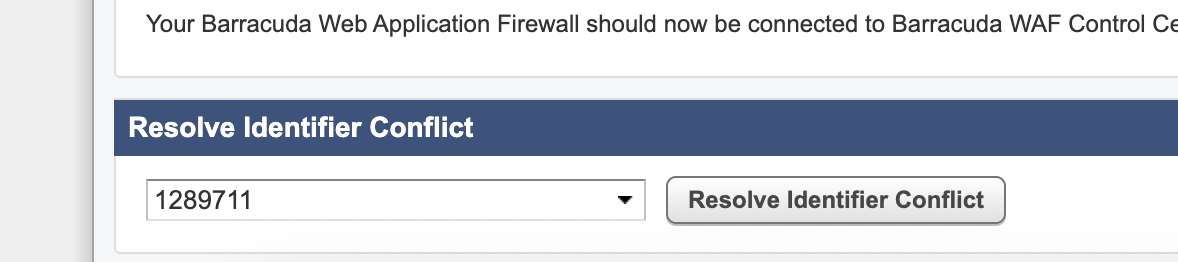
- Some time you will also have to Resolve Conflict to make sure the WAF remove correctly
to do that, you first need your NEW WAF serial number which you can find at the bottom of the WAF web interface.

Then in the Control Center, go to Account Management > Connected Devices > Resolve Conflict (bottom of the page)
If you have any issues, please see - Troubleshooting Page
This page was last reviewed on 14 October 2025.
It needs to be reviewed again on 14 October 2026
by the page owner platops-build-notices
.
This page was set to be reviewed before 14 October 2026
by the page owner platops-build-notices.
This might mean the content is out of date.