How to add new packages to Jenkins VM Builders
Jenkins agents contain a large number of packages pre-installed so that teams can easily complete their pipelines actions.
Packages can include everything from Terraform to FFMPEG and new packages can be added based on team requirements.
This document will detail the process of adding a new basic package to the VM built script.
The repos involved in this process are:
Updating the build script for Jenkins
Within the Jenkins Packer repository there is a file called provision-jenkins-ubuntu-agent.sh which contains a large number of build steps that will be carried out by Packer when building an image.
The script contains sections for more complex installations such as TFEnv or AZCopy which do not use the default Ubuntu package manager (APT).
It also contains a section for basic installations via the APT package manager
Installing with APT
Installing packages with APT is the easier option when available. On line 103 you will see the apt command being used with a list of package names:
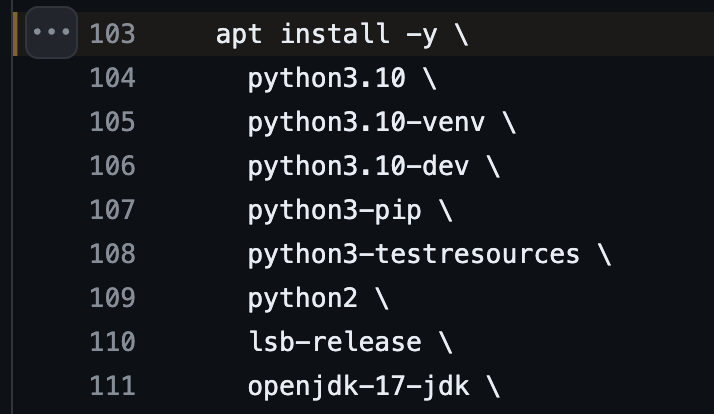
To add a new package, simply append the package name to the end of this list.
NOTE: Make sure to add a backslash to the last line of the command so it knows your new package name should be included
Installing without APT
Some packages are not available via APT or the APT version is very out of date and you must use a different installation type. Throughout the script there are examples of installations using cURL, wget and git clone.
Please refer to the installation steps for the package you need to install and append to the end of the script with comments to show what’s being done.
Here is an example of an installation of TFEnv via git clone:
rm -rf /opt/tfenv /bin/terraform /bin/tfenv
git clone -b v${TFENV_VERSION} https://github.com/tfutils/tfenv.git /opt/tfenv
ln -s /opt/tfenv/bin/* /bin
and another example using wget
wget https://github.com/fluxcd/flux2/releases/download/v${FLUX_VERSION}/flux_${FLUX_VERSION}_linux_${ARCHITECTURE}.tar.gz -O - | tar xz
mv flux /usr/local/bin/flux
Notice the use of variables in the commands. These can be created for your new package as well and the is guidance available in the repository readme.
ARCHITECTURE=$(dpkg --print-architecture)

#renovate: datasource=github-tags depName=fluxcd/flux2
export FLUX_VERSION=$(echo v2.2.3 | tr -d 'v')
Creating a new release
When you have completed your changes you can commit, push and create a pull request for review.
When merged this will trigger the ADO pipeline that builds the new release and also builds the new images in Azure.
When the ADO pipeline completes you can check that the release is now available via the GitHub repo page.

You can also check the image via Azure to make sure that a version has been created which matches this new release version.
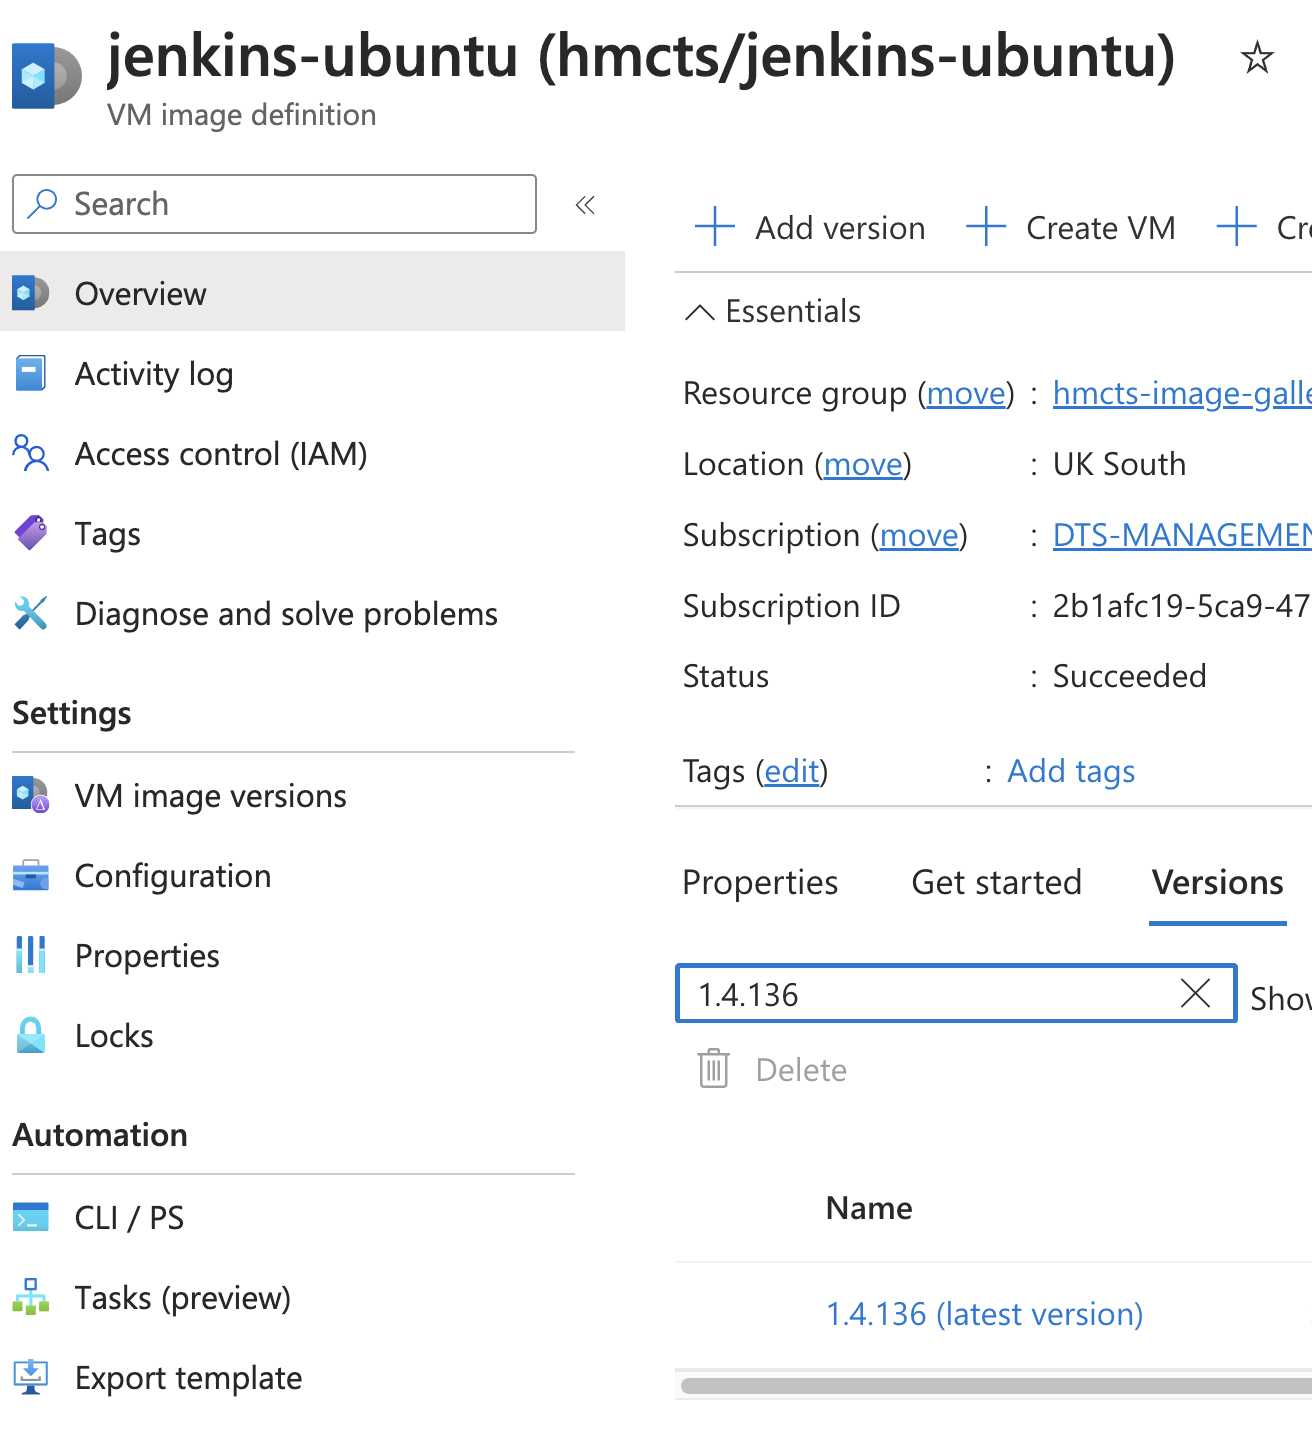
Images are created and stored in Azure Compute Galleries and for Jenkins they are stored in the hmcts gallery.
Selecting the relevant image from the gallery, jenkins-ubuntu in this example, you can see all versions of the image and this list is searchable.
Use the search to find the matching version for the release;
With this complete the next step is to deploy the latest image version.
Deploy updated images to Azure
Create the change in Flux
Deployments of Jenkins agents are carried out by Flux.
In this case there are two different deployments, one for CNP and one for SDS, the change is the same for both.
To test the new image version its possible to deploy to a single sandbox environment first then using the sandbox Jenkins server to run a test pipeline that will build an agent using the new image.
Create a PR to update the sbox Jenkins version, this PR is an example of the process PTLSBOX.
When merged this will create new agents with the version you specified in your PR but only when Jenkins needs an agent. IF any jobs are currently running they will continue to run on the old agent version until complete at which point that agent node will be removed.
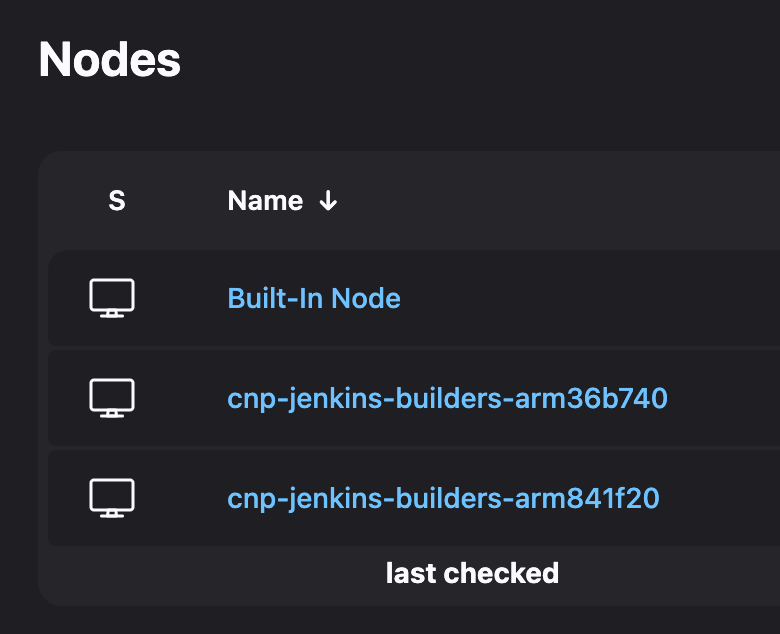
View new and existing nodes
You can view the nodes for Jenkins instances using the following links or by appending /computer/ to the base URL:
If no nodes exist in sandbox its possible to trigger the creation of an agent by running a pipeline.
To ensure there is no impact on teams its best to use one of the test pipelines, plum-frontend is the easiest option.
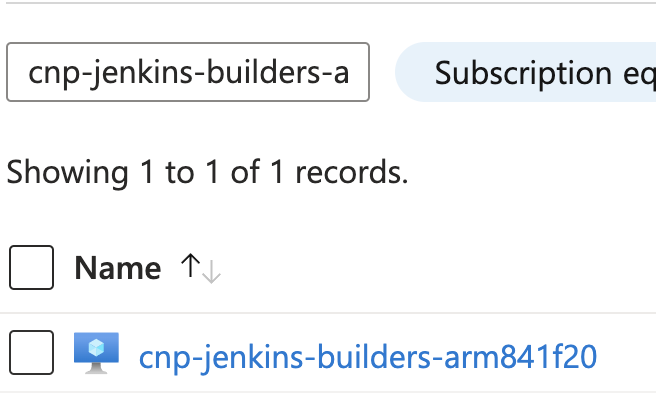
When a new agent is created you can view it as a Virtual Machine in Azure. Navigate to Azure and Virtual Machines, you can then use this search to narrow the results and search specifically for the VMs using the image version you created:

You can also use the name of the node to search for that VM only
Testing the change
When you have found the new node in Azure you can test if your new package has been installed correctly using the Run Command option:
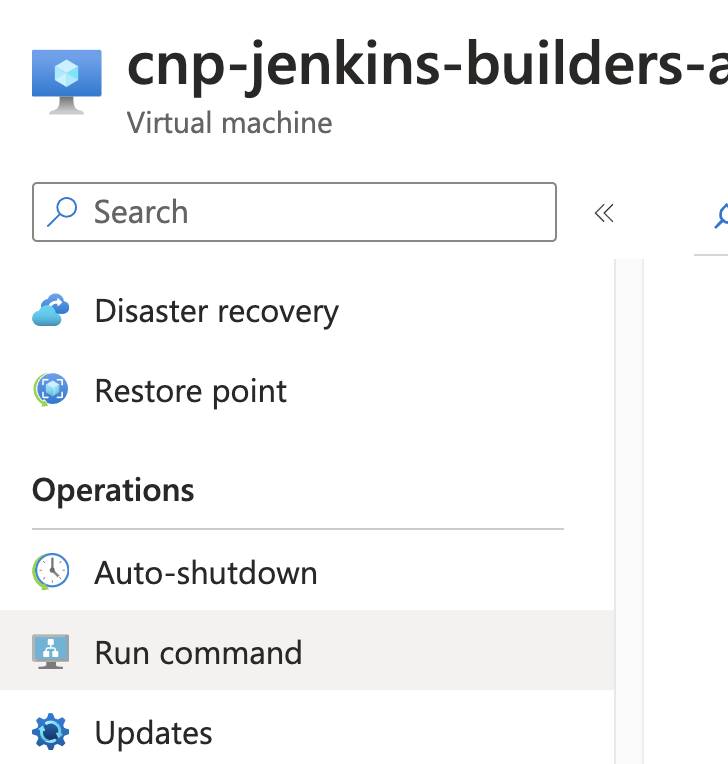
Selecting this option, then RunShellScript you will be able to run a command on the agent.
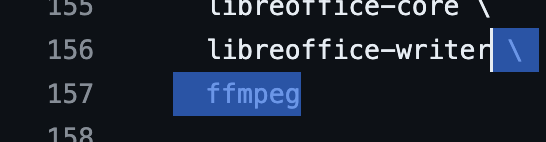
As an example, here I have checked the version of FFMPEG installed on the node:

Check the documentation for the package you’ve installed and find the version command or a similar command that outputs help information.
If the command succeeds you should see the correct output and confirm that the new package is installed.
Deploying to all environments
When you have completed a deployment and test in sandbox the image should now be ready to deploy into all environments. The same process applies to each environment via Flux and the following PRs show how this can be done in CNP and SDS.
Example PRs
These example PRs show the same process for SDS Flux:
This example PR is a complete example of updating the image version of Jenkins for both sbox and PTL environments via CNP Flux.
Things to watch out for
When you make this change it may cause Jenkins to queue builds until the new image version Virtual Machines have been built. Its best to make the change late in the day or before 9am to minimise the impact.