Camunda How To Guides
This page will contain helpful guidance on using Camunda from a PlatOps perspective
Accessing Camunda
Camunda is only available via the F5 VPN, you must connect before trying to access the service on any environment.
Local Development
There is a complete guide on building a local development environment available in the repository readme. This covers setting up your device and different development options including Docker.
Updates
Camunda provide regular updates to the base application, each update comes with changelog and information to help complete the update.
Some updates will be a simple version change
e.g. 'org.camunda.bpm:camunda-bom:7.20.3-ee' would update to 'org.camunda.bpm:camunda-bom:7.21.0-ee'
Others will be more complex and require additional DB Schema changes or upgrades to supporting applications such as Java or Spring Boot.
Every upgrade will have a guide that details the changes being made, the reasoning and links to guidance on making the change. Example upgrade guide for 7.20->7.21
Raising tickets with Camunda Support
If the worst happens and you cannot solve the issue yourself then we have access to Camunda to raise support tickets.
This URL leads to the Camunda Jira service desk.
The credentials for this can be found in the camunda-prod Key Vault under the secrets Camunda_Service_Desk_[user/password]
Logging in you will find 3 different options, the most likely option to use is Help Request.
Selecting this will open a request form to enter all the information you think will help Camunda to triage the ticket quicker.
For priority you choose between 3 levels, Level 3(L3) is a normal request issue and Level 1(L1) is a P1 response issue. If Camunda is currently functional then L3 is the correct option here.
For the Component select C7 which means Camunda version 7 (unless we upgrade to version 8 at some point!).
Its important that you check back on the ticket daily, the account is not linked to your email so you will not receive any update notifications.
Search Camunda database
There are 2 ways to search the Camunda database, one via Camunda UI itself and the other directly on the database instance, using the Camunda UI should always be preferable as it carries less risk.
Camunda UI
This method of searching the DB is a workaround, it provides search facilities but its primary purpose is to make changes so please be careful.
Searching the Camunda DB via the UI provides less freedom, you can use batch operations of specific types to search through the returned results of that operation e.g. the operation delete all finished process instances will only ever return finish process instances, not running instances or any decisions.
If what you need falls into one of the existing batch operations then it is best to use the UI to carry out the query however you must NOT complete the operation if you are simply doing a search!

PSQL
Connecting directly to the database instance itself provides all of the traditional SQL based query options as any other database.
Connecting to the DB requires:
- Access to a bastion host, prod/nonprod depending on environment
- Access to the Camunda key vaults, named
camunda-<env> - Access to the database instance in azure, name
hmcts-camunda-v14-flexible-<env>
Selecting the relevant DB you can choose the connect option in the menu which will provide details on how to connect directly to the database
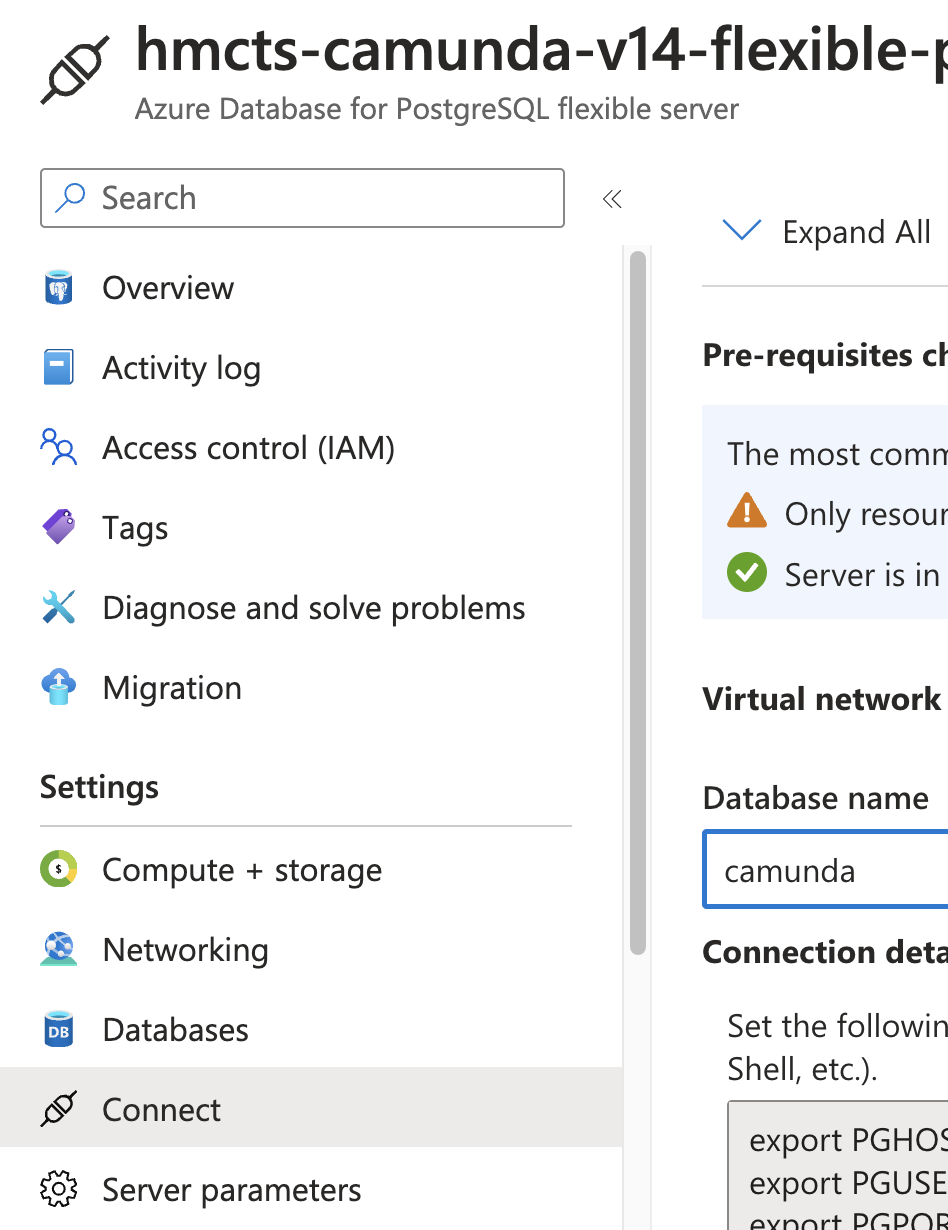
Use this information on the bastion host to connect to the database using psql as described on the page.
The 2 most obvious choices here are exporting environment variables or supplying all the details inline with the psql command

Remove process instances manually (running and finished)
There are instances were you may need to remove finished processes or decisions manually e.g. the team have removed their definition code from the repository and Camunda has not processed this correctly. Example ticket.
If you know the name of the definition you can search for it via the Camunda Cockpit UI.
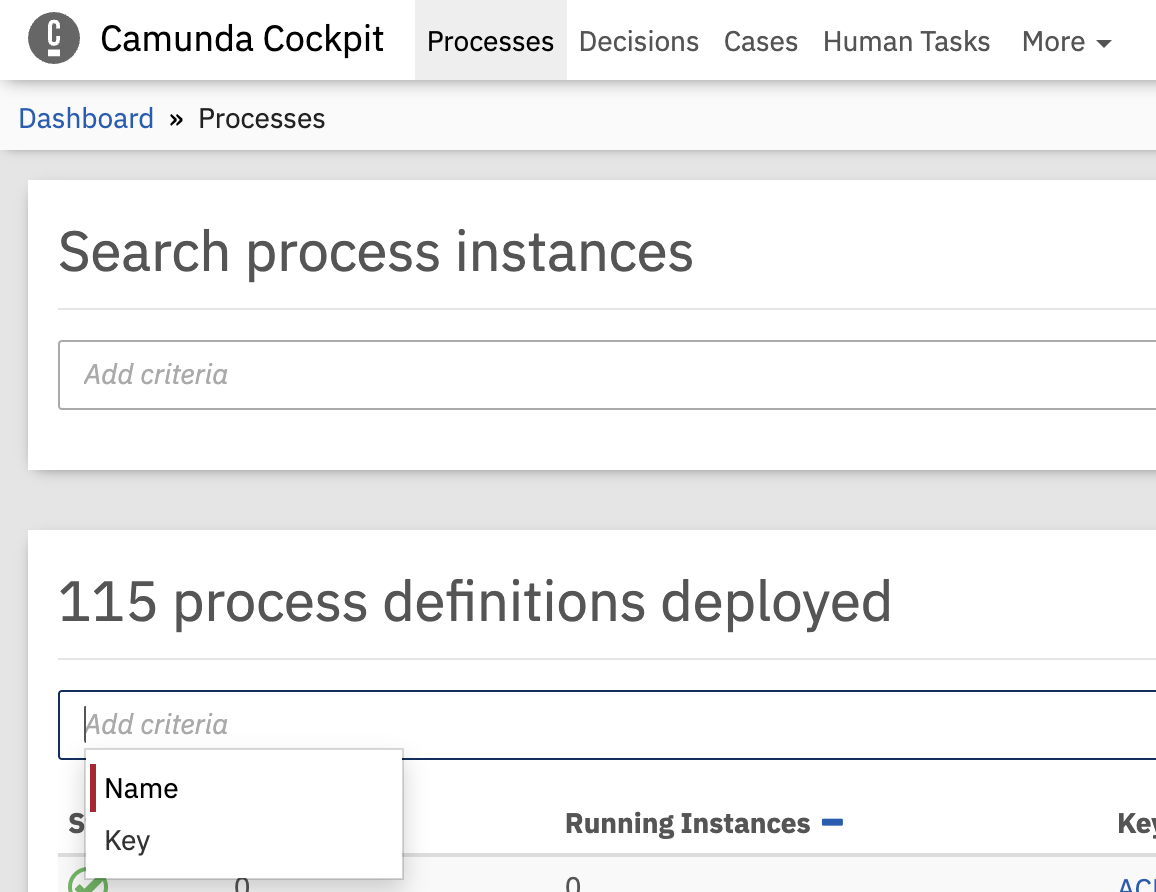
Once you have found it, you can select the process to see more details about it including a list of process instances for this specific process definition.
Within the definition page there is a delete running instances option
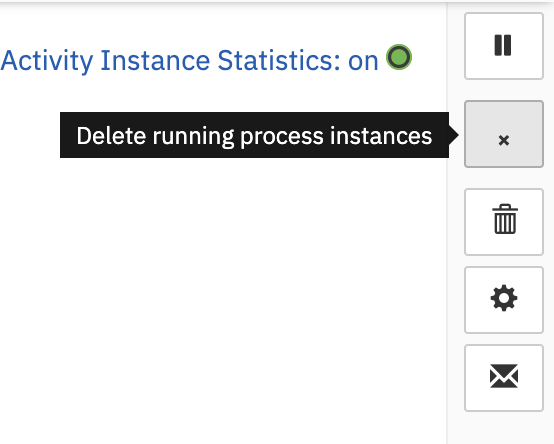
Selecting this starts a batch operation input and automatically selects Delete Running Process Instances in the operation type dropdown. This can be changed to Delete finished process instances if required (this is likely a good choice to test initially!).
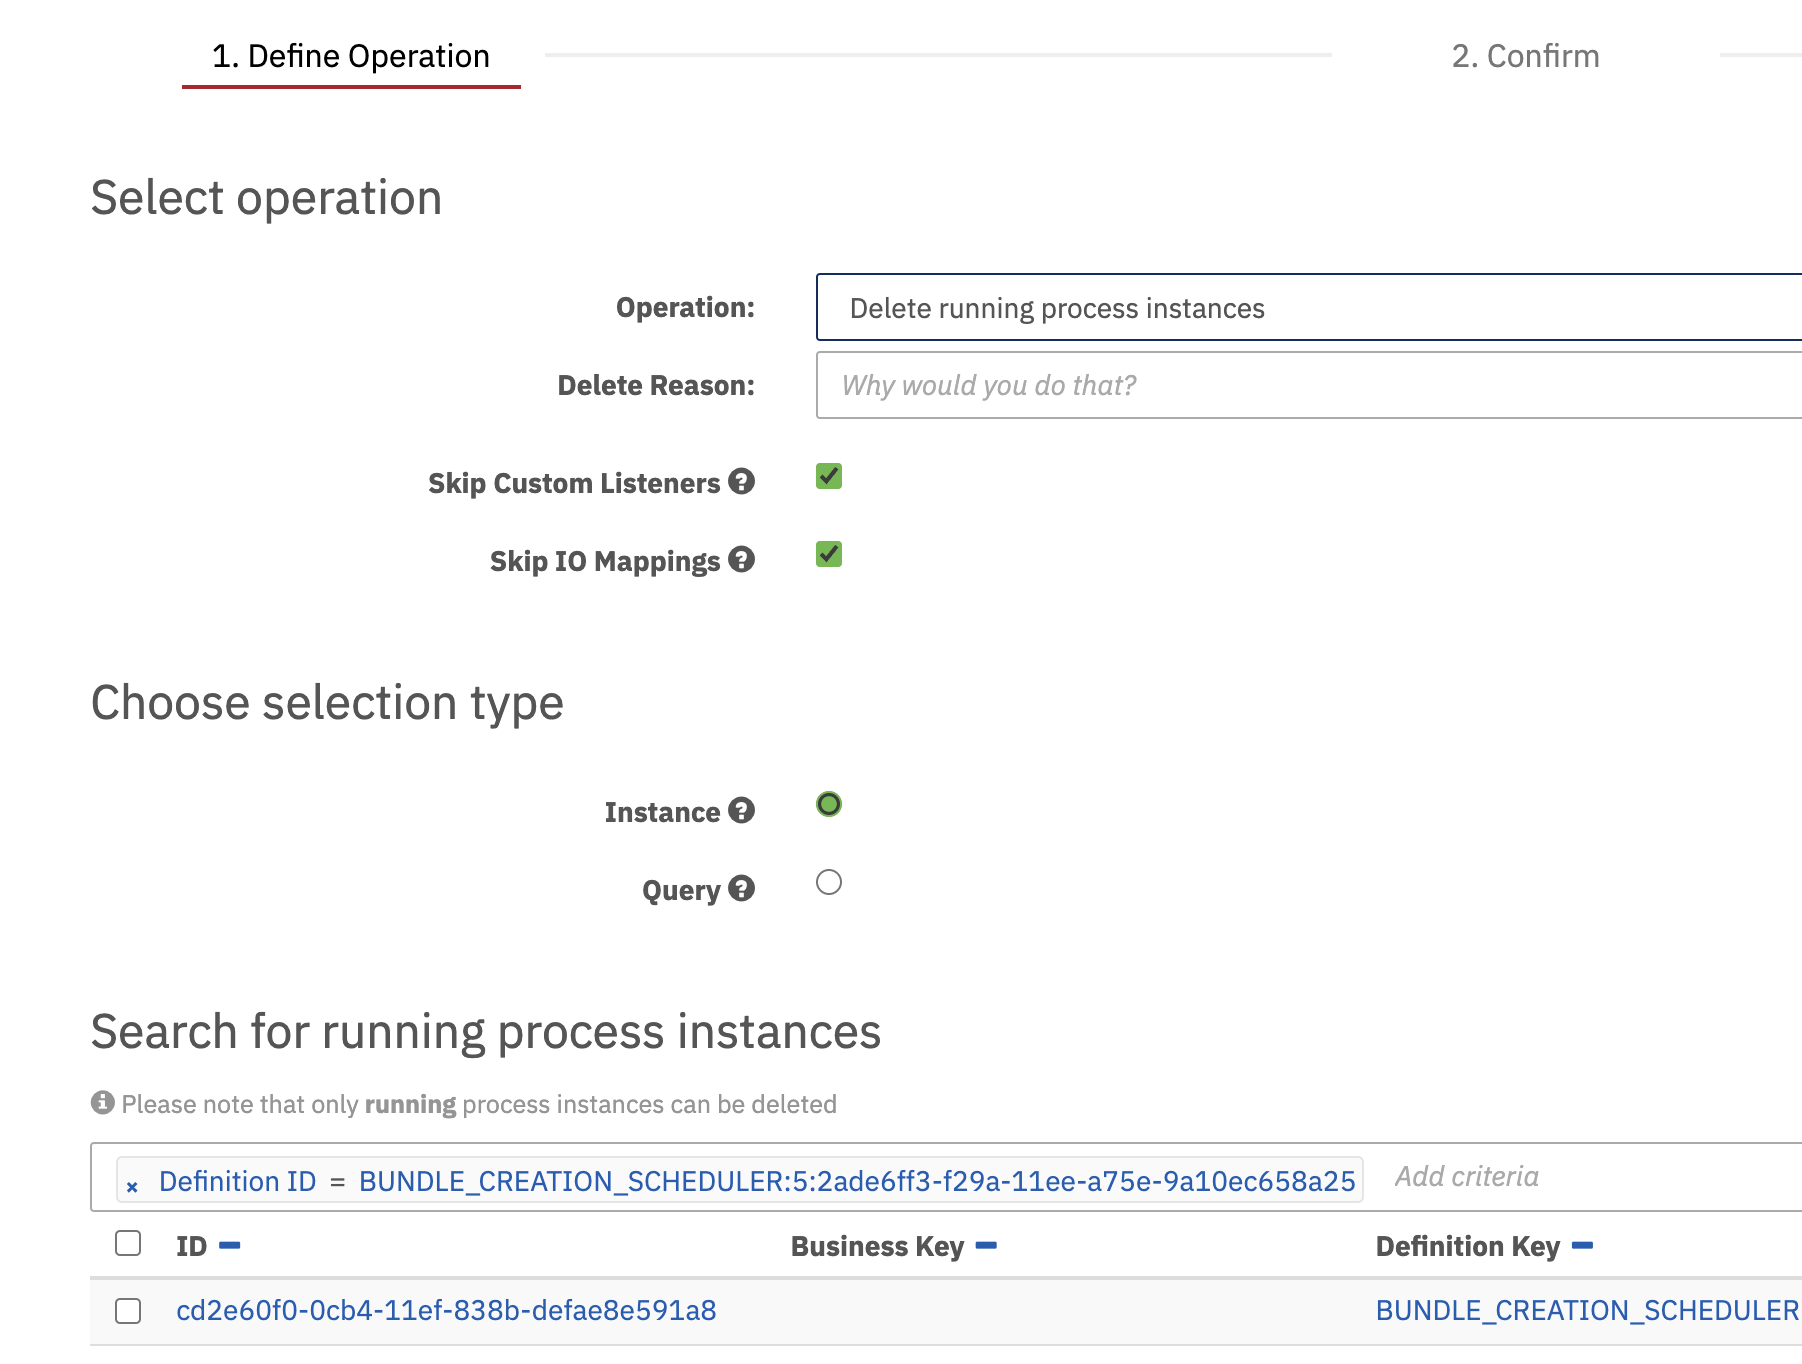
Enter a reason for the deletion e.g. the Jira ticket number and then use the search criteria to narrow down the results to what you need.
Its possible to select only specific records in the list of results or by selecting Query it will select all records found, ALL records means across all pages shown now just the current page, remember these are SQL queries in the background!
Removing Historic Process and Decision Instances
There are two types of instances that needs to be cleared out in Camunda, historic process instances and historic decision instances. Removing historic process and decision instances will improve the performance of Camunda and prevent the database from becoming too large. Going forward, manual clearing should be less necessary as new process and decision instances will automatically have a TTL (Time to Live) value set. This TTL is 90 days for production environments and 30 days for all non-production environments.
However, TTL values have not been set for all existing instances, and only some teams have adopted the practice of setting TTLs. As a result, manual cleanups may still be required until all teams have updated existing instances and fully embraced the process.
There are two ways to remove historic process and decision instances:
- Set removal time on process or decision instance (preferable)
- Delete the process or decision instance
Set Removal Time on a Process or Decision Instance
Camunda removal time updates are a batch operation that can be carried out via the Camunda Cockpit UI.
Setting a records removal time will control when that record will be removed from the Camunda database by the Camunda clean up task.
Process Instance
To run a removal time operation on process instances you can:
Log into Camunda and select the
Cockpitoption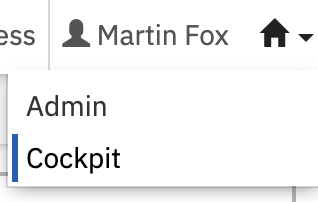
Navigate to the menu and select
morethenbatch operation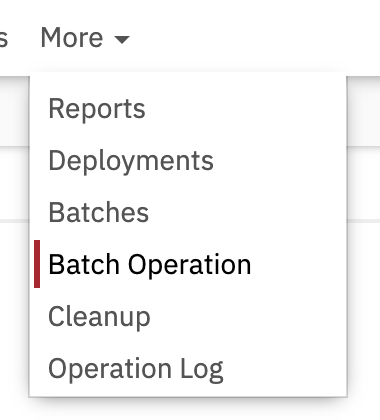
On this page you will find a number of fields, selecting
operationwill show a dropdown of available options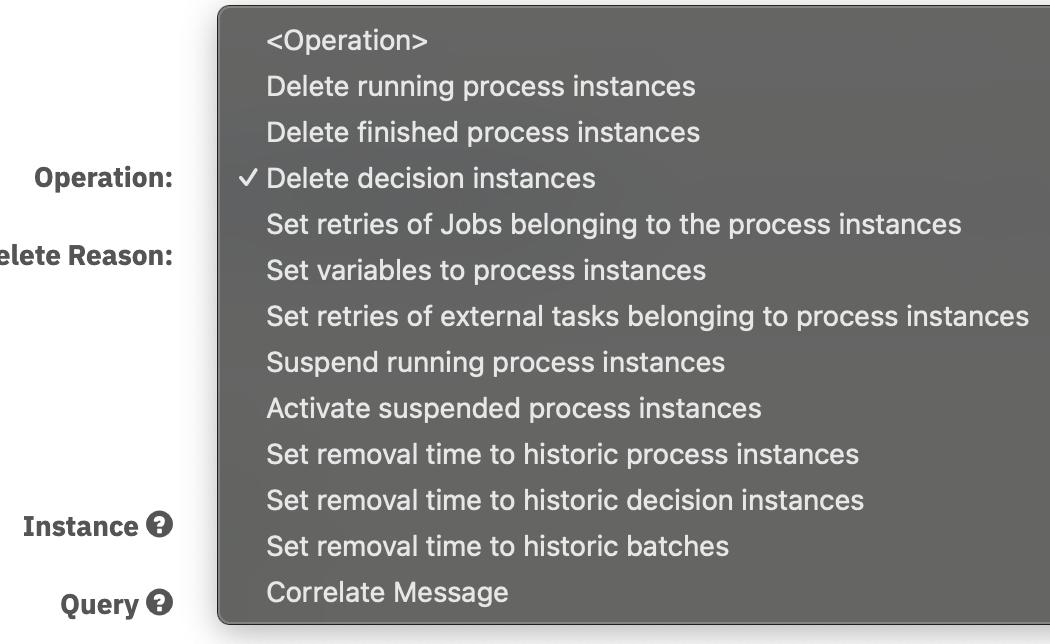
Select
Set removal time to historic process instances. Ensure you select all options as per the below screenshot. Double check that Absolute, Hierarchical and Query are selected.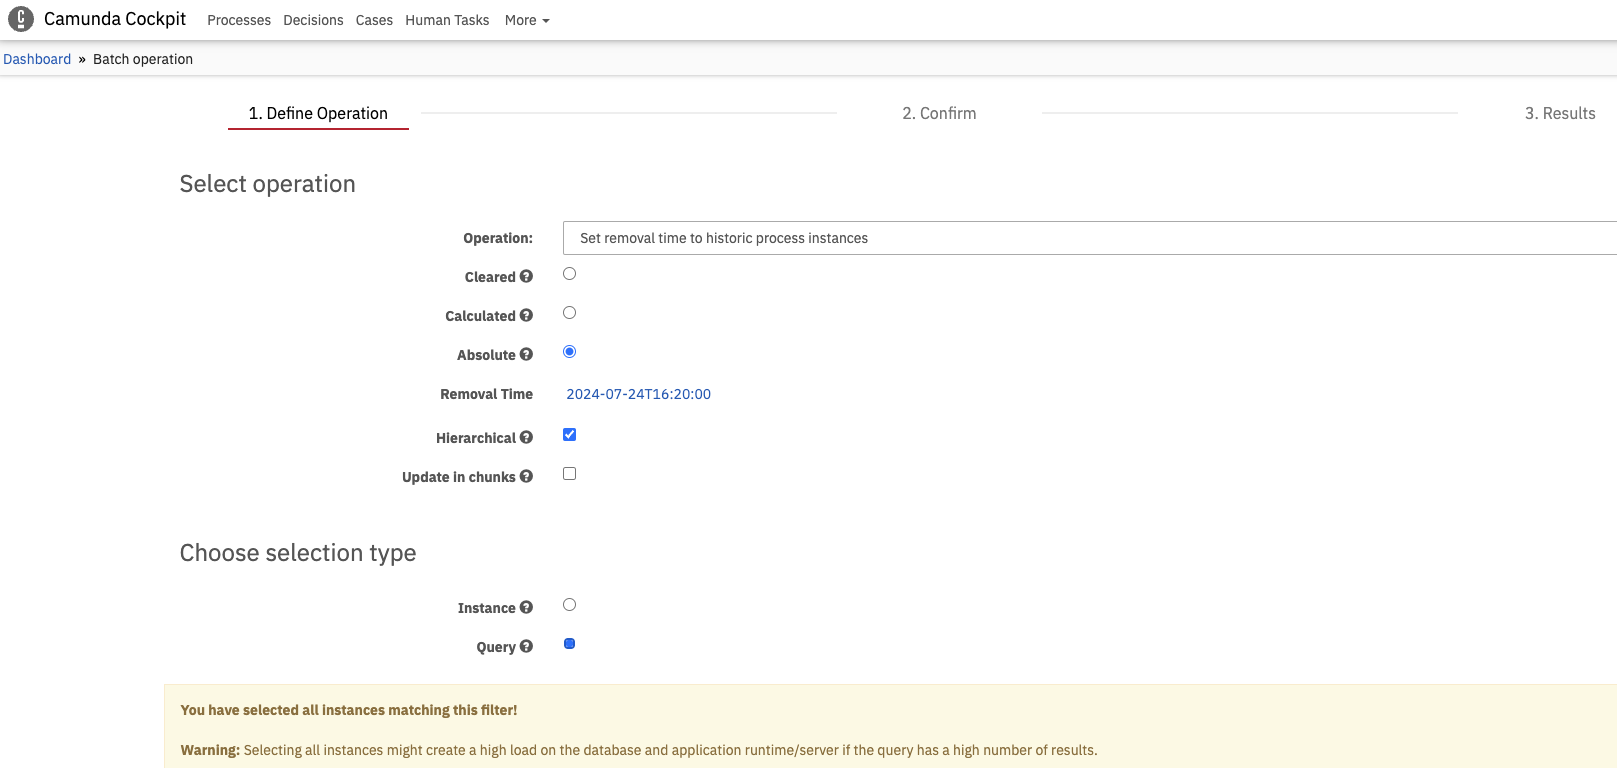
Initially this will search the database for all historic records of process instances. You can reduce the time to return results by using search criteria.
To narrow down these results you can add search criteria. Clicking in the
add criteriasearch box will show a list of available options such as start date, finish date,incident statusand a host ofIDsoptions. For the purposes of cleanup, you can chose ‘Finished Only’ and ‘Finish Date’ with value set to before a particular date. If you are getting lot of results or if the results are taking a long time to load, simply set the finish date to an older date to reduce the number of results being returned.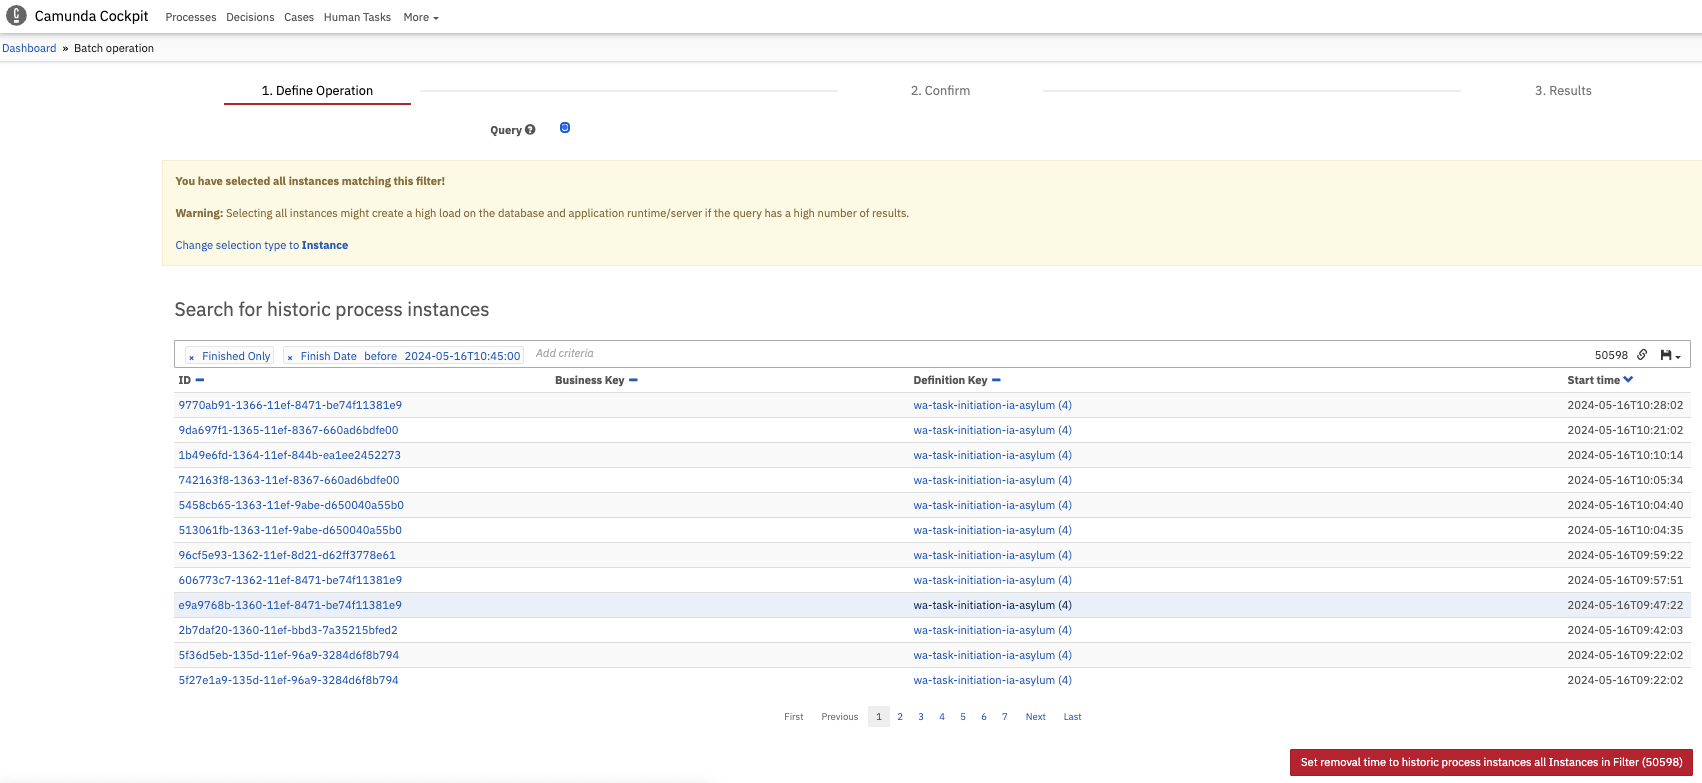
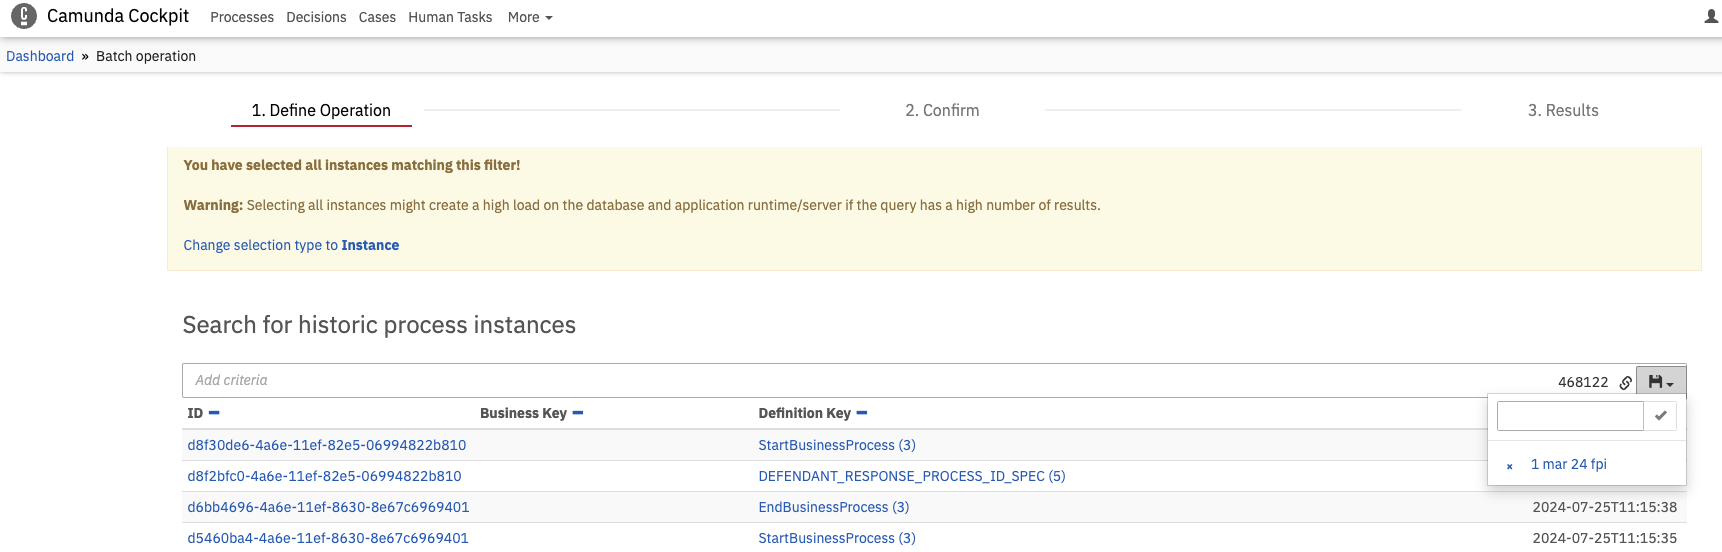
You can also save your query as shown in the screenshot below for later use. However, this query is not available across different users as it is stored in the browser cache of the user.
Ensure you have the right dates and filters applied and then select “Set removal time to historic process instances all Instances in Filter”.
On the next screen select “Execute Operation” to proceed with setting the removal times.
Finally you can track progress of the operation by navigating to the menu and select
morethenbatches
Decision Instance
To run a removal time operation on decision instances you can:
Log into Camunda and select the
CockpitoptionNavigate to the menu and select
morethenbatch operationOn this page you will find a number of fields, selecting
operationwill show a dropdown of available optionsSelect
Set removal time to historic decision instances. Ensure you select all options as per the below screenshot. Double check that Absolute and Query are selected and importantly Hierarchical is deselected. This differs slightly from the steps from process decisions. If you select Hierarchical the whole operation will run extremely slowly, so ensure it is not selected as it is selected by default.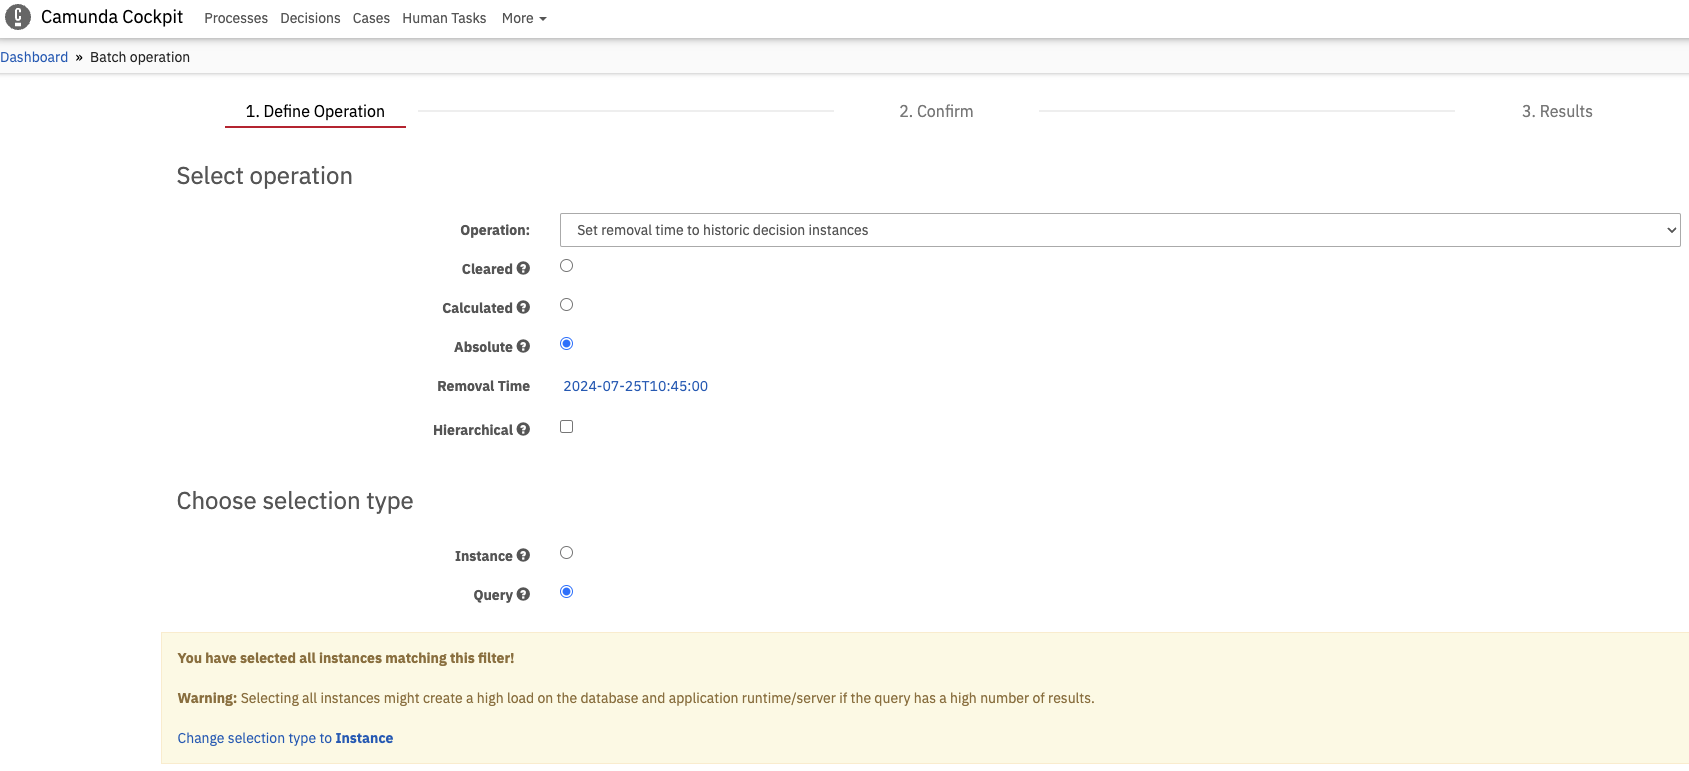
Initially this will search the database for all historic records of decision instances. You can reduce the time to return results by using search criteria.
To narrow down these results you can add search criteria. Clicking in the
add criteriasearch box will show a list of available options. For the purposes of cleanup, you can chose ‘Evaluation Date’ with value set to before a particular date. Evaluation Date is the equivalent of Finished Date when it comes to decision instances. If you are getting lot of results or if the results are taking a long time to load, simply set the evaluation date to an older date to reduce the number of results being returned.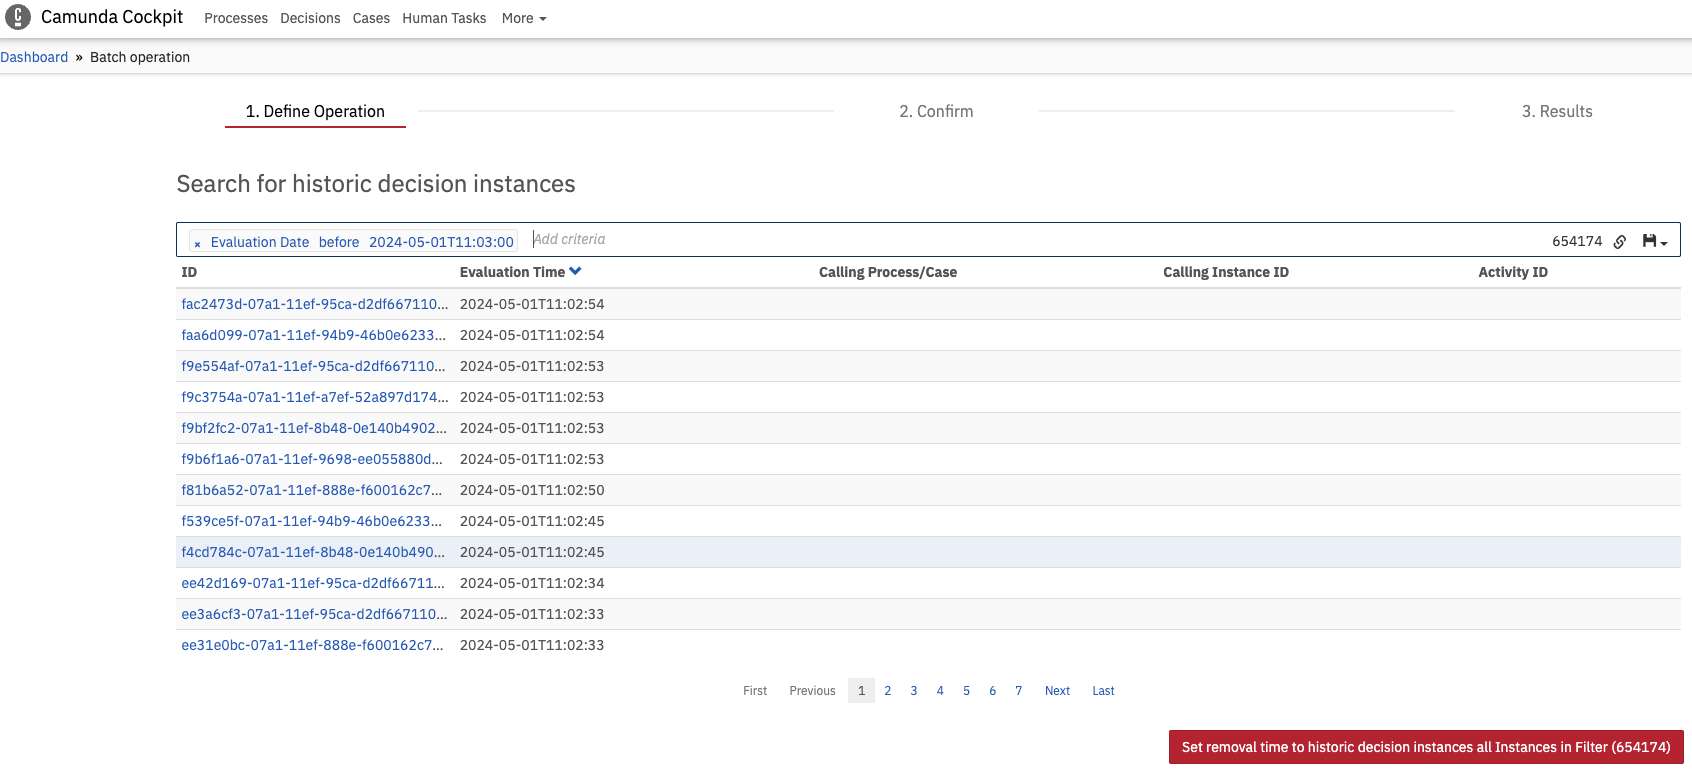
You can also save your query as shown in the screenshot below for later use. However, this query is not available across different users as it is stored in the browser cache of the user.
Ensure you have the right dates and filters applied and then select “Set removal time to historic decision instances all Instances in Filter”.
On the next screen select “Execute Operation” to proceed with setting the removal times.
Finally you can track progress of the operation by navigating to the menu and select
morethenbatches
Cleanup Job
Once the removal times are set, you can confirm this by checking the batches to see if the set removal time jobs have completed. Now you can either wait for the next schedule clean up to complete or you can manually run the cleanup job by navigating to the menu and selecting more then cleanup. Click on cleanup to trigger the job. Once the cleanup is complete which may take a while depending on the number of instances to clean up, you can run the same queries as before from the batch operation menu. If the cleanup job has completed correctly, the queries should return empty results.
Delete the Process or Decision Instance
Instead of setting a removal time and waiting for cleanup jobs, you can directly delete a historic process or decision instance. However, this approach is riskier because there is no option to revert in the event of an incorrect execution. This direct deletion is a single operation on the database, whereas the other option (Setting Removal Times) involves first updating and then deleting the instance.
Running a Delete operation is pretty similar to running a Set Removal Time operation, except you should select “Delete finished process instances” or “Delete decision instances”

Provide Usage Metrics Report to Camunda Support
Camunda Support may request usage metrics to help with the subscription renewal process.
- On the Cockpit Camunda portal go to Execution Metrics
Select the Display legacy metrics (FNI/EDE) option and at the bottom copy the output under the Annual usage metrics by subscription term and save this in a file to send to Camunda Support.