Converting Installer Files to VHDX Images
In order to provision an application with App Attach, the application needs to be in the MSIX package format and contained in a Virtual Hard Disk file. Very few software vendors publish their packages in the MSIX format. Fortunately, it is possible to convert an installer file such as a .exe or .msi into a MSIX package using the MSIX Packaging Tool.
This process will involve installing the program on a fresh VM, using the MSIX Packaging Tool to generate an MSIX package from the installed files, signing the MSIX package with a self-signed certificate then converting it to a VHDX file that we can mount.
Standing Up a Conversion Environment
According to environment best practices provided by Microsoft, It is recommended to perform installer conversions in a clean environment:
A clean machine for conversion is important because during the installation step of the MSIX Packaging Tool, we will be listening to everything in the environment to capture what the installer is doing. A clean machine means that there aren’t extraneous apps or services running on your machine that could get captured in your package.
Because of this, we recommend standing up a temporary ‘conversion VM’ in Azure to create packages for the applications. This can be expedited using the HMCTS terraform VM module should you wish to configure by code.
VM Requirements
While Microsoft states that the minimum version of Windows required to use the Packaging Tool is Windows 10 1809, we have not been able to get it working on anything earlier than Windows 10 21H2. Because of this, we recommend setting up your conversion VM with Windows Server 2022 Datacenter as its’ operating system as that is what we have had success with.
Installing the MSIX Packaging Tool
The MSIX Packaging Tool is normally distributed through the Windows Store, but this is not available on Windows Server operating systems. Thankfully, Microsoft provide a direct download link for an offline version that we can use instead. The following powershell script will install and provision the MSIX Packaging Tool:
New-Item -Path "C:\MSIX" -ItemType Directory
Set-Location "C:\MSIX"

# Download MSIX Packaging tool
Invoke-WebRequest "https://download.microsoft.com/download/d/0/0/d0043667-b1db-4060-9c82-eaee1fa619e8/493b543c21624db8832da8791ebf98f3.msixbundle" -OutFile MSIXTool.msixbundle

# Download offline cert
Invoke-WebRequest "https://download.microsoft.com/download/d/0/0/d0043667-b1db-4060-9c82-eaee1fa619e8/493b543c21624db8832da8791ebf98f3_License1.xml" -OutFile License.xml

# Check Sha1 sum of downloaded MSIX Packing Tool. This may change if the file gets updated
if ((Get-FileHash -a sha1 .\MSIXTool.msixbundle).Hash -ne "206c958c6e67e229b8b9e883395be1a2514212f3") {
    exit 1
}

# Sha1 hash is good, install packages
Add-AppProvisionedPackage -Online -PackagePath C:\MSIX\MSIXTool.msixbundle -LicensePath C:\MSIX\License.xml
Please note that this script cannot be used to install the packaging tool as a custom script extension or similar. For some reason, provisioning packages in this manor does not appear to work until at least one user logs on to the machine. Therefore, we recommend just logging into the machine and running the script in an administrator powershell window.
Generating a Self-Signed Certificate
To create and install an MSIX package, we will need to sign it. If you already have a certificate generated, you can skip this step.
If creating a self-signed certificate using the powershell below, make sure to change the value of the $certSubject to provide an identifiable common name for the cert.
# We will use this certificate to sign the MSIX packages we install to the target machine
# Change the common name of your certificate:
$certSubject = "CN=<My Self-Signed Certificate>"
# Generate a cert and install it to "Local Computer\Personal"
$cert = New-SelfSignedCertificate -Type Custom -Subject $certSubject -KeyUsage DigitalSignature -KeyAlgorithm RSA -KeyLength 2048 -CertStoreLocation "cert:\LocalMachine\My"
Exporting the PFX File
We need to export the certificate and its’ private key to a PFX file to sign the MSIX package. This can be done with the powershell below or in the certificate manager.
PFX files are password-protected so we must provide one here. Keep the password and .pfx file to hand as we will need to install the pfx file on the target machine later. You may also want to store the password of the certificate in a key vault if you intend to reuse the PFX file in the future.
# Change this certificate password
$certPass = ConvertTo-SecureString -String "<My password>" -Force -AsPlainText
Get-ChildItem -Path "Cert:\LocalMachine\My\$($cert.Thumbprint)" | Export-PfxCertificate -FilePath "C:\MSIX\MySSCert.pfx" -Password $certPass
Creating an MSIX Package
With those prerequisites done, we can now use the MSIX Packaging Tool to generate an MSIX package from an installer.
We will be using an installer for 7-Zip as an example, but the process will be the same for any installer file.
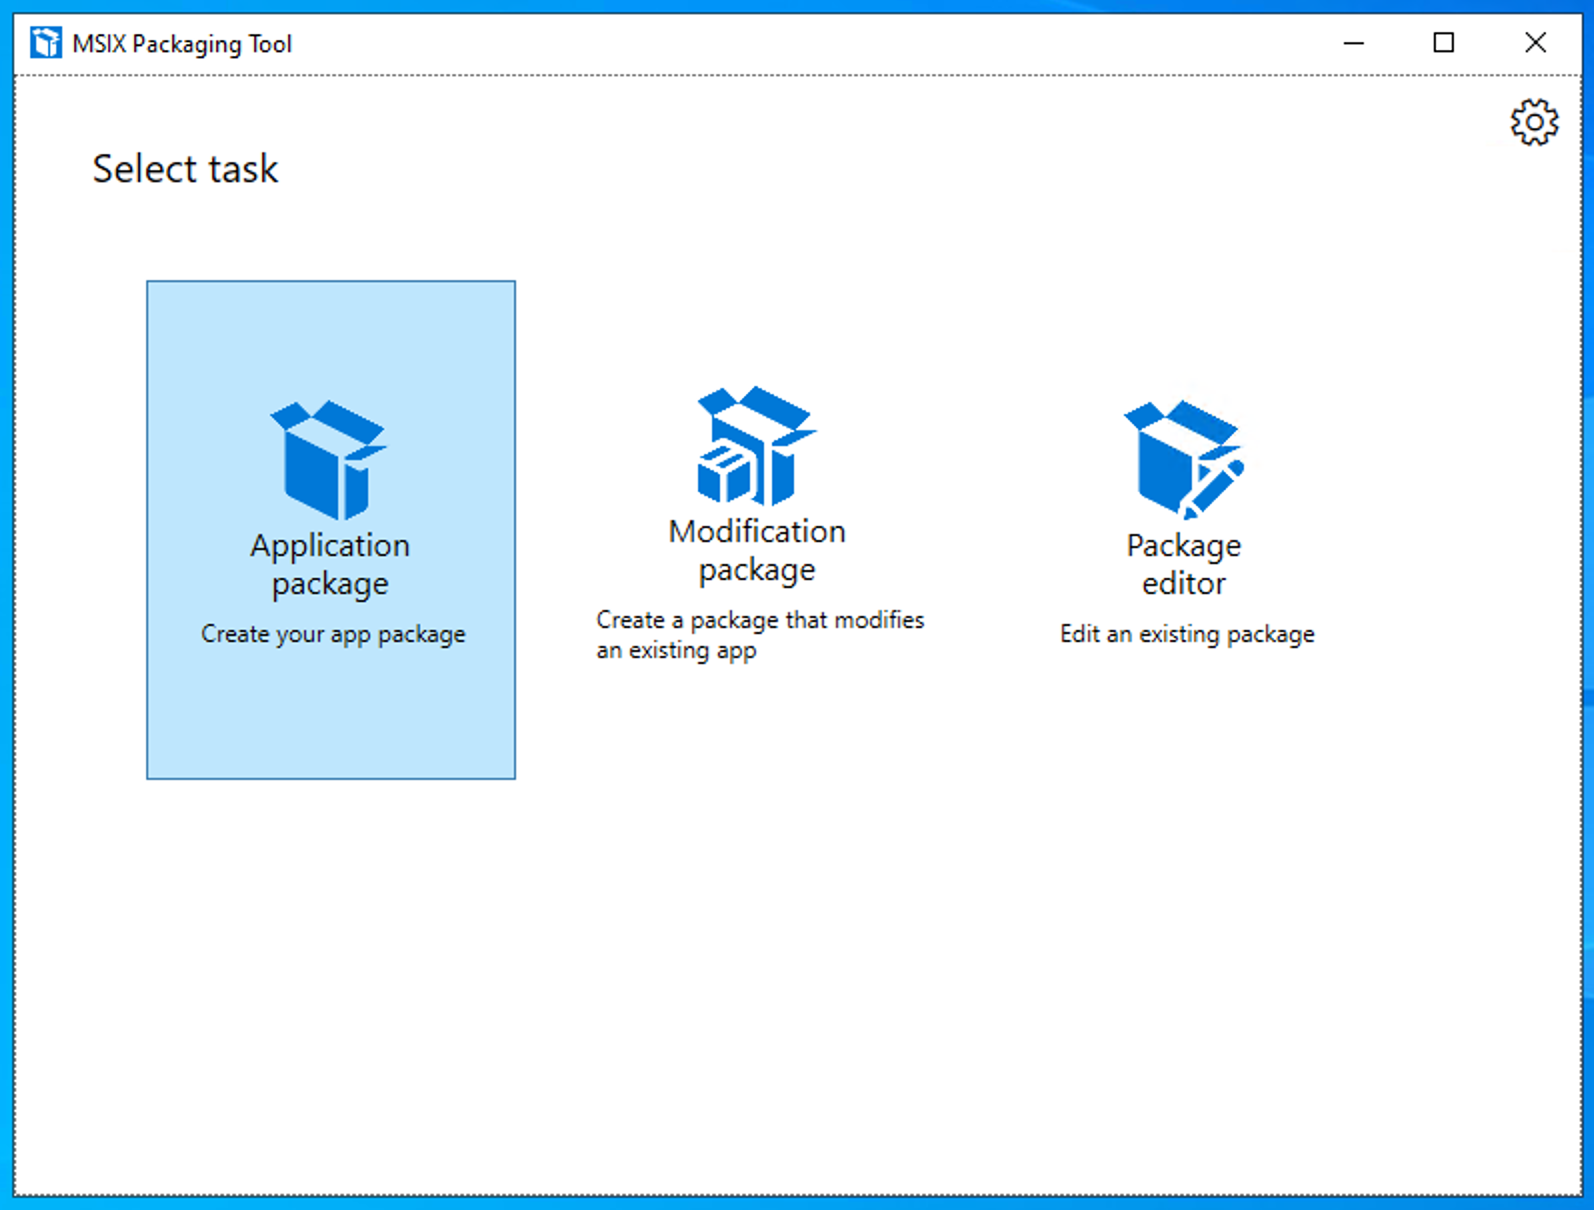
1) Open the MSIX Packaging Tool and select ‘Application Package’ on the Left.
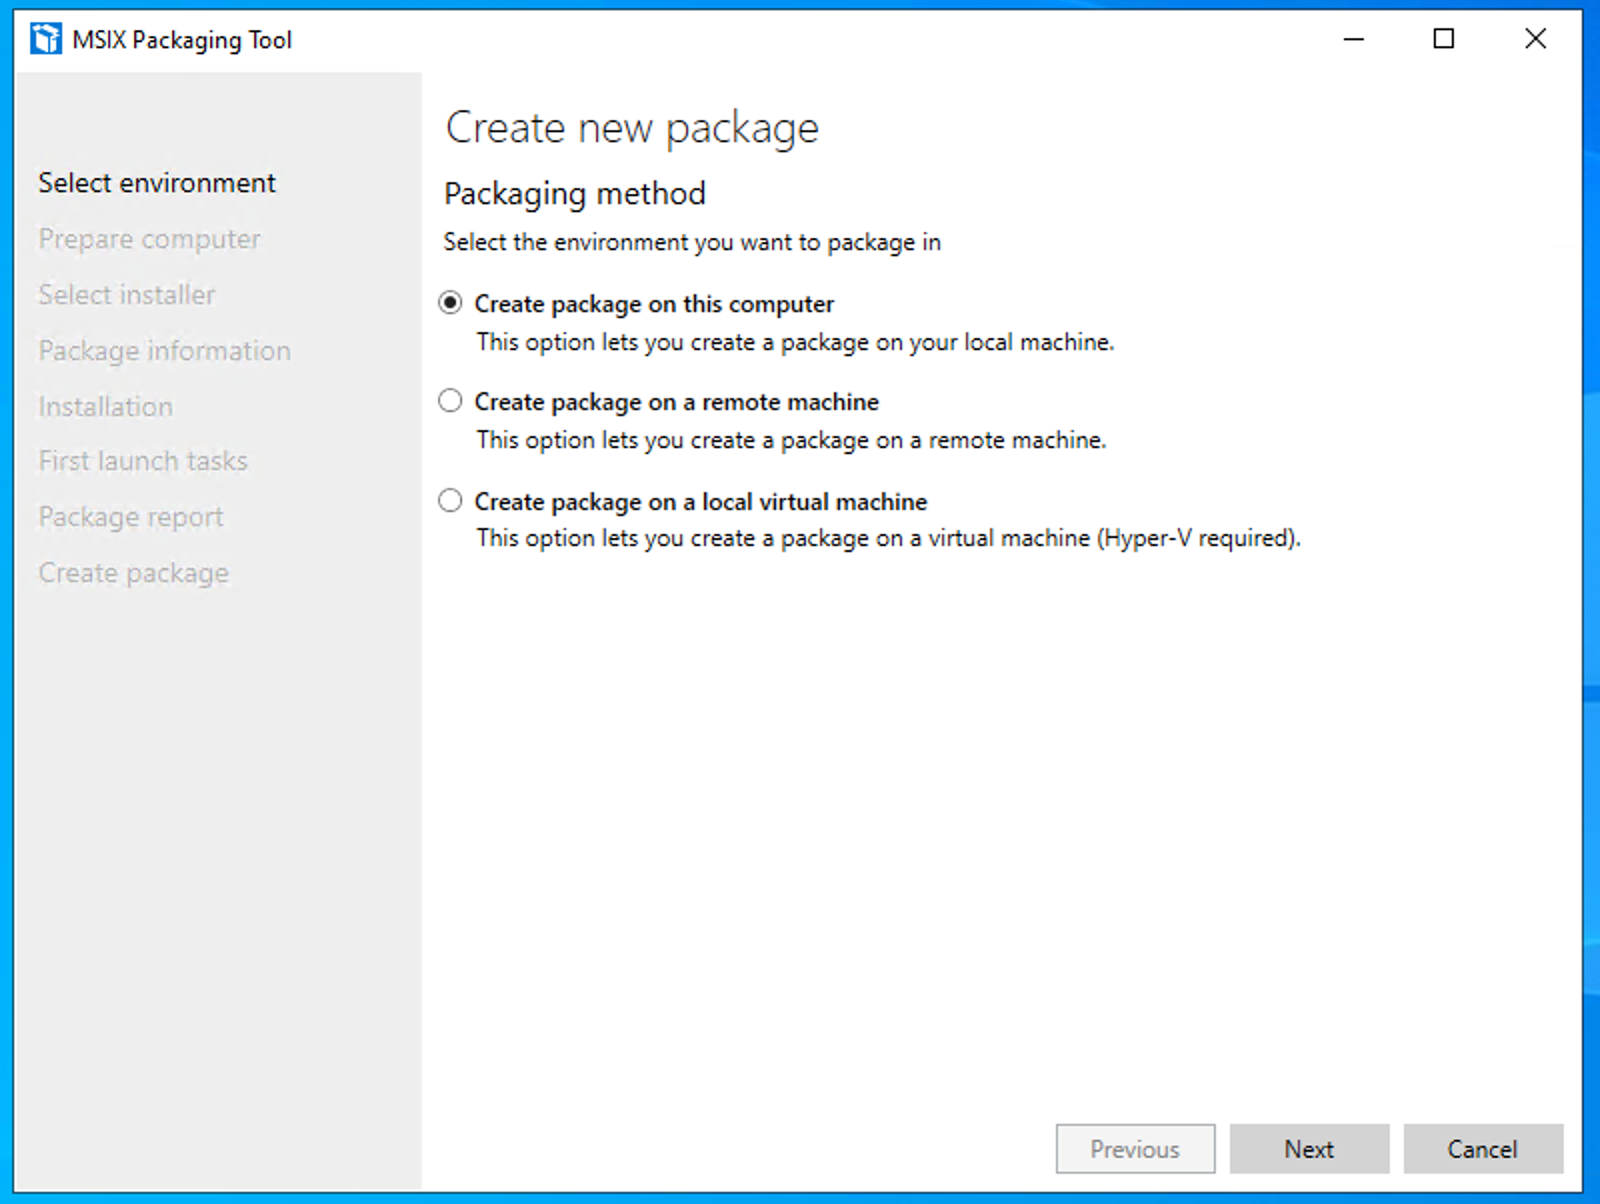
2) Select ‘Create package on this computer’ and click ‘next’
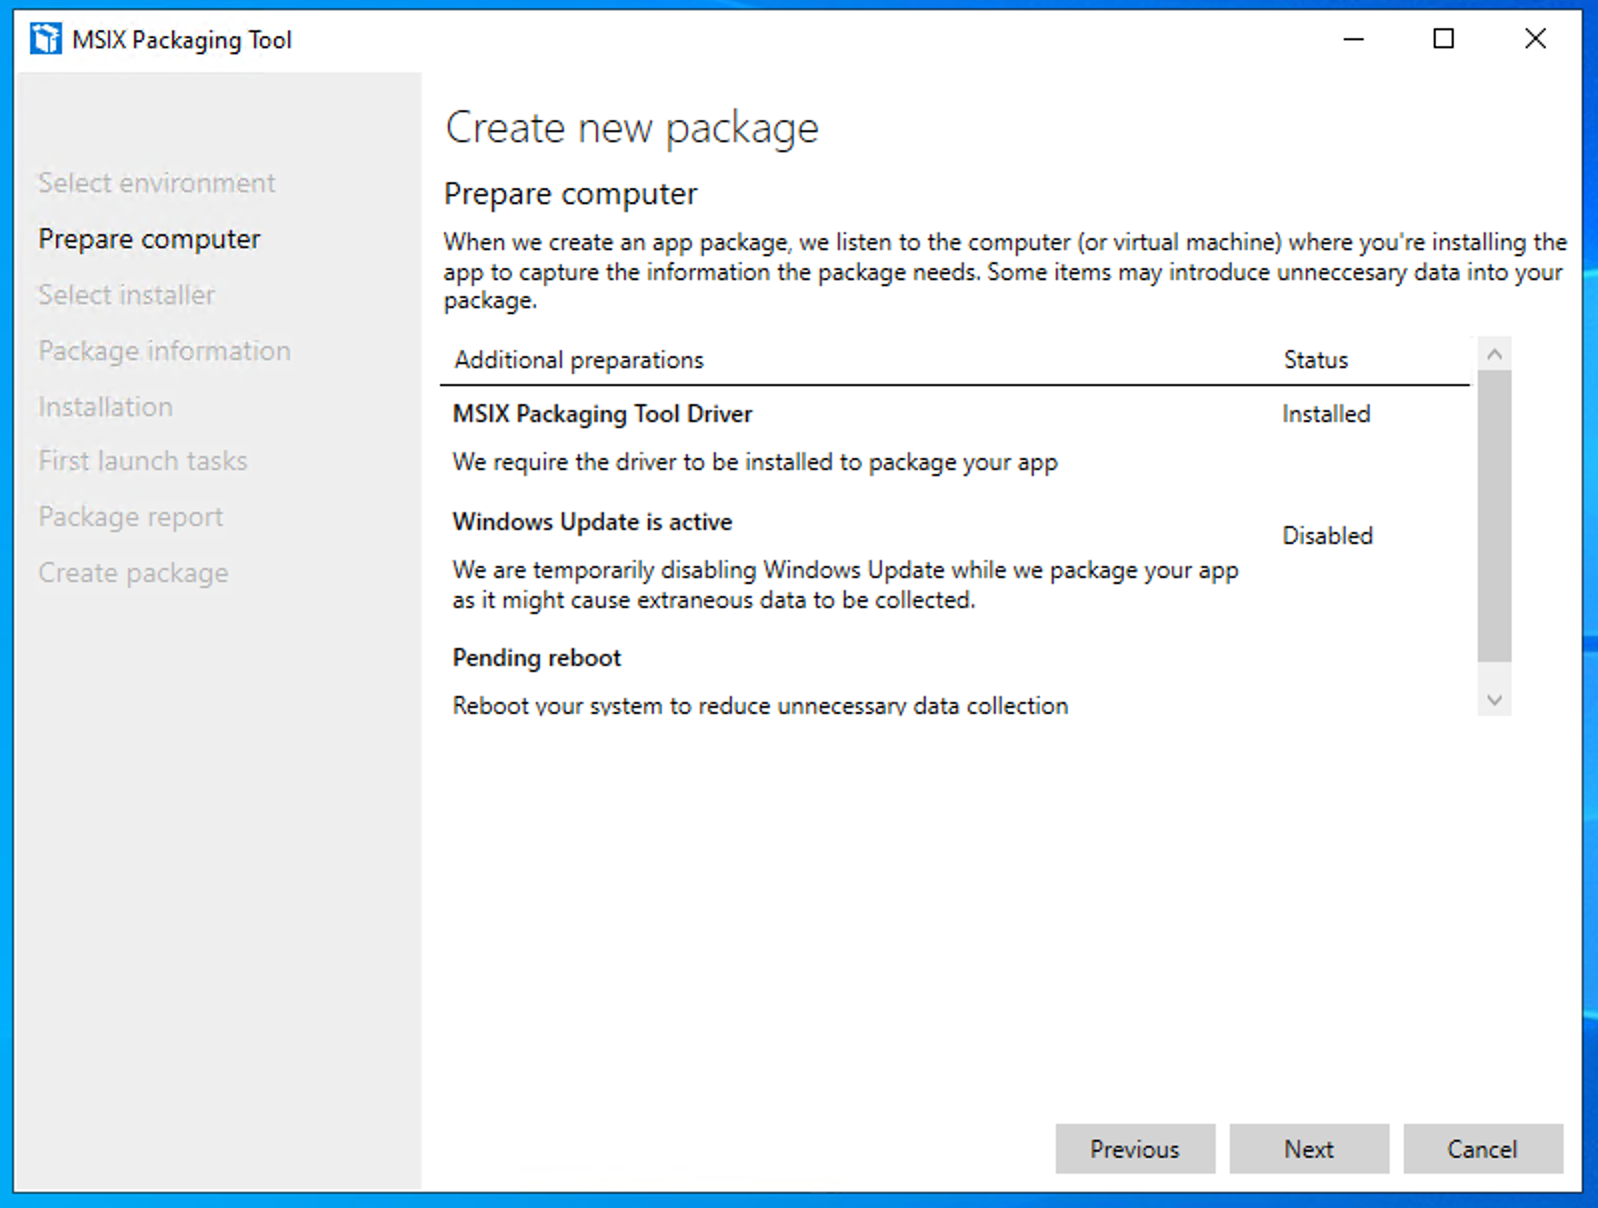
3) Review any additional preparations to be made before running the installer.
The first time the MSIX Packaging Tool runs, it will need to install the MSIX Packaging Tool driver. This is normal and should take about a minute to complete. If nothing happens, consider checking for updates in Windows Update.
If there is a pending restart, consider restarting your machine and start back at step 1.
The MSIX Packaging Tool will temporarily disable Windows Update while it is running. This is normal. Windows updates will resume when the Packaging Tool is finished.
If everything looks okay, click ‘Next’.
More information on this step can be found in the Microsoft Documentation for the MSIX Packaging Tool.
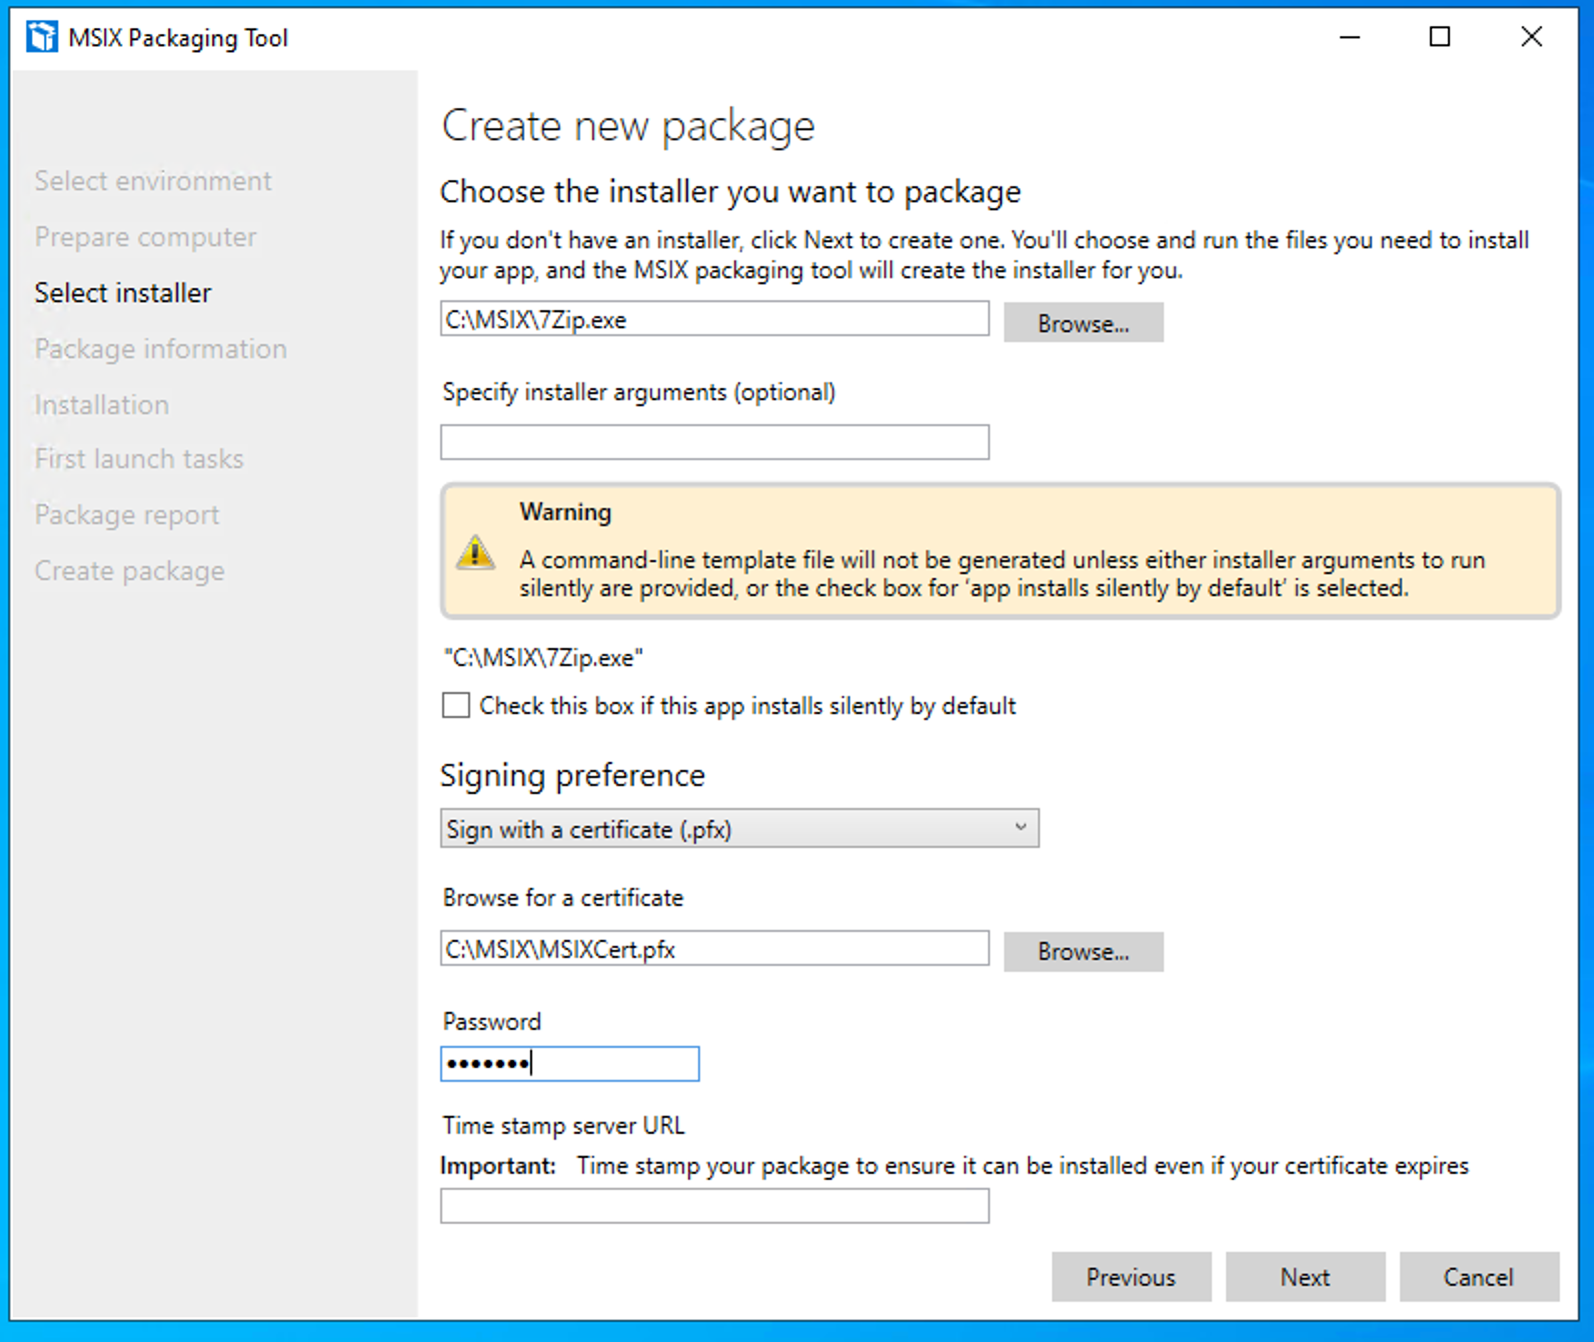
4) Select Installer and Signing Options
Select your installer file in the topmost file select. If any command-line arguments are required for the installer, put them in the text box below.
For ‘Signing Preference’, select ‘Sign with a certificate (.pfx) and locate the PFX file we generated earlier. You will also need to provide the password you used to export it.
Providing a timestamp server is optional.
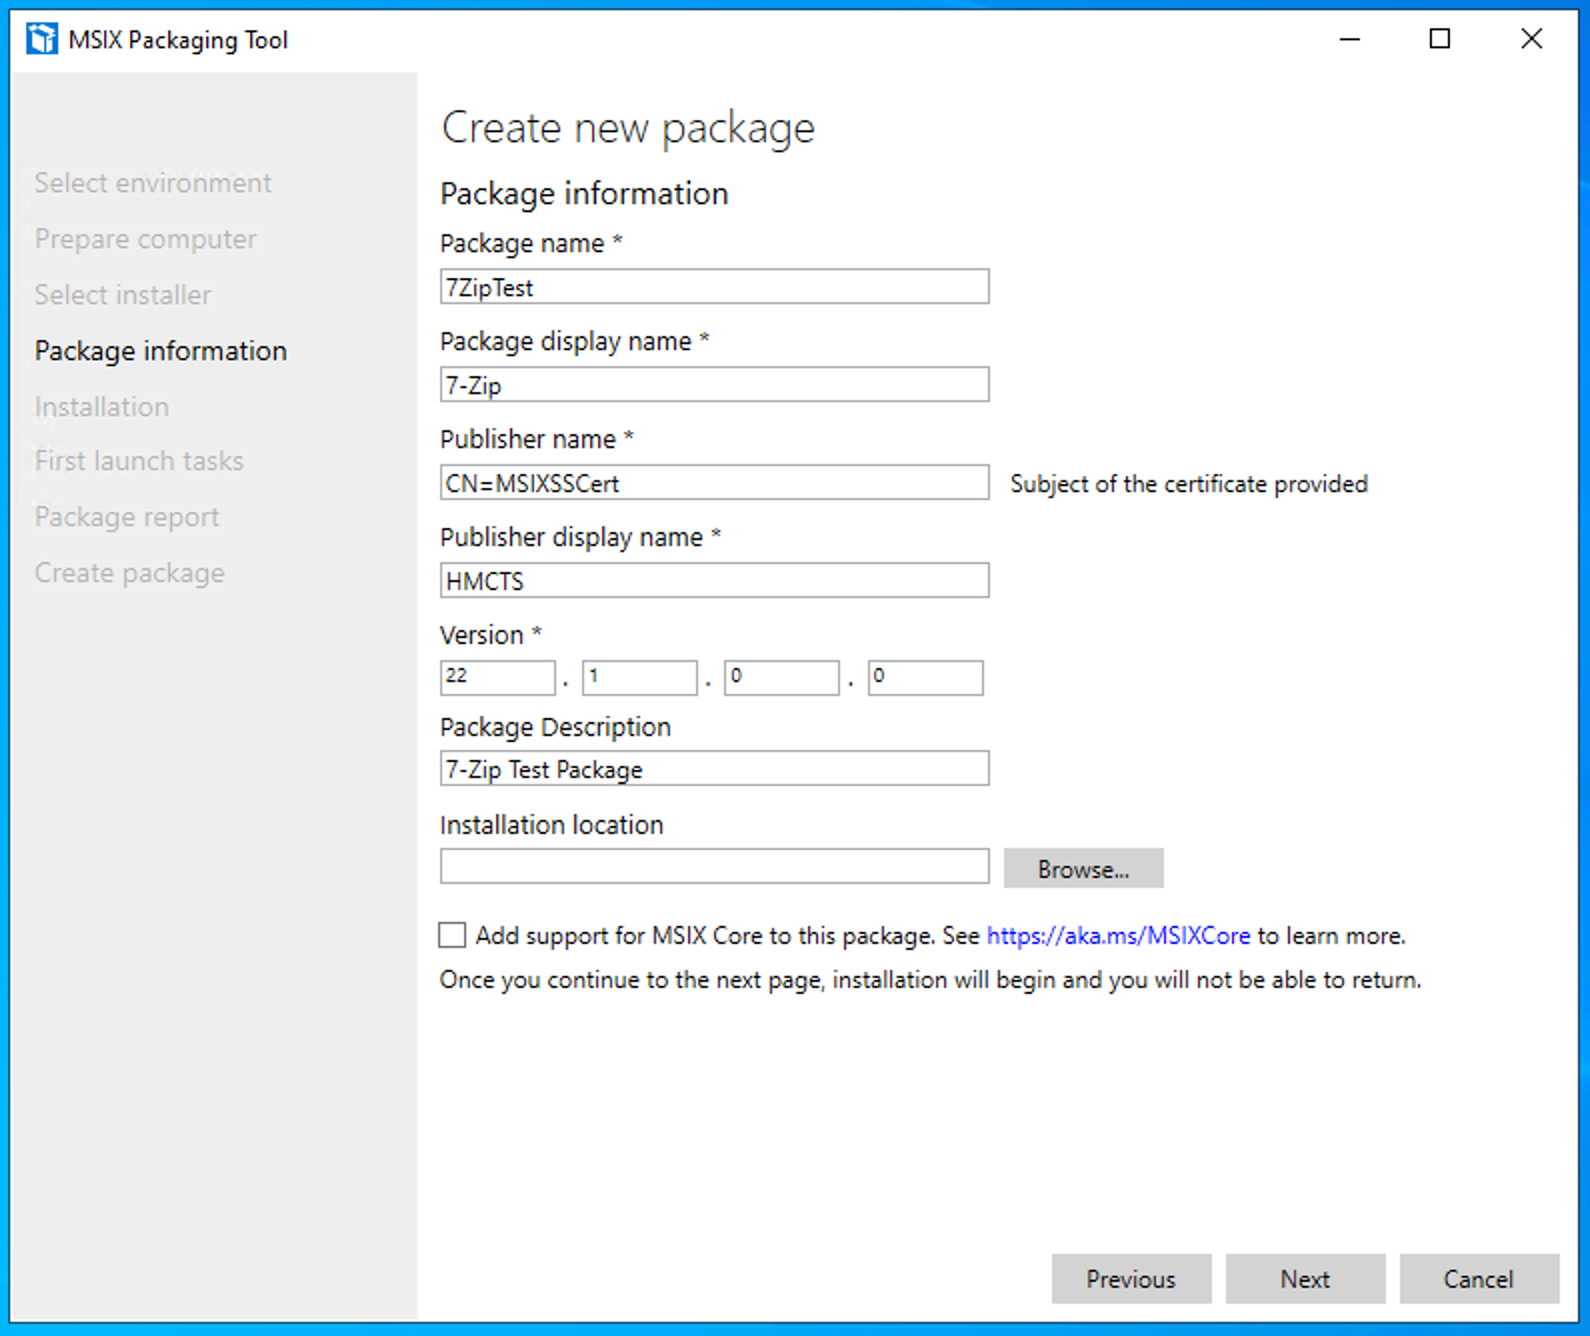
5) Provide Package Details
This area is fairly self-explanatory. Provide information so that your package can be easily used and identified. If you’re making an updated version of a package, make sure the version number is higher than the previous one.
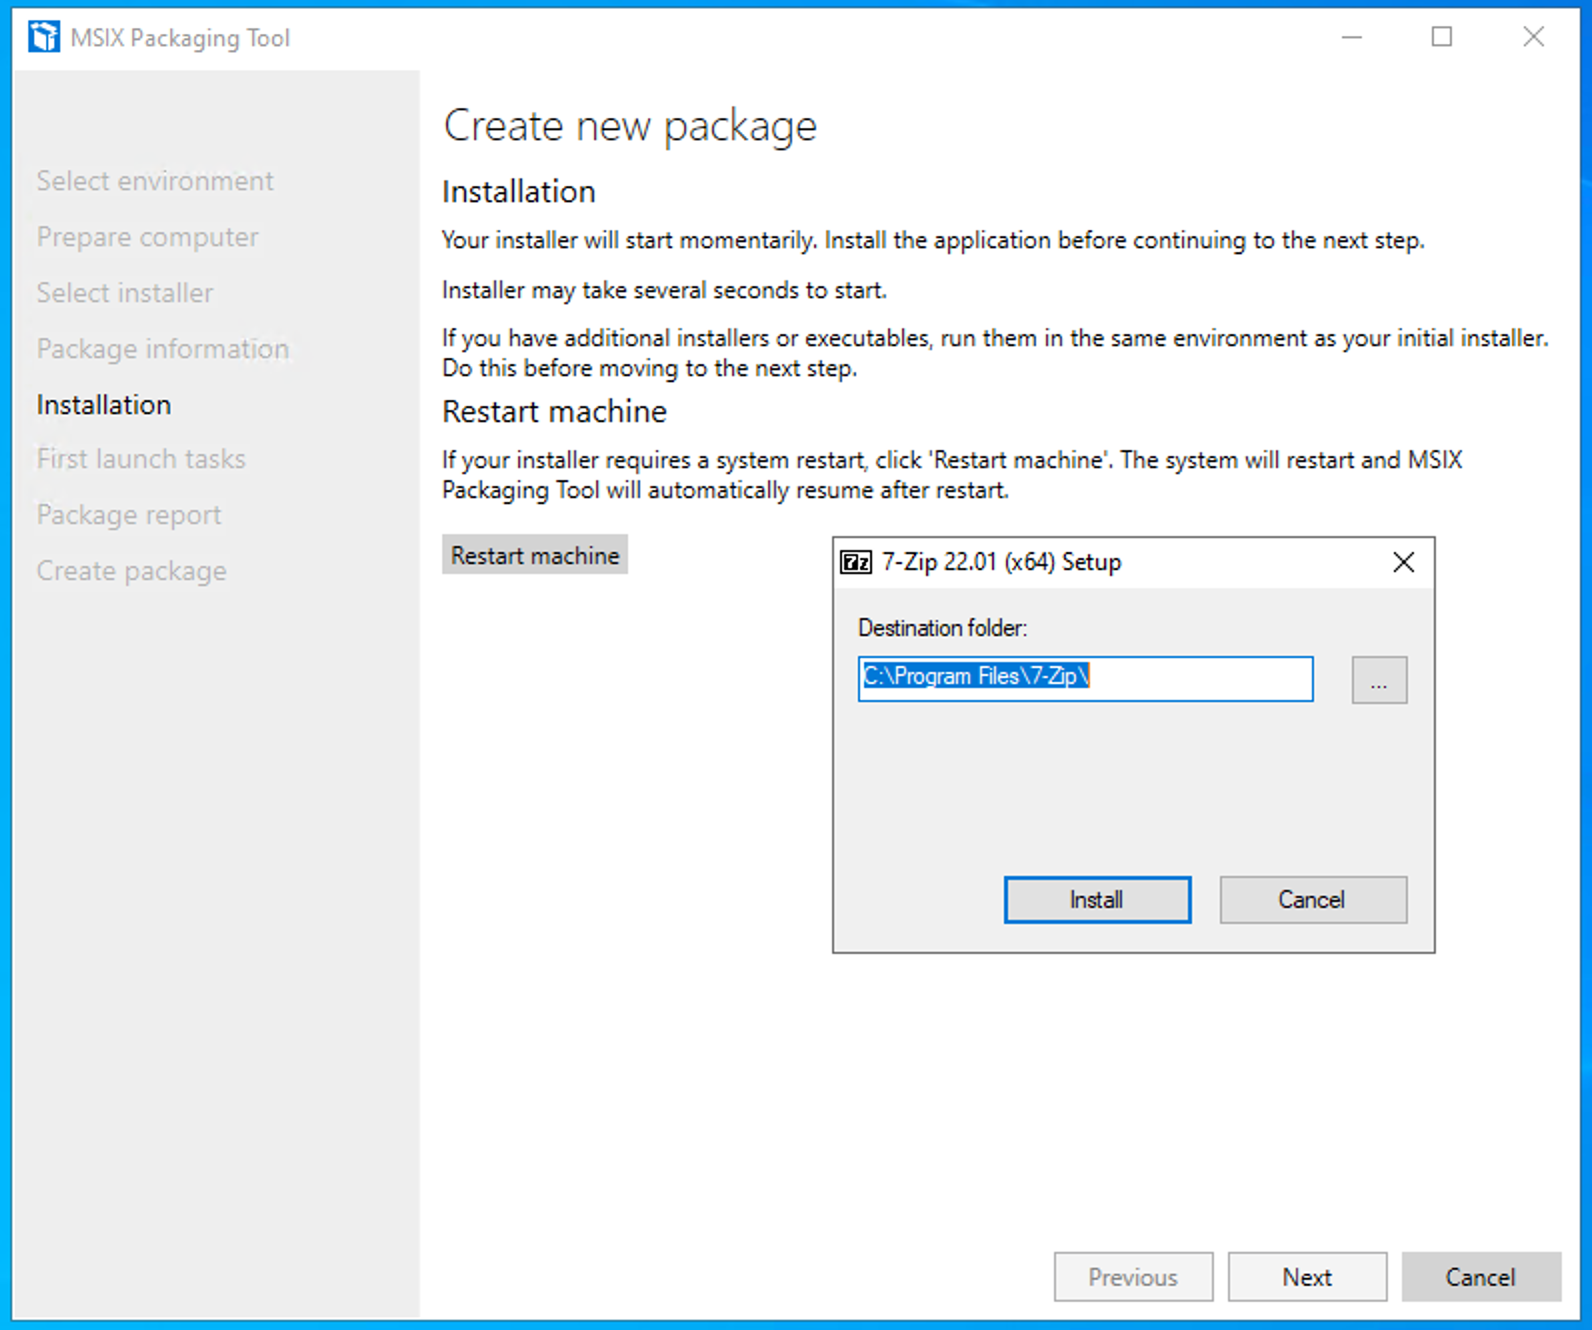
6) Run the Installer
The installer window will now pop up. Run through the installer like you would for a normal installation. If you are prompted for a restart, click 'Restart Machine’ in the MSIX Packaging Tool, NOT the installer or Start Menu. This will ensure the packaging process continues normally after the restart.
Once the installer has exited, click ‘Next’.
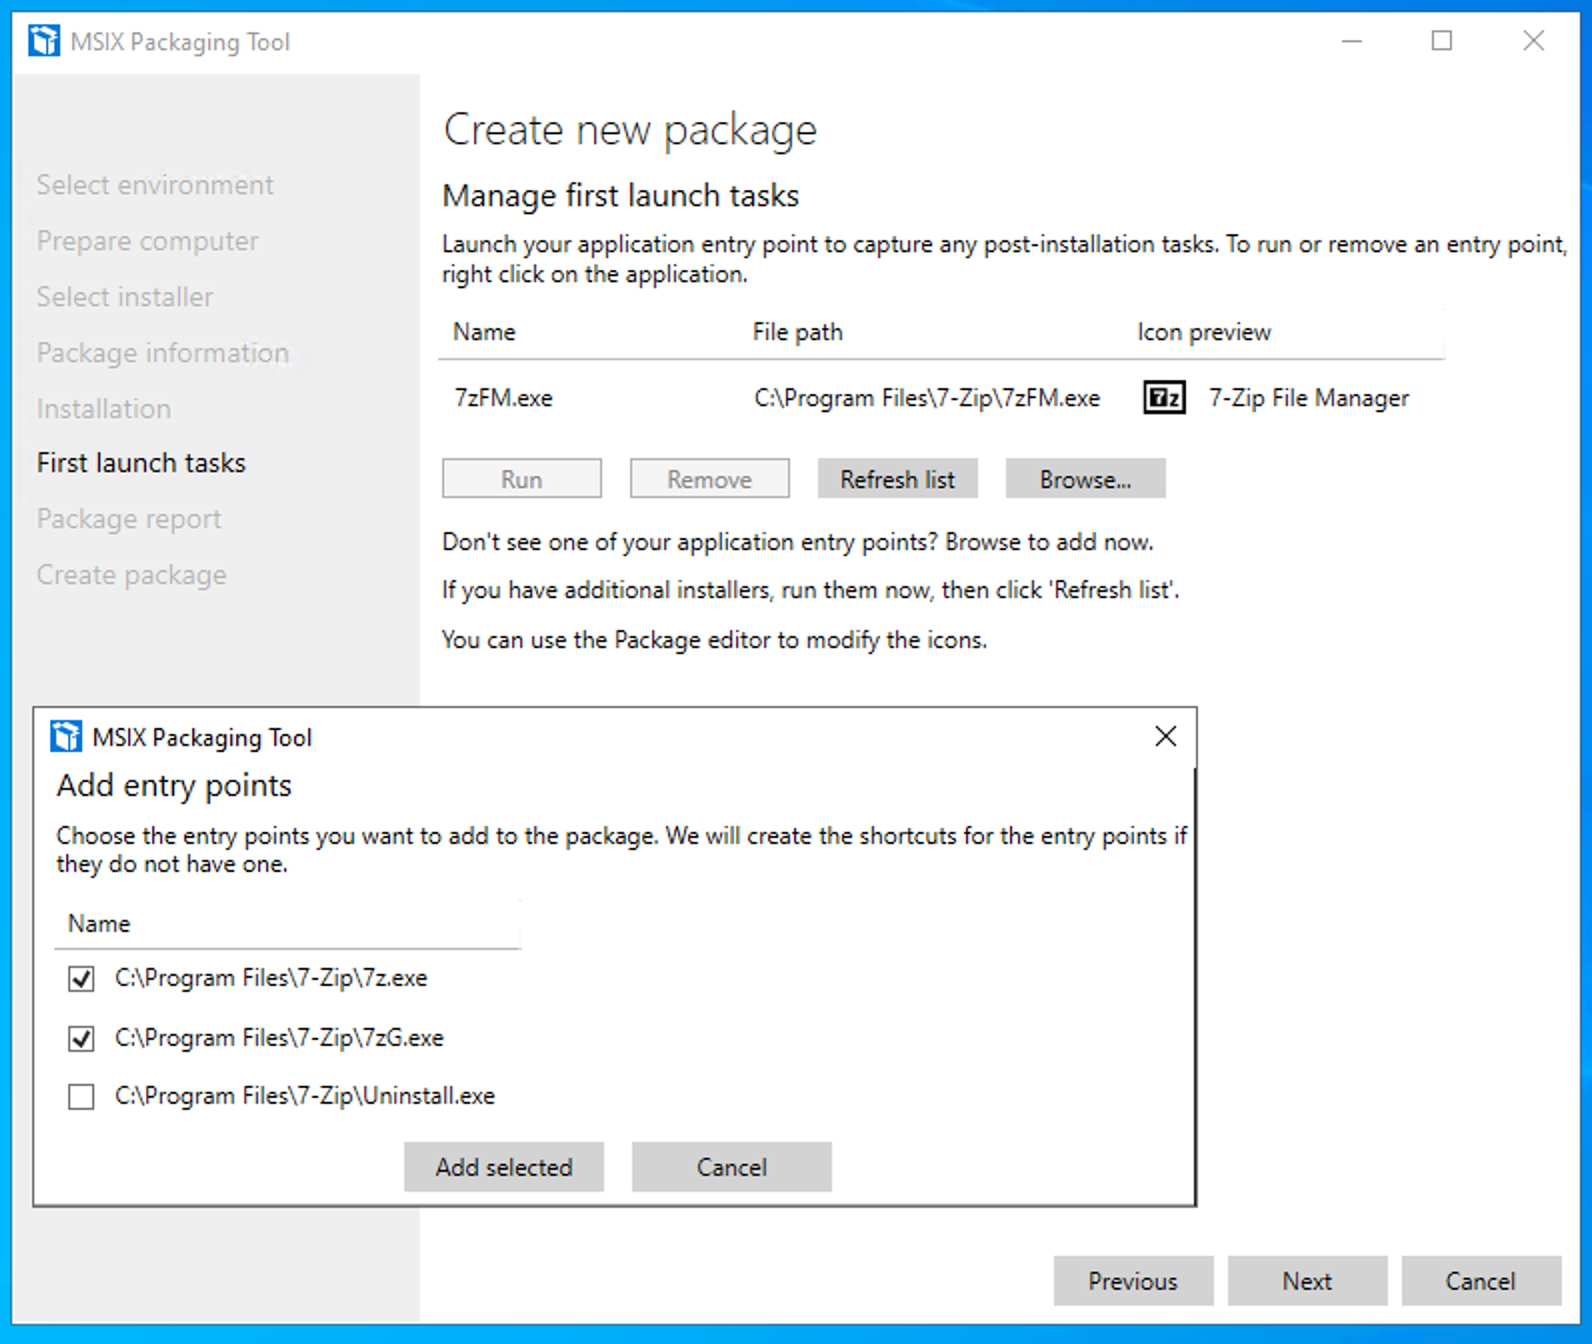
7) Find Additional Entry Points
If your installer writes multiple files or executables, there’s a good chance the MSIX Packaging Tool has only selected one. Click the ‘Browse…’ button to see all the executable files the installer wrote and select everything you want in your package. Do not add any uninstaller files to your package.
It helps to run the installed application at this point to capture any services or post-installation tasks that the Packaging Tool didn’t pick up.
When you’re happy with what you see, click ‘Next’.
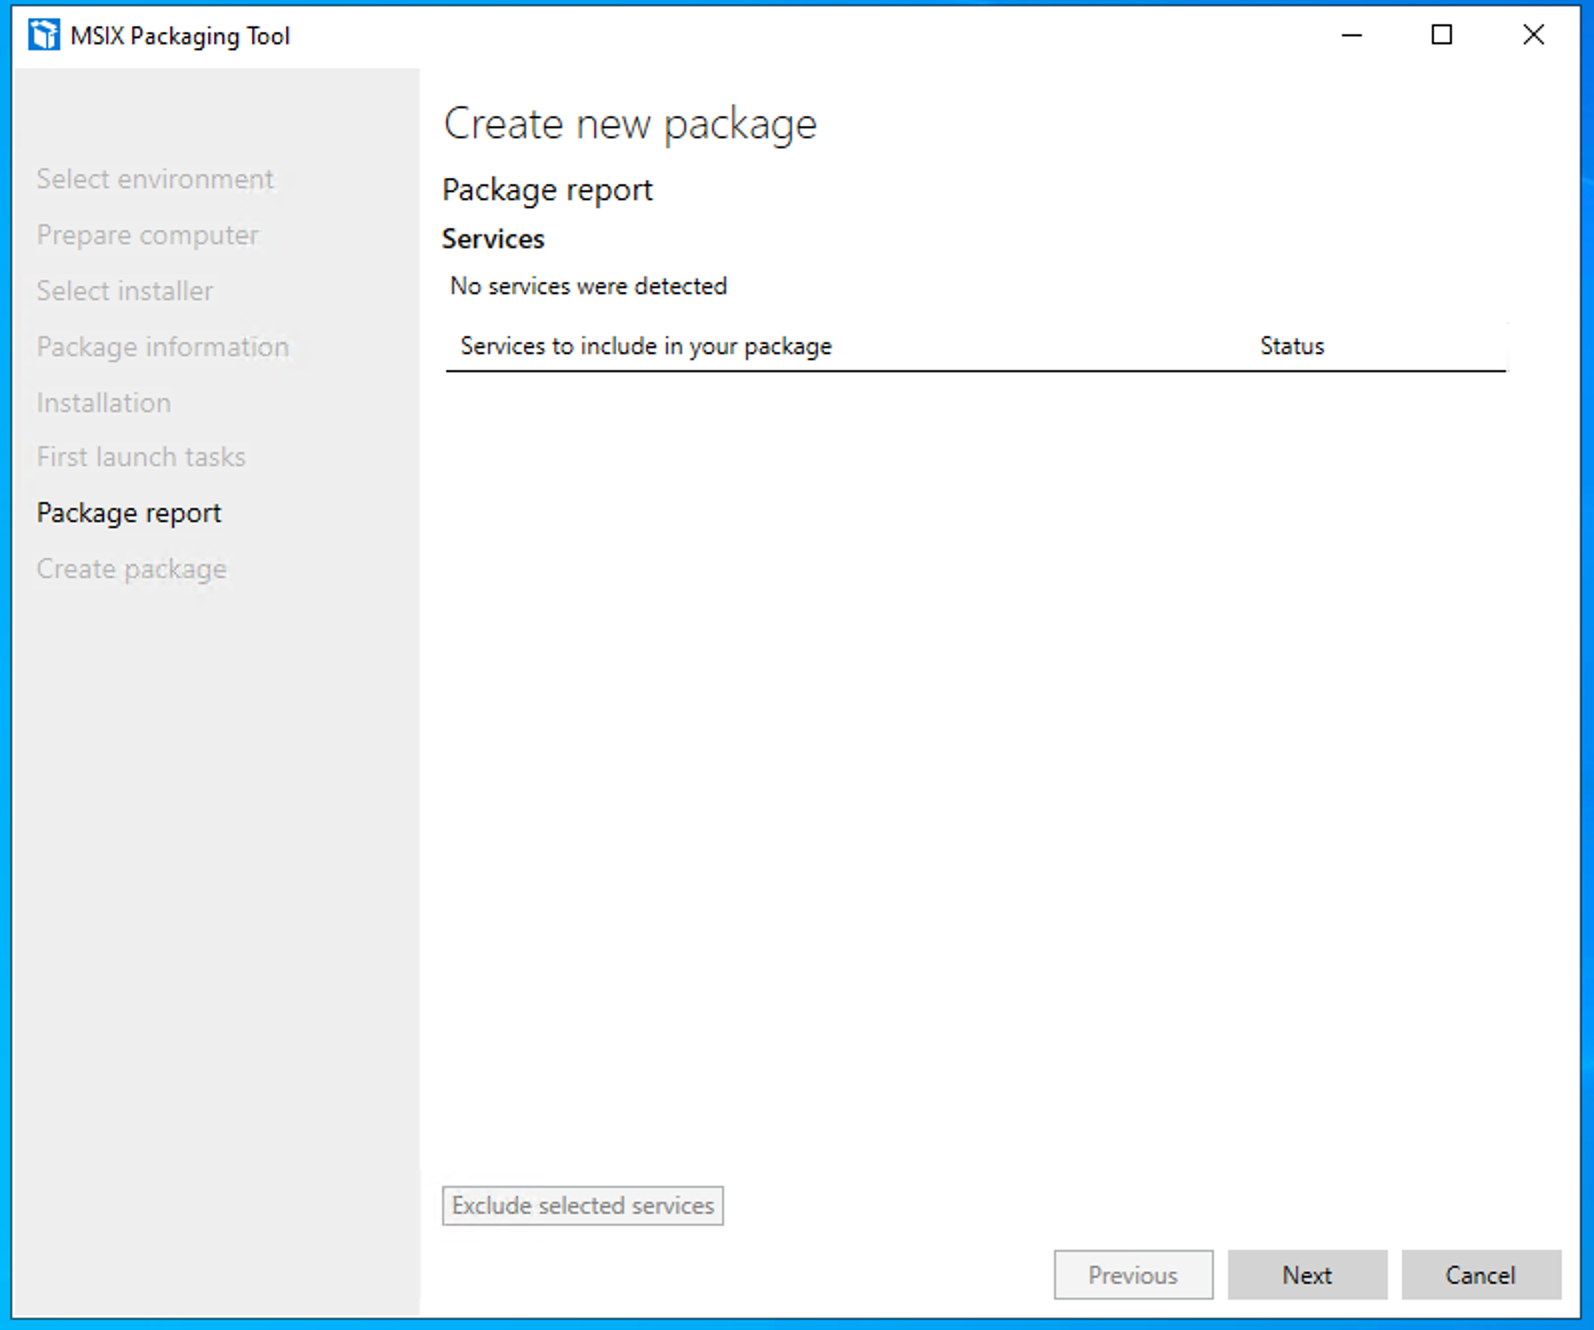
8) Select Services
If the MSIX Packaging Tool has detected any services written by the installer, it will show them here and prompt you to select what you want included in the package. In this case, 7-Zip does not stand up any services, so we do not need to worry about them.
When you’re happy with what you see, click ‘Next’.
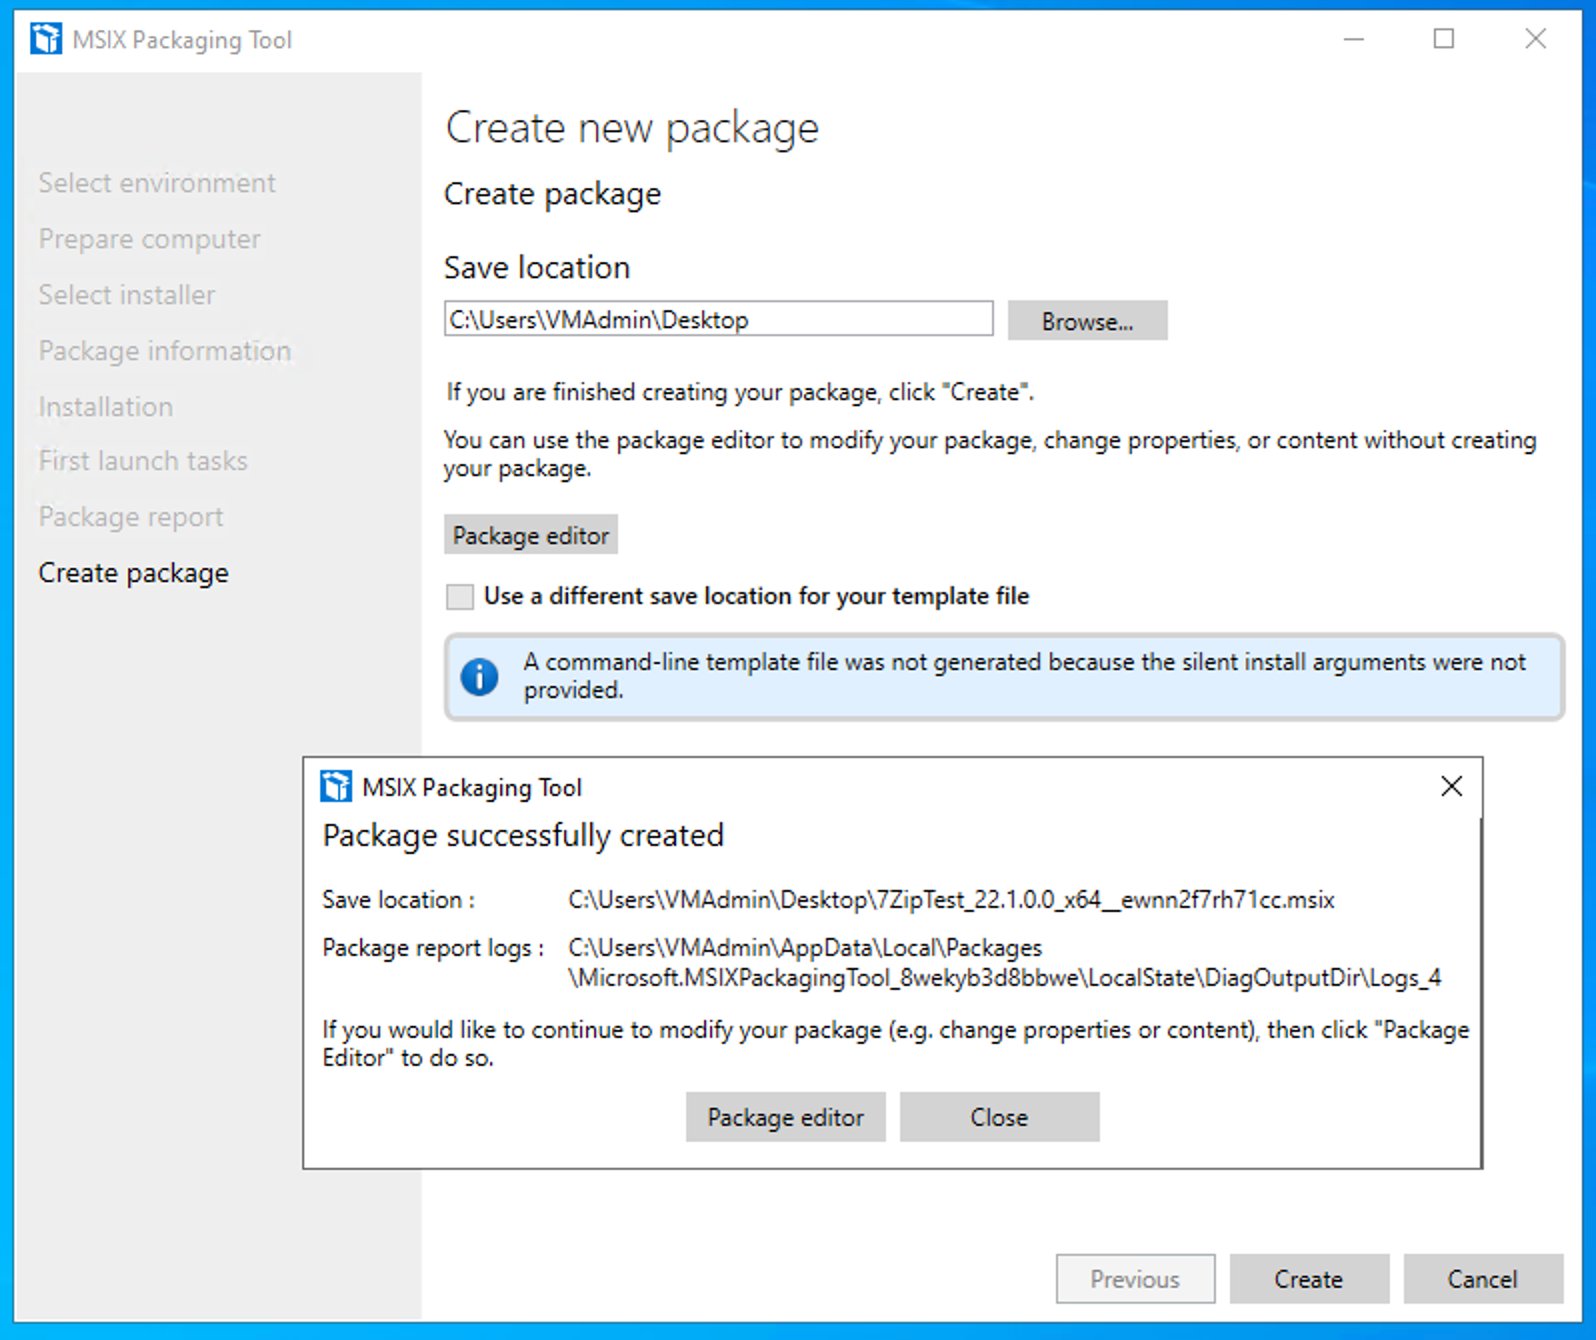
9) Create Your package
Finally, select a save location for your MSIX file and click ‘Create’. If all goes well, you’ll have an MSIX package you can install and provision. But we’re not quite done yet. We still need to convert it to a VHDX file.
Creating a VHDX file
Once we have an MSIX package we want to deploy, we can convert it to a VHDX file that we can mount on a the target VM.
Hyper-V (Optional?)
You may need Hyper-V enabled to create and read VHDX files. (This needs confirming. Don’t know if it’s necessary as we don’t need to use the powershell module) You can enable Hyper-V and its associated PowerShell Module with the following powershell script:
Enable-WindowsOptionalFeature -Online -FeatureName Microsoft-Hyper-V -All
Enable-WindowsOptionalFeature -Online -FeatureName Microsoft-Hyper-V-Management-PowerShell -All
This will require a restart to take effect.
MSIXaaCT
We use a community tool called MSIXAACT to convert MSIX packages to VHDX files.
MSIXAACT is a very temperamental piece of software and it won’t tell you when it’s failed. Take extra care to heed the steps marked ‘Important:’ or you may find yourself with an empty or corrupt package.
1) Download and install MSIXAACT on the conversion VM.
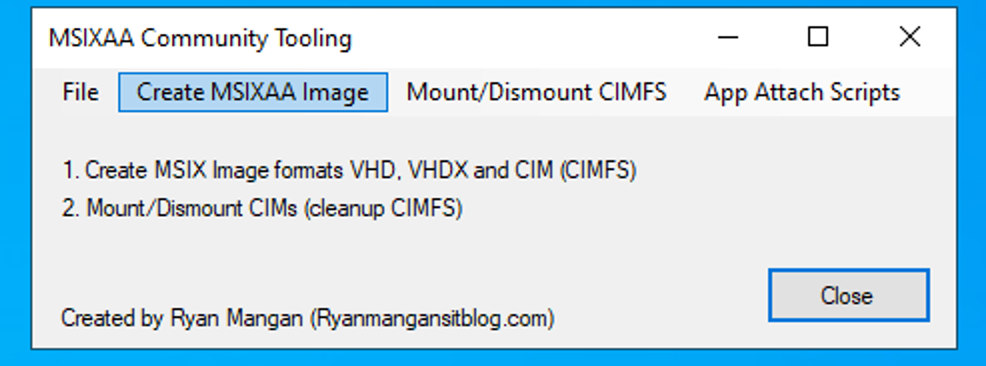
2) Click ‘Create MSIXAAImage’
3) Select the MSIX package you want to convert from the file select at the top.
Important:
- Check only ‘vhdx’ in the middle
- Make sure a file at the ‘MSIXAA Image Path’ does not already exist. It will not overwrite the file and MSIXAACT will still say it was successful.
- Make sure you allocate enough space for the VHDX. The default of 1024MB will be more than enough for anything that isn’t Google Chrome, but if there’s not enough space to write everything, it will corrupt the package and MSIXAACT will still say it was successful. We will show you how to check for this in the next step.
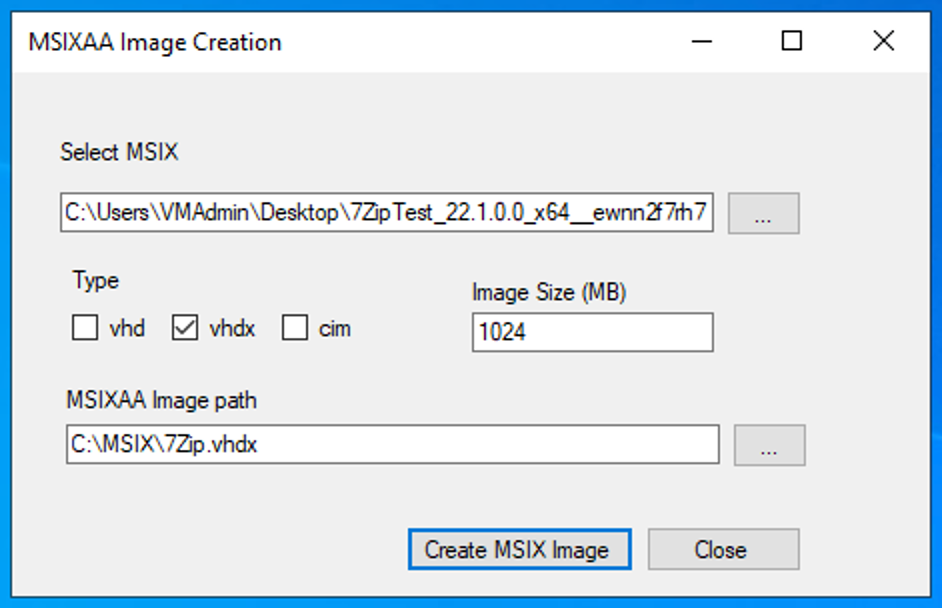
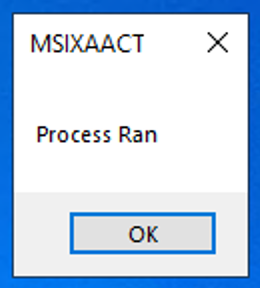
4) Click ‘Create MSIX Image’
This may take a couple of seconds depending on how big you set the image size to. You will know it is finished when you get the following popup:
5) Double-Check the VHDX File
As mentioned above, if MSIXAACT runs out of space in the drive when writing the package, it will fail silently. Thankfully, we can detect this in a few ways.
Mount the created VHDX file by double clicking it in the file explorer. Take note of the drive letter it mounts to. In this case, it mounted to F:\
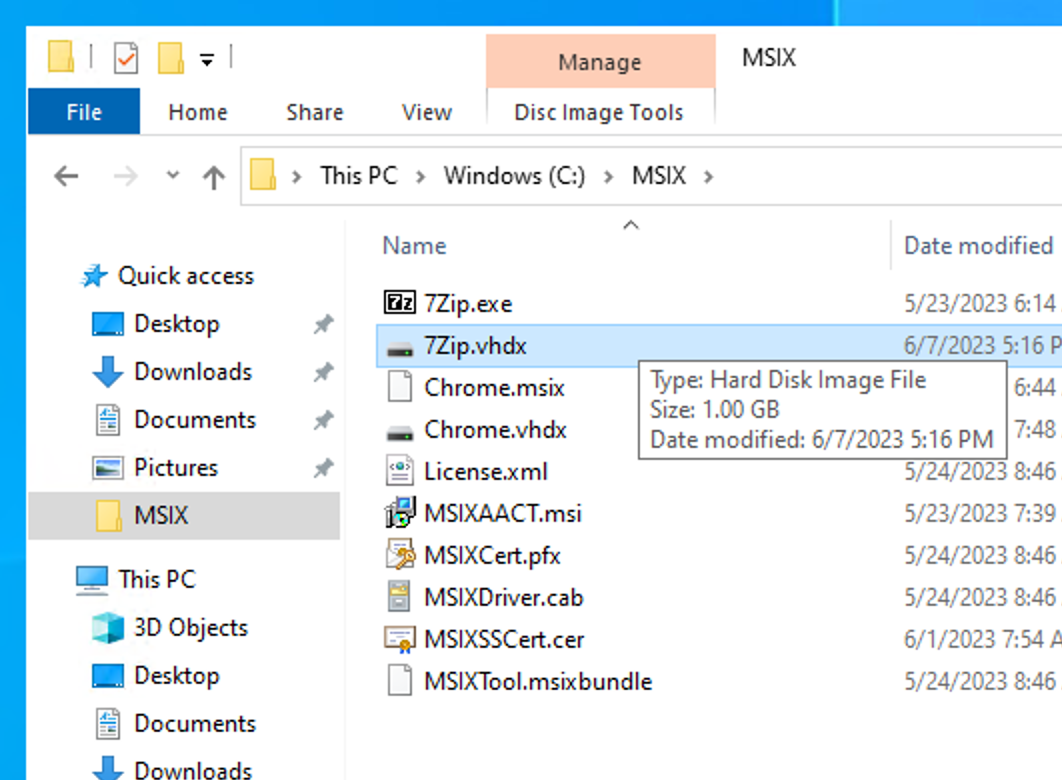
In the mounted drive, there should be a folder called MSIX containing another folder named after your package. Check the package folder contains at least the following files:
AppxBlockMap.xmlAppxManifest.xmlAppxSignature.p7x
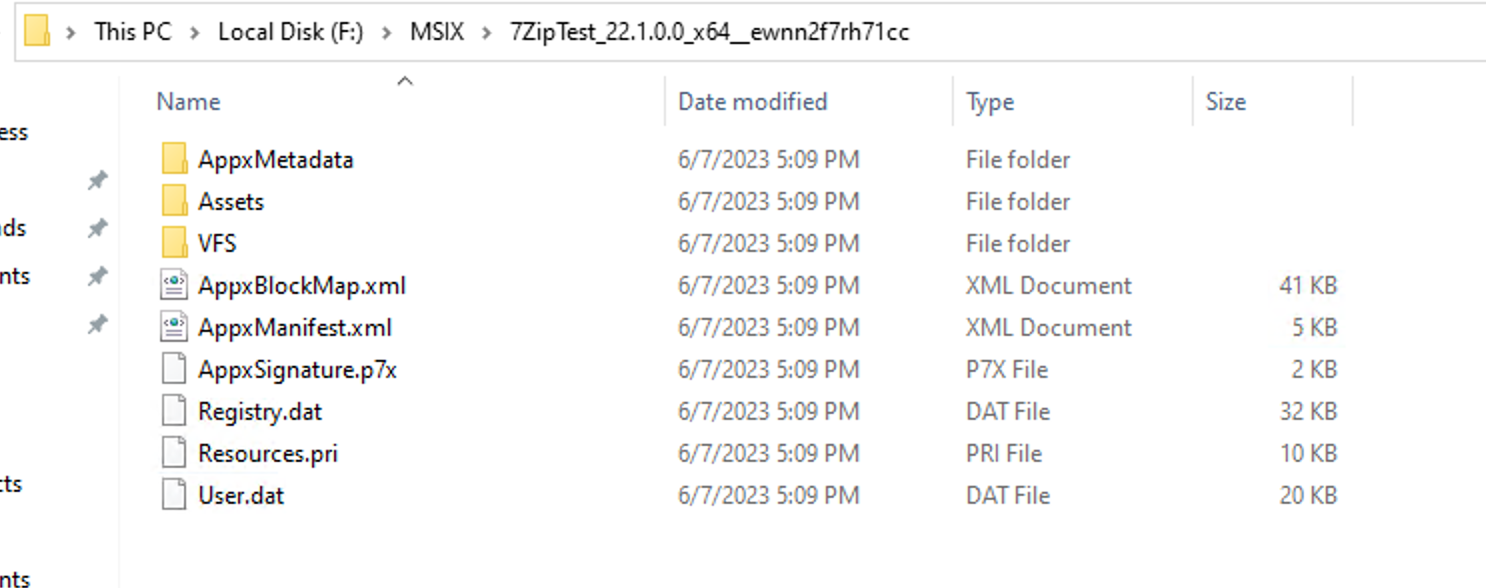
This is the bare minimum your package should contain. If it does not contain these files, delete it and start again.
To make sure MSIXAACT did not run out of space elsewhere, go to ‘This PC’ in file explorer and check the mounted drive. It should have an ample amount of free space remaining and the bar should not be in the red. If this is the case, the VHDX conversion worked.
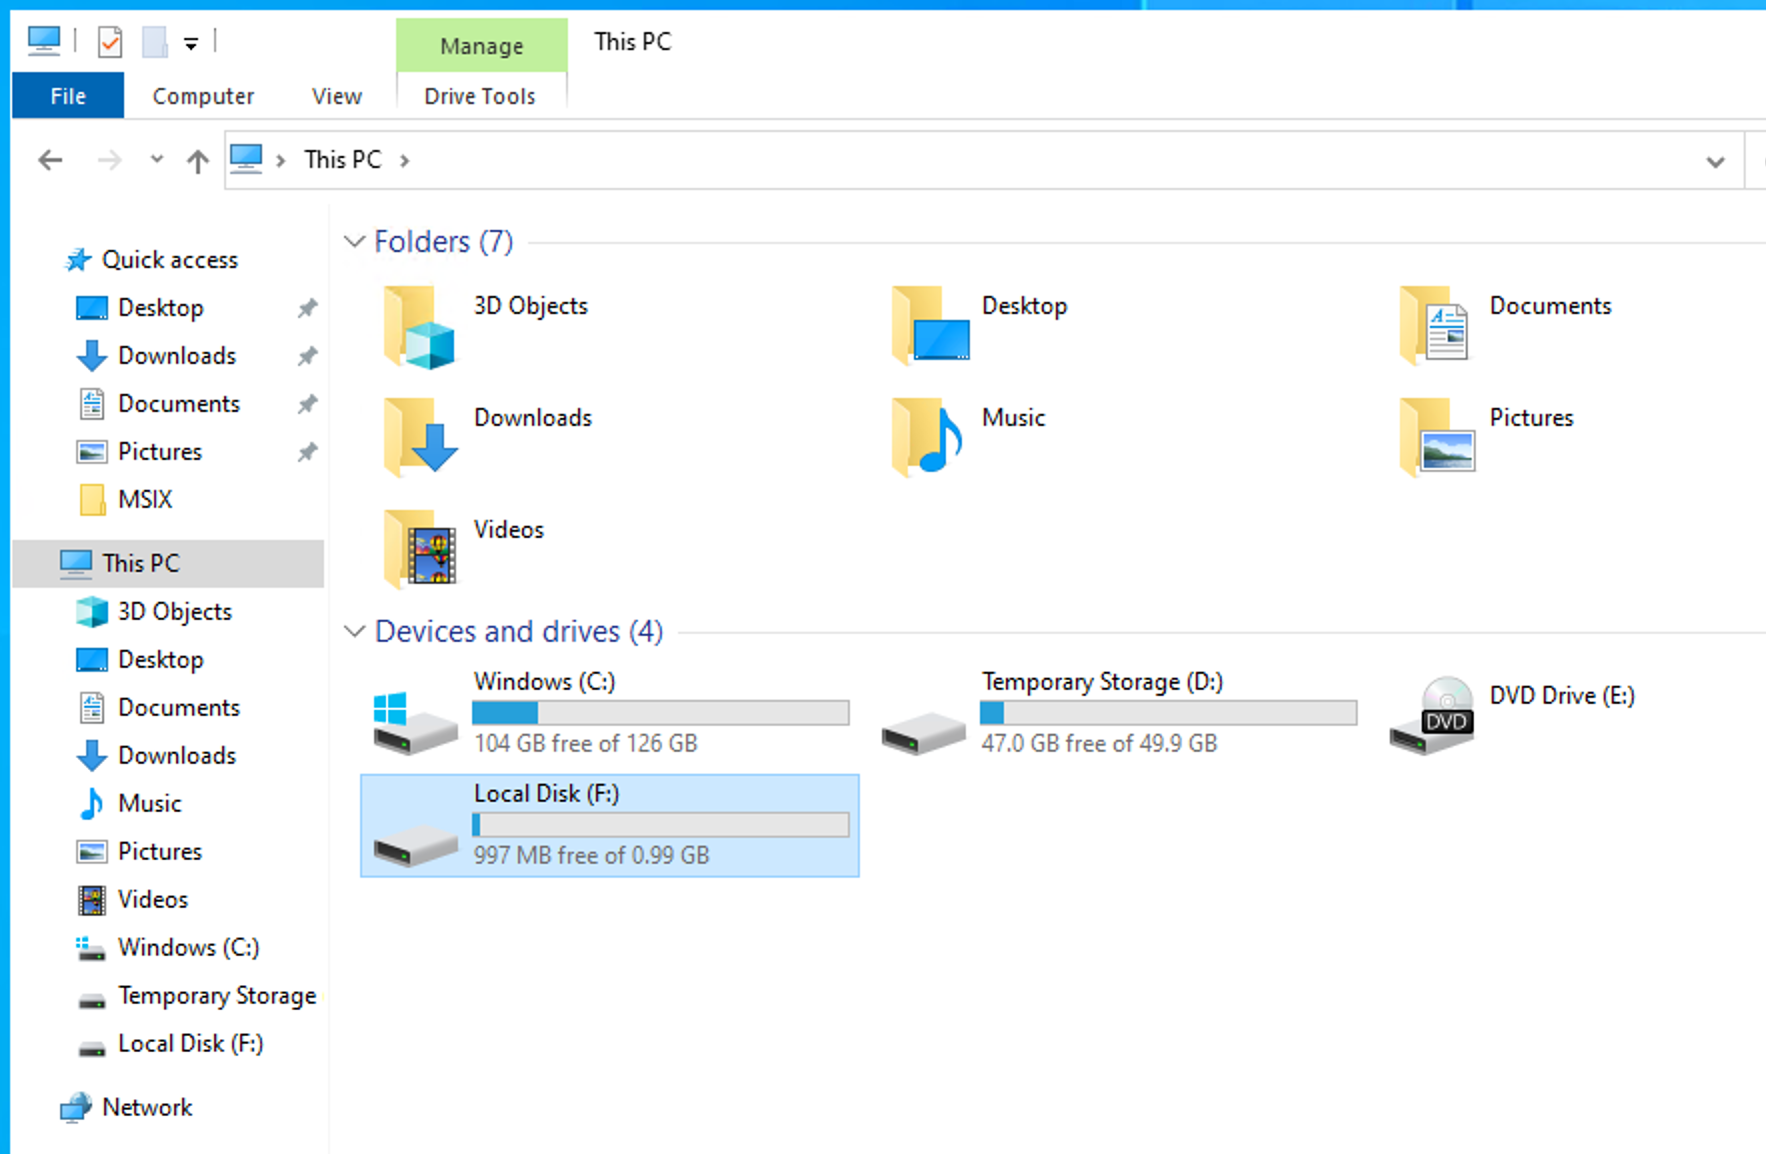
Remember to eject the drive when you’re done.
Upload to File Share
To make app deployments across multiple VMs easier, we’ll upload the completed VHDX image as well as our .pfx certificate to an Azure File Share which we will then connect to from our target VM.
You may want to store the .pfx certificate in a key vault instead
In the case of deploying to the ops jumpboxes, we’ll be using the hmctsfslogixprodstor storage account for prod and hmctsfslogixnonprodstor for non-prod. Both of these have a file share called ‘MSIX’ that contain our VHDX files, as well as some powershell scripts. More on those in the next chapter.