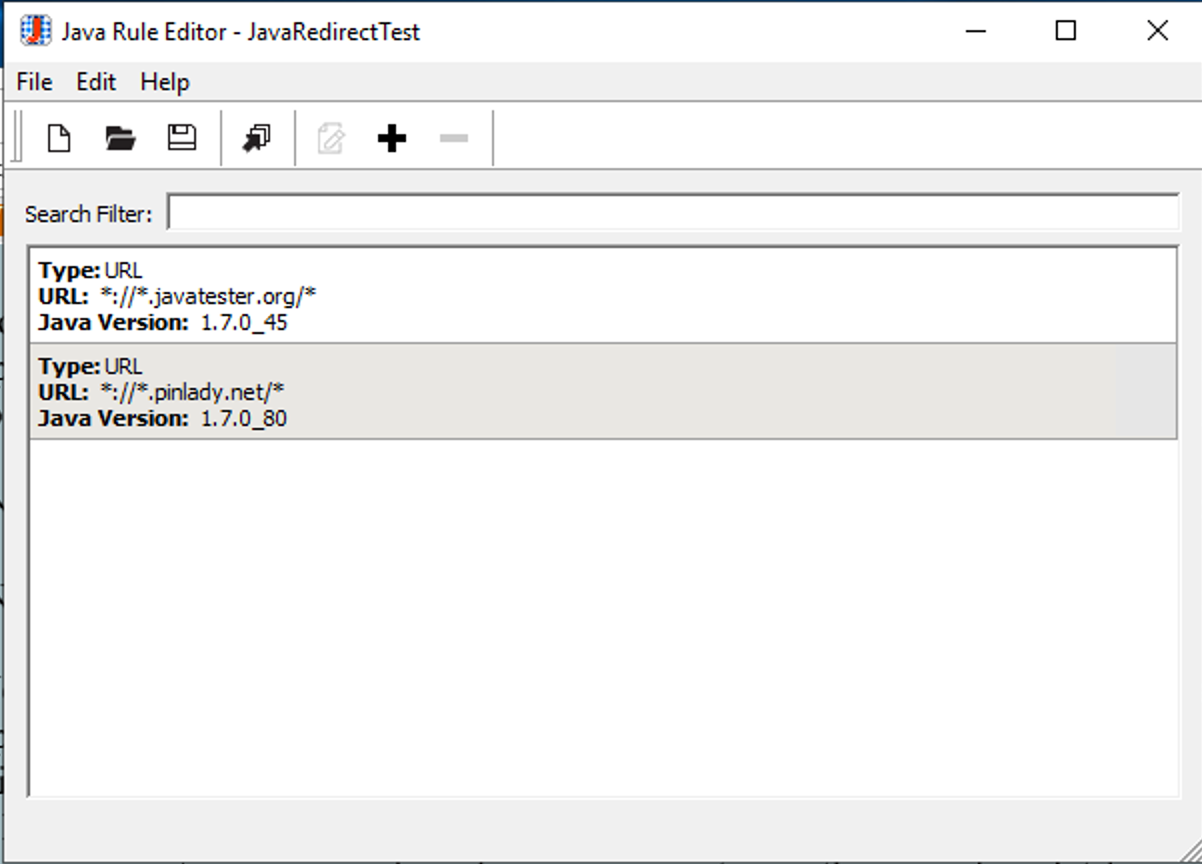
FFSLogix-Java Rule Editor
FSLogix has a ‘Java Rule Editor’ that allows creating rules limiting certain web URLs or applications (specifically .exe files) to using specific versions of the Java Runtime Environment (JRE). This can be used to limit internet explorer itself or specific java applets running in those browsers to a specific version of Java. A demo of this feature has not been created yet. I believe we can utilise https://javatester.org/version.html to accomplish this. See also: https://www.htg.co.uk/blog/fslogix-first-look-1-managing-legacy-or Currently FSLogix has been tested using ‘ClickOps’ i.e. connecting to a jumpbox via RDP and entering the rules manually via the FSLogix GUI. There exist some methods to deploy FSLogix rules via terraform. These need looking into: https://github.com/MicrosoftDocs/azure-dev-docs/blob/main/articles/terraform/create-avd-azure-files-storage.md
We’ve constructed a demo with two java applets on different sites running different versions of Java concurrently. One running JRE 7u80 and another, (while showing an error) can be seen to be running JRE 7u45.


It should be noted that the 32-bit JRE must be installed in order for the java redirection to work. If only the 64-bit version of the desired JRE is present, it will default to the latest JRE installed on the machine. These rules will be applied when Internet Explorer starts up. In order to apply rules while Internet Explorer is running, it will need to be closed and re-opened before they are applied. Some applets may require a security exception in the Java Control Panel to work. The FSLogix Java Rule Editor is a separate software package to the normal Rule Editor. It saves rule projects as a .xmlp file. This is not sufficient to apply the rules, however. To do this, a .xml file must be generated by clicking the ‘generate’ button or selecting ‘file -> generate’ from the menu bar. The .xml file must then be copied to the FSLogix system directory as detailed previously. Only the .xml file is required to apply the Java Rule. The .xmlp file is used only to generate the .xml file.
In order to configure FSLogix rules via code, we can use a Powershell module called FSLogix.Powershell.Rules to create and configure FSLogix rules and assignments: https://github.com/FSLogix/FSLogix.Powershell.Rules/tree/master This module can be installed from Powershell Gallery with the following commands: Set-PSRepository -Name ‘PSGallery’ -InstallationPolicy Trusted Install-Module -Name FSLogix.Powershell.Rules It’s important to note I’ve been unable to find any documentation for this module, so I will provide some information here that I’ve gleamed largely from digging around in the module’s source code.
Adding Rules
FSLogix rules can then be added via the Add-FslRule command: Add-FslRule -Path “C:\Program Files\FSLogix\Apps\Rules\HideNotepad.fxr” -HidingType FileOrValue -FullName “C:\Windows\system32\notepad.exe” The Path parameter specifies the path to the FSLogix rule file. Here we write directly to the FSLogix program directory where it reads it’s rules from. This will require administrator privileges. If said privileges are not available, it may be desirable to create the files to a different directory and then copy them over later. The HidingType parameter is an enum and specifies the type of object we’re hiding. This can be any of: • FolderOrKey • FileOrValue • Font • Printer For our purposes, we’re only concerned with FolderOrKey to hide folders and FileOrValue to hide individual files. The FullName parameter specifies the full path of the object we want to hide. In the example above, we direct this to the windows notepad executable.
Adding Assignments
FSLogix rules can then be assigned to users/groups via the Add-FslAssignment command: Add-FslAssignment -Path “C:\Program Files\FSLogix\Apps\Rules\HideNotepad.fxa” -RuleSetApplies -UserName “your.email@hmcts.net” The Path parameter specifies the path to the FSLogix assignment file. These should have the same name as the rule file they apply to, but with the .fxa extension instead of .fxr The RuleSetApplies parameter is a switch that determines whether a rule set applies to the group or user we’re specifying. If present, the rule will apply to the entity we specify, if absent the rule will not apply. This can be used to include/exclude groups of users from a rule. The UserName parameter specifies the name of the user this assignment is targeting. Wildcards (*) are supported. Alternatives to targeting usernames include GroupName to target groups, ProcessName to target running programs and ADDistinguishedName to target active directory objects.
Additional Functions
The full list of commands added by the FSLogix.PowerShell.Rules module can be seen in the module’s git repository: https://github.com/FSLogix/FSLogix.Powershell.Rules/tree/master/FSLogix.PowerShell.Rules/functions/Public Adding the -? flag to the end of a command name details the parameters of that command and sometimes provides examples, though the quality and quantity of documentation varies from command to command.
Reloading Rules
Once rules have been added to the FSLogix program directory, FSLogix needs to be reloaded to apply them. This can be done with the FSLogix command-line utility that is installed alongside FSLogix: C:\Program` Files\FSLogix\Apps\frx.exe reload-rules
Java Rules
The FSLogix.PowerShell.Rules module does not have functionality required to create and add Java redirection rules. Thankfully, unlike .fxa and .fxr files, Java rules are plaintext .xml files. This makes it possible to simply construct the Java rules with native PowerShell, if so desired. I’ve provided a sample xml file that I created during testing. The structure of the file is very simple largely self-explanatory:
<?xml version=“1.0”?>