Configuring App Attach
App Attaching our created packages on the target VM takes place in two stages: Staging and Registering.
Staging will involve mounting the VHDX files to a virtual mount point with no drive letter, creating a junction to that virtual mount point and using the Win32 package manager to stage the package in place.
Registering will involve using Add-AppxPackage to provision that package to specific users.
This process is automated using a modified version of four powershell scripts created by Ryan Mangan.
These scripts rely on a JSON config file to mount, register and provision packages. They have been modified by us to accept the config file from a command-line argument rather than being hardcoded. This allows us to use the same scripts to provision different sets of packages at a time.
These scripts should be available on the file share, but just in case, we’ve included them in the runbook as well
Connect to the File Share
To make app deployments across multiple VMs easier, we’ll download the completed VHDX images from an Azure File Share which we will connect to from our target VM.
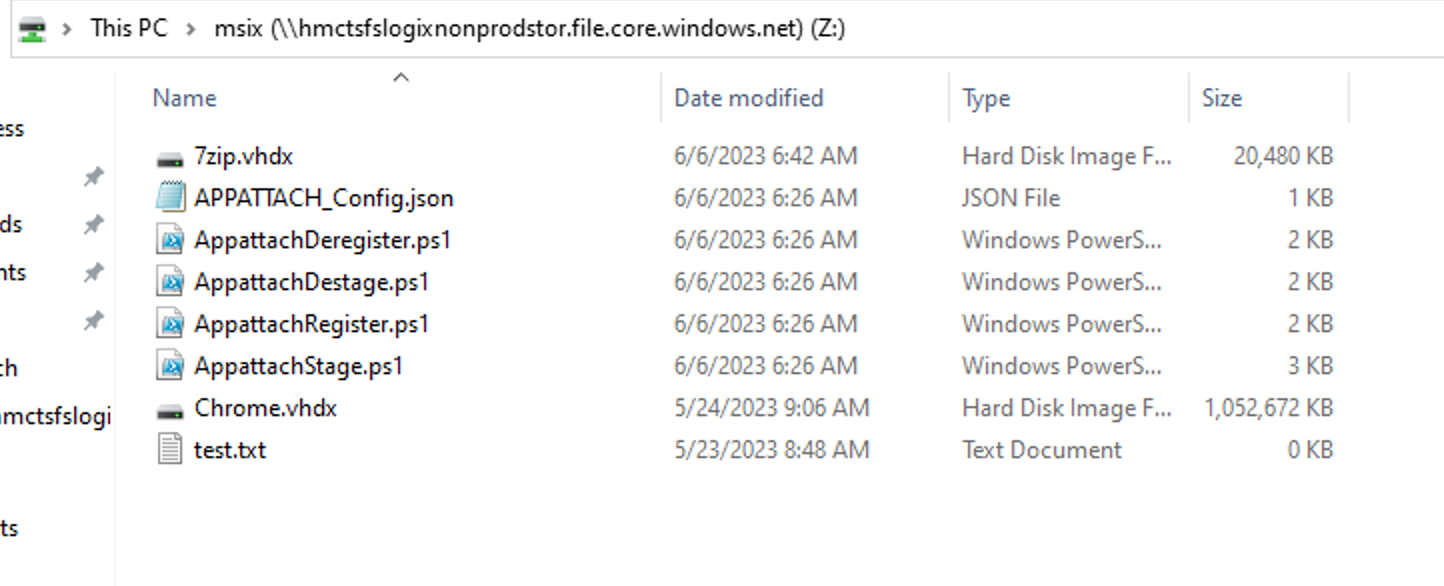
In the case of deploying to the ops jumpboxes, we’ll be using the hmctsfslogixprodstor storage account for prod and hmctsfslogixnonprodstor for non-prod. Both of these have a file share called ‘MSIX’ that contain our VHDX files, as well as some powershell scripts. More on those in the next step.
Since the jumpboxes will be domain joined, we can connect and authenticate using Microsoft Entra credentials. The ‘Connect’ tab of the file share in the azure portal will provide you a powershell script you can use to connect to the file share.
In this example, the machine we’re using is not domain joined, but the process will be the same. We will be mounting the file share to Z:\
Download From the File Share
We’ll need to download the contents of the file share to a local directory on our machine. There are several reasons for this:
1) Remote Powershell scripts can’t be run unless they’re signed first.
2) The VHDX images will need to be on the same drive if we want to create a junction to them.
3) The powershell scripts expect to be in the same directory as the VHDX images.
The following powershell will download everything from the connected file share, assuming it is mounted to Z:\:
New-Item -Path "C:\AppAttach" -ItemType Directory
Set-Location "C:\AppAttach"

# Copy contents of file share to local directory
# powershell scripts will need to be local in order to be ran
# MSIX packages will need to be local in order to be mounted
Get-ChildItem -Path "Z:\" -Recurse | Copy-Item -Destination "C:\AppAttach"
We will be using the C:\AppAttach directory to keep all our files for this process and the powershell snippets in the following steps will assume you are using it, too.
Installing the Self-Signed Certificate
We’ll need to install the self-signed certificate we used to sign our MSIX package if we want to provision the package. Copy the .pfx file to the target VM.
The following powershell will install the exported certificate to the ‘Trusted Root Certification Authorities’ store.
# Import certificate to trusted authority
# Again, find a way to get the password nicer than this
$certPass = ConvertTo-SecureString -String "<My Password>" -Force -AsPlainText
Import-PfxCertificate -FilePath "C:\AppAttach\MSIXSSCert.pfx" -CertStoreLocation "Cert:\LocalMachine\Root" -Password $certPass
Creating a config file
Config files are just plain JSON that the scripts read to get a bunch of variables needed to mount our VHDX files. Config files can contain entries to mount multiple VHDX files, but as we’ll want to deploy specific software to different users, we’ll need to have a config file for every software package and run them on an individual basis.
For our 7-Zip example, we’ll have our config file C:\AppAttach\7Zip_Config.json.
To figure out what to put in there, first mount the drive by double-clicking in file explorer. This should assign it a drive letter (e.g. F:).
Open the newly mounted drive in file explorer.
ParentFolder
“parentFolder” is the first folder you see in the directory structure that contains the folder your package sits in. If you created the VHD using MSIXAACT, this will always be MSIX.
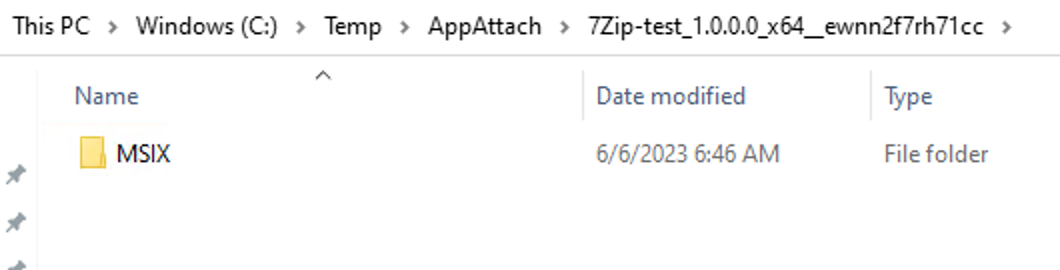
PackageName
Next, if you enter the MSIX folder, it will contain one folder named after your package. The verbatim name of this folder will be your “packageName” (e.g. 7Zip-test_1.0.0.0_x64__ewnn2f7rh71cc)
VolumeGuid
Next, we’ll need to use mountvol to find the “volumeGuid”. This is distinct from the disk identifier the file assigns itself.
To find the volume GUID, open powershell and run the following to get your GUID:
mountvol F:\ /L
Replace F: with the drive letter your image is mounted to if it differs. We want the part of the GUID inside the curly braces. (e.g. dfff5b61-ff4d-11ed-8f6a-6045bdcf6bef)
When you’re done, eject the image by right clicking on the drive in file explorer. Disk images can only be mounted to one mount point at a time and staging the image will fail if it’s already mounted somewhere else. Alternatively, run:
Dismount-DiskImage -ImagePath C:\Path\To\Your\DiskImage.vhdx
MsixJunction
Leave “msixJunction” as-is. This is the temporary directory we will be junction all our packages to.
VhdFilename
Finally, “vhdFileName” is the relative path to the file from where you’re running the script from. It’s recommended to keep everything all in one directory, so for example if your disk image file is C:\AppAttach\7Zip.vhdx and you’re running the script in C:\AppAttach\, vhdFileName should be 7Zip.vhdx
Example
So a full config file would look like this:
[
  {
    "_comment1": "Example block for a 7Zip image",
    "vhdFileName": "7zip.vhdx",
    "parentFolder": "MSIX",
    "packageName": "7Zip-test_1.0.0.0_x64__ewnn2f7rh71cc",
    "volumeGuid": "dfff5b61-ff4d-11ed-8f6a-6045bdcf6bef",
    "msixJunction": "C:\\temp\\AppAttach"
  }
]
It helps to test the staging and registering scripts now. If there’s a problem with your config, it’s a lot easier to debug it when you can see the output from your script.
The scripts are invoked as follows:
.\AppattachStage.ps1 -configFile "C:\AppAttach\7Zip_Config.json"
The order you run the scripts is important, in order, they go: Stage, Register, Deregister, Destage.
The Staging and Destaging scripts will require administrator privileges to work. The Register and Deregister scripts must be run from the user account you want to provision the package to.
Troubleshooting
After staging the file, check the integrity of the junction created at C:\Temp\AppAttach. If this junction is corrupt, it means there’s a problem with your config file and your volumeGuid is probably incorrect.

If you run into a problem mounting the image, check your vhdFileName. Check if you can mount the image by double-clicking in file explorer. If you get an error saying ‘Permission Denied’, this means the disk is already mounted. Try running:
Dismount-DiskImage -ImagePath C:\Path\To\Your\DiskImage.vhdx
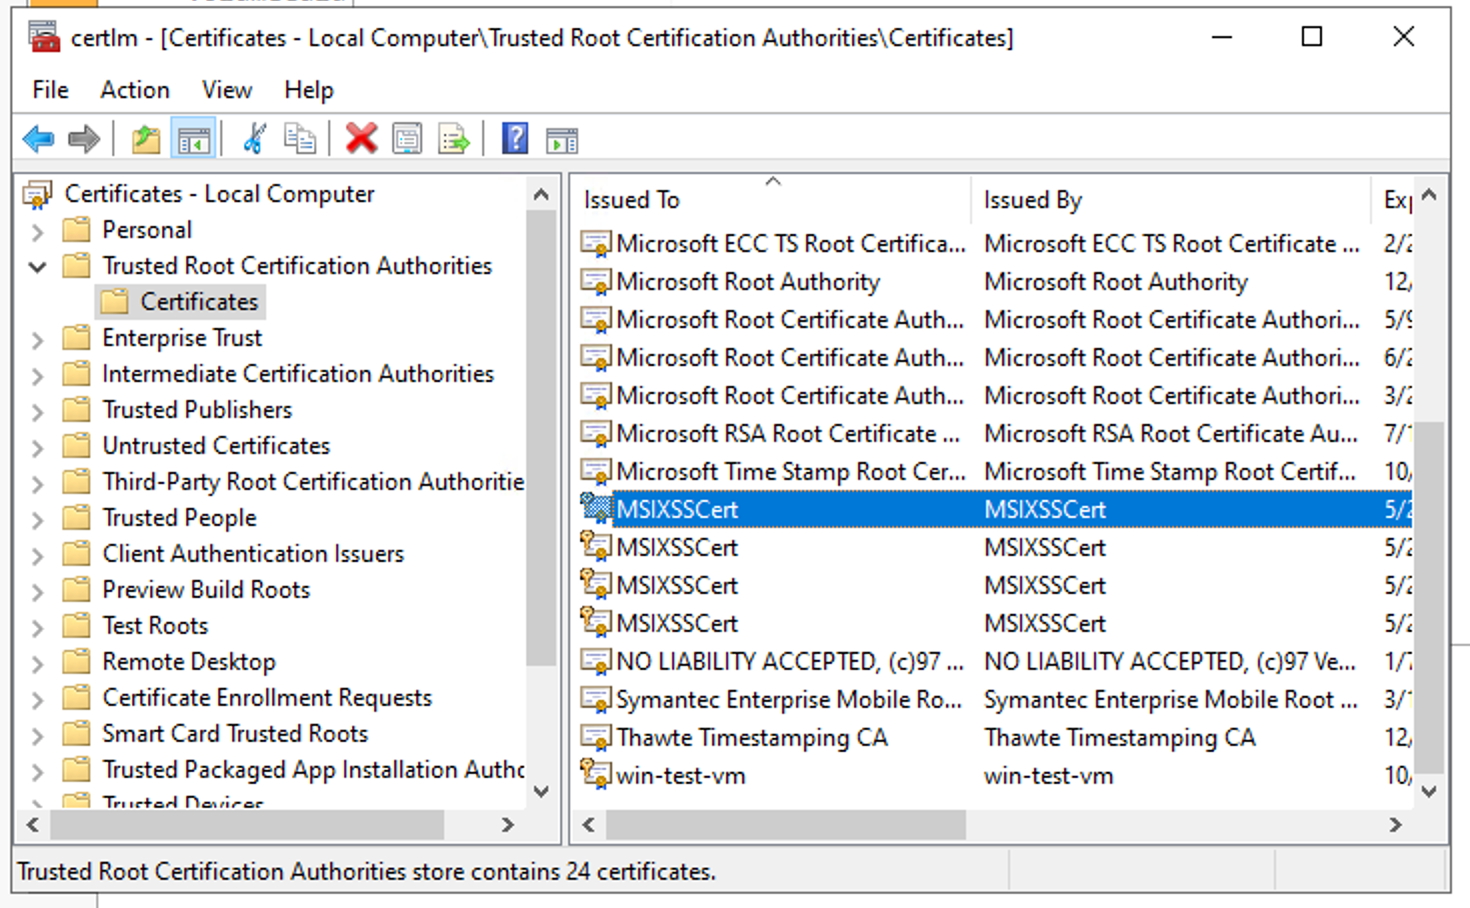
If you encounter a certificate problem when registering the package, this means the certificate is likely not installed properly. Refer to the step where we installed the certificate. Open the certificate manager and check you can see your certificate under Local Computer\Trusted Root Certification Authorities\Certificates
If that fails, consider re-exporting the .pfx file and trying again.
Scheduling the Scripts
Now that we have working scripts, we need to automate running them. This can be done in the task scheduler, or through the Win32 API. Both have pros and cons, so we’ll cover an example of both.
We’ll want the staging to be done at startup by a system account or someone with administrator privileges. There is a built-in trigger for performing a task on startup.
Destaging should be done at shutdown, again by a system account someone with administrator privileges. Unfortunately, there is no built-in trigger for performing a task on shutdown. We will have to listen for an event from the event log. Event ID 1074 with a source of User32 occurring in the System log signifies an imminent shutdown.
Registering should be performed by the user account we want to have access to the application. There is a built-in trigger for connecting to a remote session that we can use to register the package just before they log on.
Similarly, de-registering should be performed by the same user account. There is a corresponding built-in trigger for disconnecting from a remote session that we can use to de-register the package when they disconnect. It’s important to note that this will not deregister the application if the user selects ‘Sign out’ instead of ‘Disconnect’ from the start menu. However, seeing as signing out terminates any processes the user is running, we do not anticipate this being a problem.
Win32 API
The following example deploys two scheduled tasks to stage 7-Zip on startup and destage it on shutdown.
If you want to stage/destage multiple packages, simply create another action from the trigger’s action group and pass in a different config file.
# Any documentation needed for task scheduling can be found at or near here:
# https://learn.microsoft.com/en-gb/windows/win32/taskschd/taskservice

# Get the scheduler object and connect to it
$scheduler = New-Object -ComObject ("Schedule.Service")
$scheduler.Connect()

# Create a folder called 'AppAttach' to keep everything in, if it does not exist already.
$rootFolder = $scheduler.GetFolder("\")
$appAttachFolder = $rootFolder.GetFolders(0) | Where-Object { $_.Name -eq "AppAttach" }

if ($null -eq $appAttachFolder)
{
    $appAttachFolder = $rootFolder.CreateFolder("AppAttach")
}

# Create a task to stage 7-Zip on startup.
$startupTask = $scheduler.NewTask(0)
$startupTask.RegistrationInfo.Description = "Stages 7-Zip on Startup"
$startupTask.Settings.Enabled = $True
$startupTask.Settings.AllowDemandStart = $True
$startupTask.Settings.DisallowStartIfOnBatteries = $False
$startupTrigger = $startupTask.Triggers.Create(8) # Trigger type 8 is on boot
$startupTrigger.Enabled = $True
$startupTrigger.Id = "On Startup"
$startupAction = $startupTask.Actions.Create(0) # Action type 0 is an exec
$startupAction.Id = "Stage 7Zip MSIX Package"
$startupAction.Path = "powershell.exe"
$startupAction.Arguments = "-ExecutionPolicy Unrestricted -File C:\AppAttach\AppattachStage.ps1 -configFile C:\AppAttach\7Zip_Config.json"
$startupAction.WorkingDirectory = "C:\AppAttach\"

# What these numbers mean:
# https://learn.microsoft.com/en-gb/windows/win32/taskschd/taskfolder-registertaskdefinition
$appAttachFolder.RegisterTaskDefinition("Stage 7-Zip Package", $startupTask, 6, "System", $null, 5)

$shutdownTask = $scheduler.NewTask(0)
$shutdownTask.RegistrationInfo.Description = "Destages 7-Zip on Shutdown"
$shutdownTask.Settings.Enabled = $True
$shutdownTask.Settings.AllowDemandStart = $True
$shutdownTask.Settings.DisallowStartIfOnBatteries = $False
$shutdownTrigger = $shutdownTask.Triggers.Create(0) # Trigger type 0 is on event
$shutdownTrigger.Enabled = $True
$shutdownTrigger.Id = "On Shutdown"
$shutdownTrigger.Subscription = "<QueryList><Query Id='0' Path='System'><Select Path='System'>*[System[Provider[@Name='User32'] and EventID=1074]]</Select></Query></QueryList>"
$shutdownAction = $shutdownTask.Actions.Create(0) # Action type 0 is an exec
$shutdownAction.Id = "Destage 7Zip MSIX Package"
$shutdownAction.Path = "powershell.exe"
$shutdownAction.Arguments = "-ExecutionPolicy Unrestricted -File C:\AppAttach\AppattachDestage.ps1 -configFile C:\AppAttach\7Zip_Config.json"
$shutdownAction.WorkingDirectory = "C:\AppAttach\"

$appAttachFolder.RegisterTaskDefinition("Destage 7-Zip Package", $shutdownTask, 6, "System", $null, 5)
Task Scheduler
Here, we’ll go over adding the register and de-register steps for a specific user in the Task Scheduler.
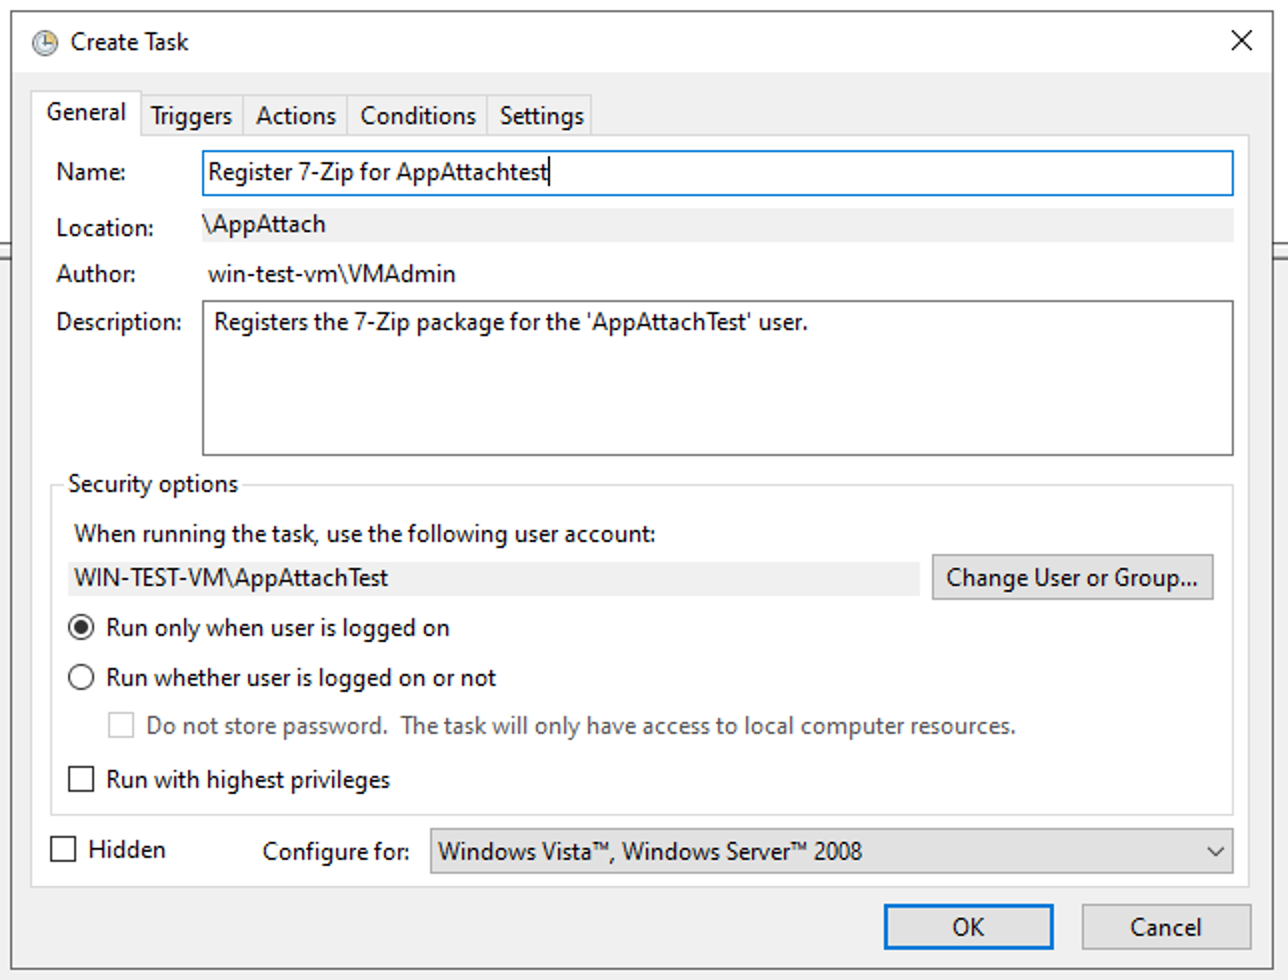
1) Create a New Task
Open Task Scheduler and click ‘Create Task’ in the right-hand panel.
Fill out a suitable name and description.
Make sure to specify the user account you’ll be registering the package for. If registering for an AD user, you may need to specify the domain they’re from. Here, we’re using a local user.
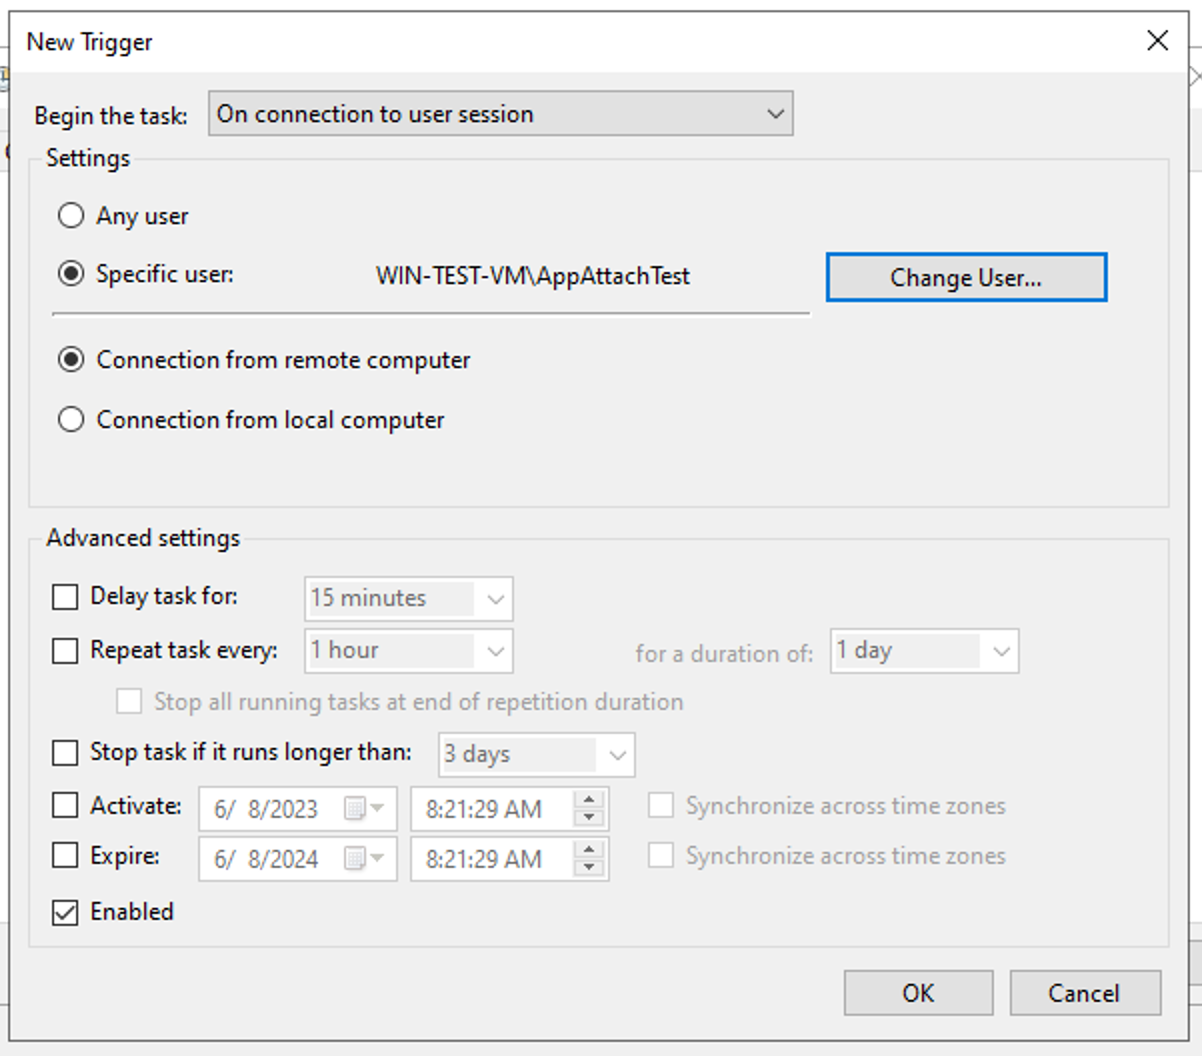
2) Specify a Trigger
Navigate to the ‘Triggers’ tab and click ‘New…’.
Select ‘On connection to user session’ from the drop down menu at the top.
Select ‘Specific user’ and specify the user account you’ll be registering the package for.
Click ‘OK’.
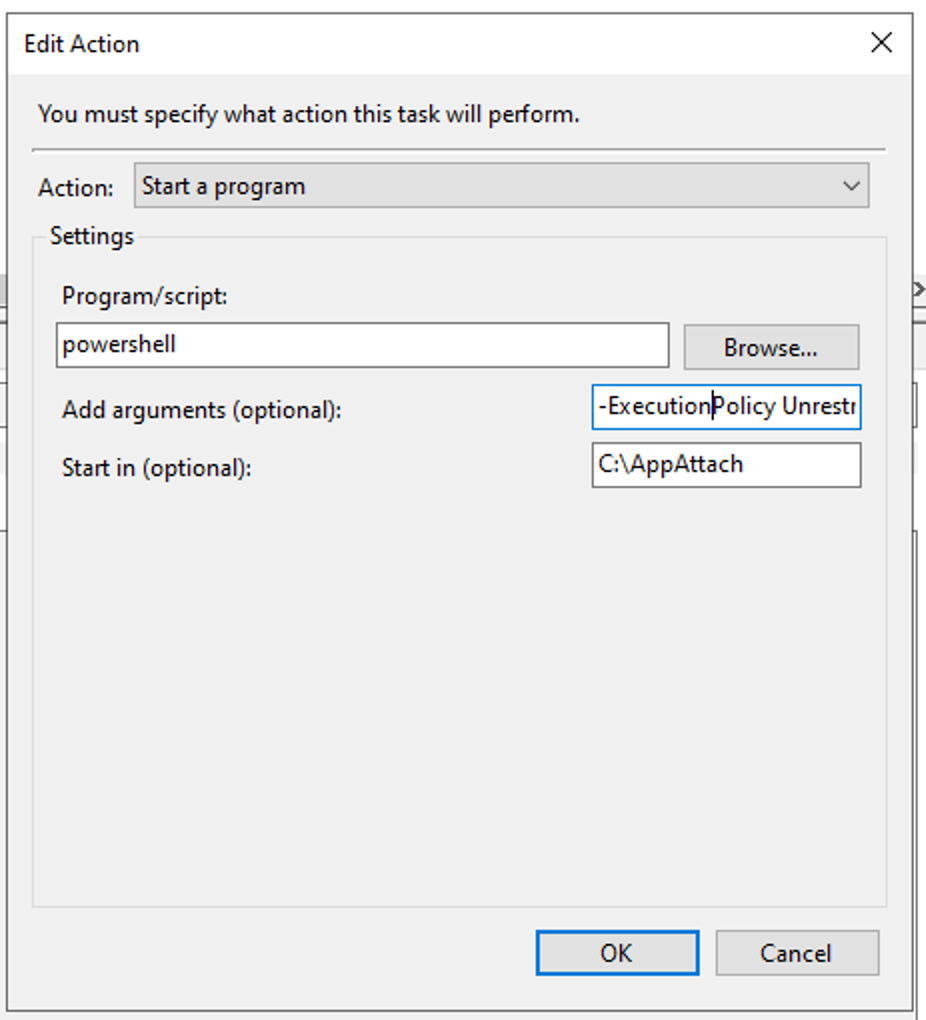
3) Specify an Action
Navigate to the ‘Actions’ tab and click ‘New…’.
Select ‘Start a program’ from the drop down menu at the top.
Type powershell in ‘Program/Script’
Type -ExecutionPolicy Unrestricted -File C:\AppAttach\AppattachRegister.ps1 -configFile C:\AppAttach\7Zip_Config.json in ‘Add Arguments’
Type C:\AppAttach in ‘Start in’
Click ‘OK’.
If you want to register more packages for the user, simply add more actions at this step and pass in a different config file.
When you’ve added all the actions you want, click ‘OK’.
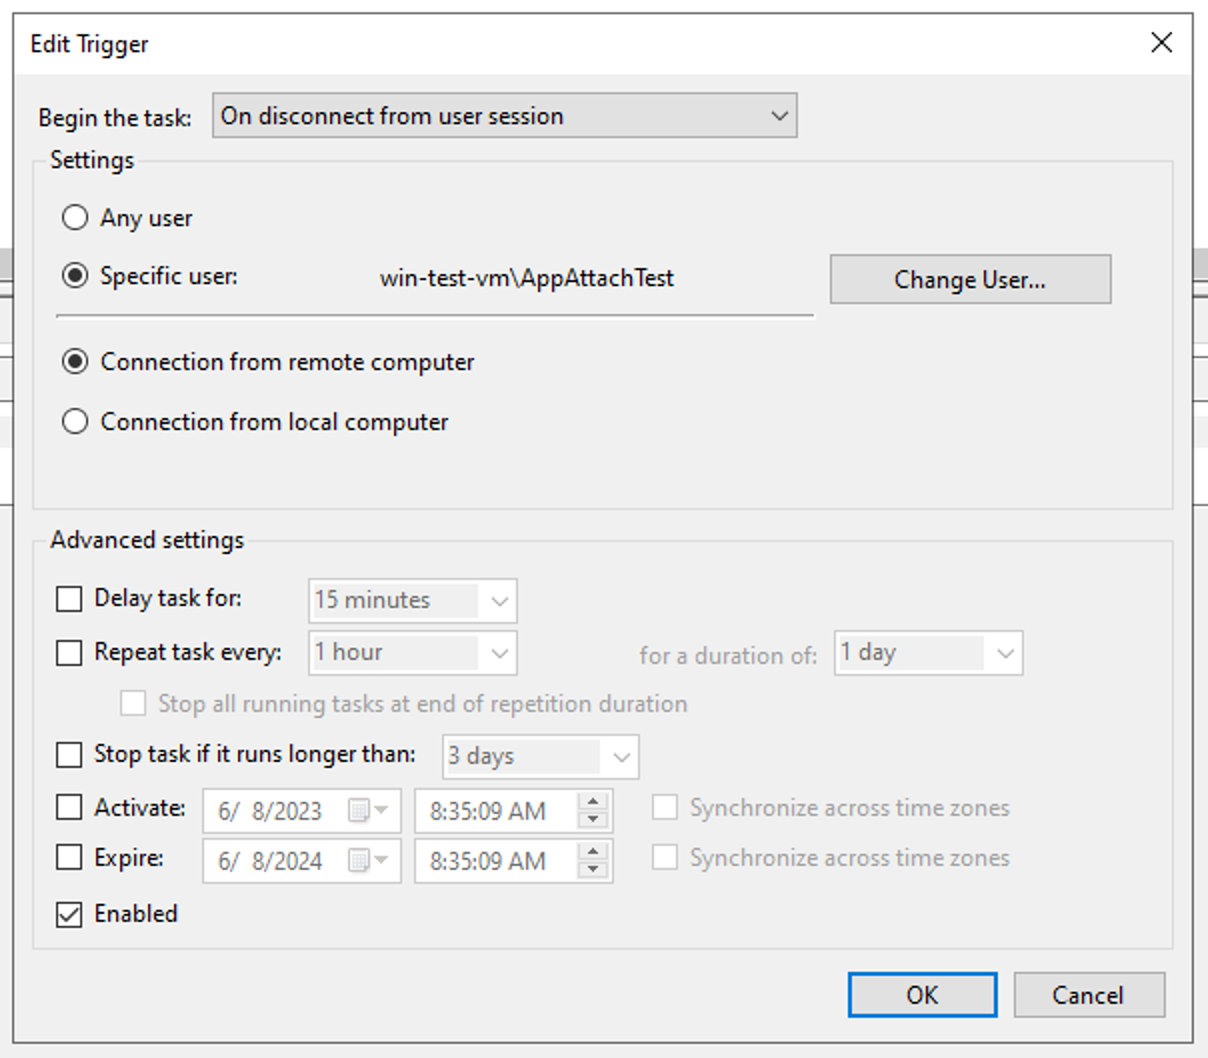
4) Create the Deregister Task
The deregister task will be largely identical to the register task, only you’ll want to set the trigger to ‘On disconnect from set session’ and specify the ‘AppattachDeregister’ script in the action arguments.
Verify
Run the stage task in the task scheduler manually. If all goes well, you should see ‘The last operation completed successfully. (0x0)’ under the ‘Last Run Result’ column.
Check the C:\Temp\AppAttach directory to see if your package junction is present. If it is, this means the staging was successful.
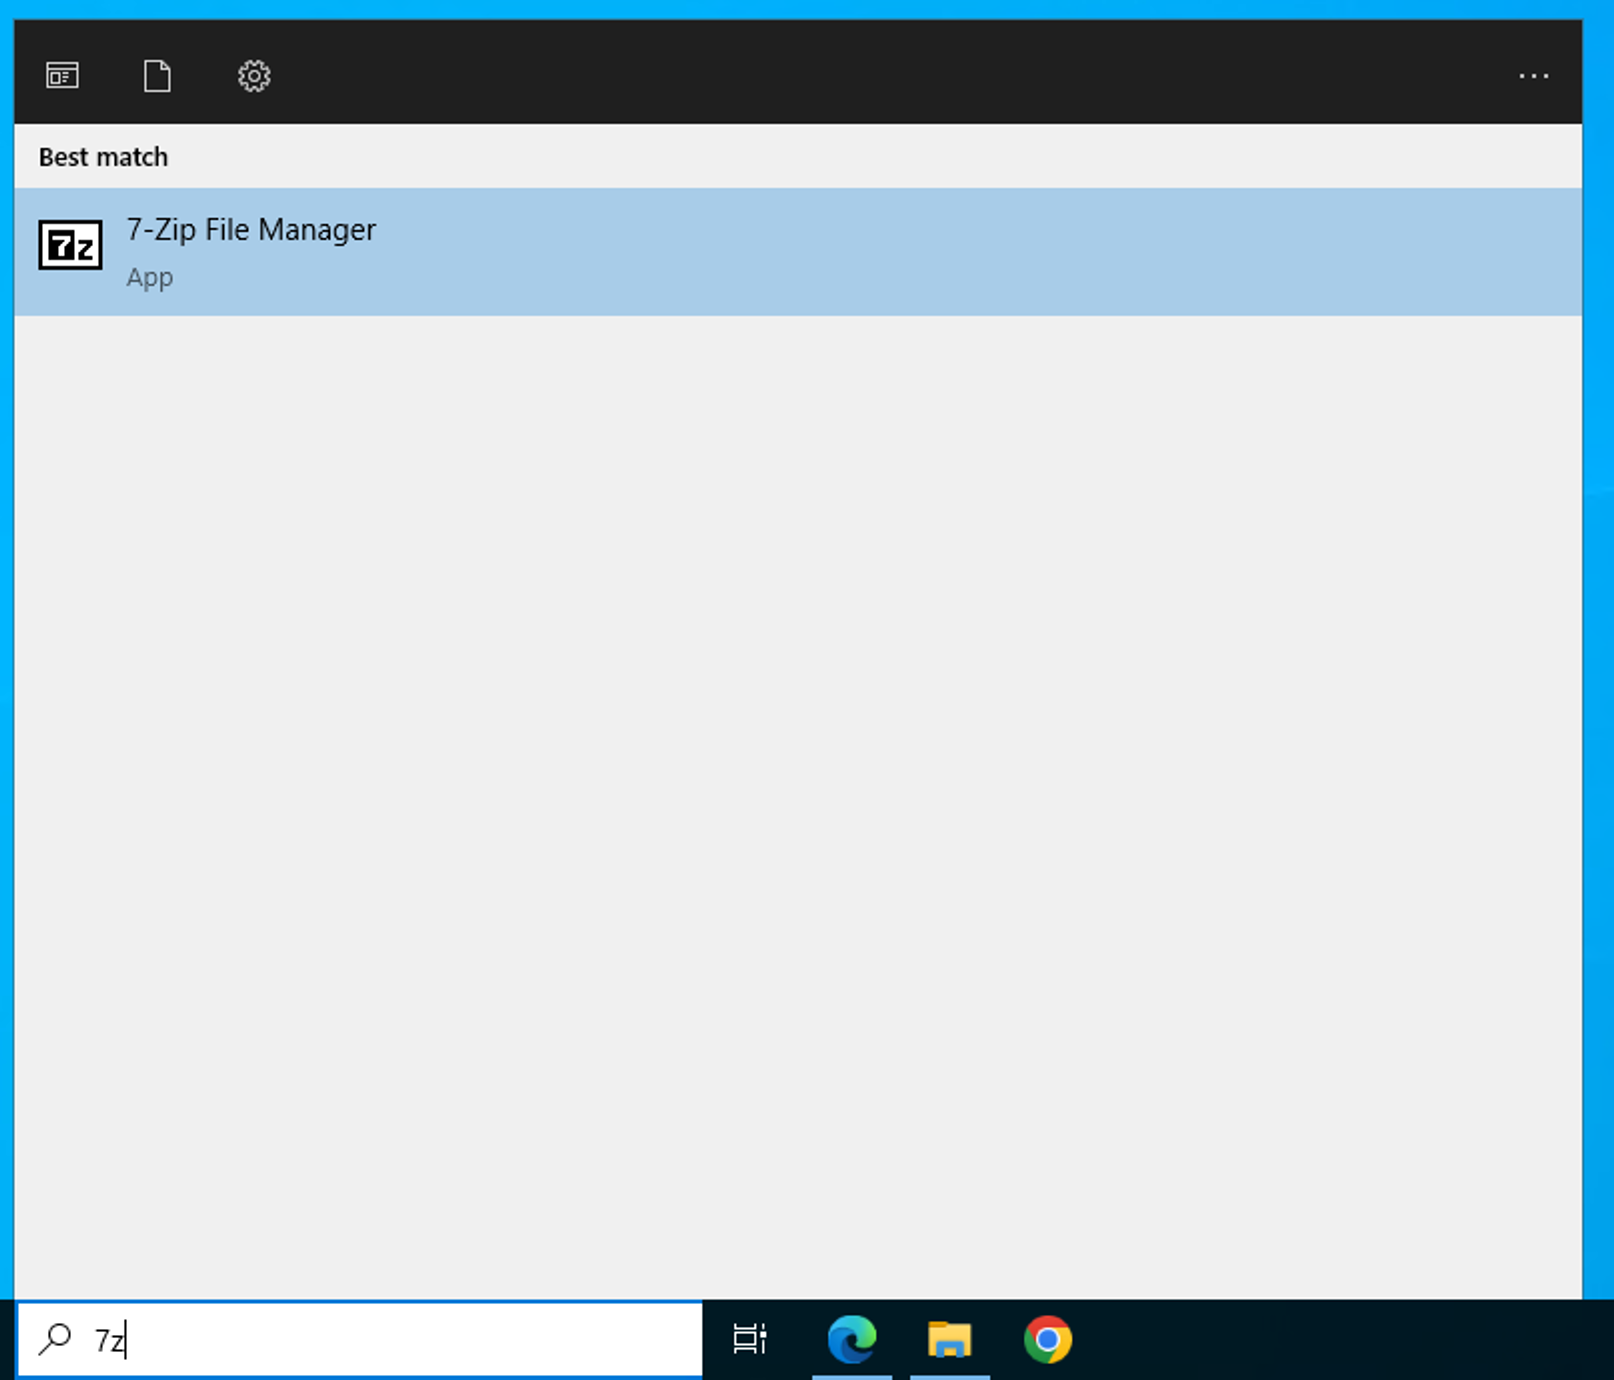
The user should now see 7-Zip in their start menu the next time they connect: