Nessus Agent Installation - Crime
Set up
We have developed a method of installing the XDR agent on the Crime VMs and will replicate this method for the Nessus agent installs to.
The pre-existing infrastructure has been deemed unusable and new infrastructure will be provisioned.
1) Tenable SC (Management UI) - The central management hub that provides the web interface.
2) Scanners - Network-based components that conduct remote vulnerability checks and report results to the Tenable SC.
3) Agents - installed directly on the endpoints that perform local scans.
We are utilising Ansible as the delivery method and have developed an Ansible Role link which performs the installation.
The pre-existing adhoc (automation.ansible) pipelines will be used to trigger the Ansible playbook (nessus-agent-deploy.yml) in the main Crime Jenkins instance and will provide limited scope via Ansible’s limit functionality.
These are also limited in scope with an adhoc pipeline for each environment and a stack selection parameter. This enables us to follow a rollout plan through environments and safely stage our delivery with segmentation, the setup will follow the bootstrap script in the terraform-module-vm-bootstrap repo.
Folder set up in Automation Ansible
We have the playbook called nessus-agent-deploy.yml, which is located within the sp-ansible folder on the branch dev/tenable-nessus-install-dtspo-25466. This is the playbook that will be called from the pipeline and specifies the role used to run tasks on the target host.
Under the sp-ansible/roles/nessus-agent-deploy folder we have a further four folders;
1) sp-ansible/roles/nessus-agent-deploy/defaults - provides all the parameters the playbook needs to run similar to a Vars file in Terraform ie the installation URL, install directory location etc.
2) sp-ansible/roles/nessus-agent-deploy/handlers - only runs when notified by other tasks, in this case after the agent is newly linked to the scanner to restart the agent.
3) sp-ansible/roles/nessus-agent-deploy/meta - declares the minimum Ansible version required to run the playbook and the dependencies for the role, similar to init file in Terraform.
4) sp-ansible/roles/nessus-agent-deploy/tasks/main.yml - tasks are to be run by the role ie install and clean up the installer.
4a) sp-ansible/roles/nessus-agent-deploy/tasks/cleanup-nessus.yml - cleanup of the installer after the agent has been installed.
4b) sp-ansible/roles/nessus-agent-deploy/tasks/install-nessus.yml - install the Nessus agent and link to the scanner.
The installation of the agent package is declared in the defaults/main.yml file, which is the default location for Ansible to look for variables. The installation URL will point to a different version of the agent for RHEL or Ubuntu within Artifactory, in the MDV (nlv) or MPD (nl) and Jenkins will then be able to access the installer during the pipeline run.
The recommended method is to use the ANSIBLE_EXTRA_VARS parameter, as it’s easier to provide via the pipeline parameter compared to updating the automation.ansible group/host Vars.

The above parameter example is for non-live (nlv) and there will also be live (lv), to select which scanner (nlv or lv) to connect the VM agent to, based on the environment tags on the Crime VMs. Further information about the set up for CNP is on the following link, the new Crime set is to mirror the CNP set up.
Non-live

Live

Using the Pipelines
Pick the pipeline for the applicable environment via parameters.
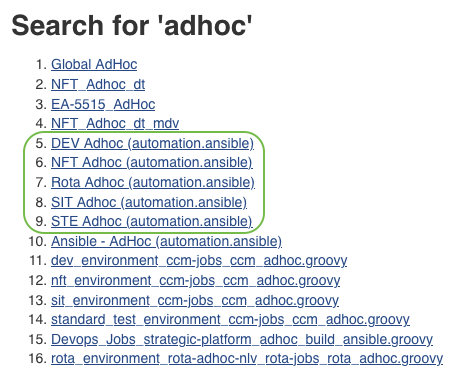
The pipelines in Jenkins for deployment are the current pre-existing adhoc pipelines and there is an adhoc pipeline per Crime environment. These can be found by searching adhoc in Jenkins either in live or non-live Jenkins.
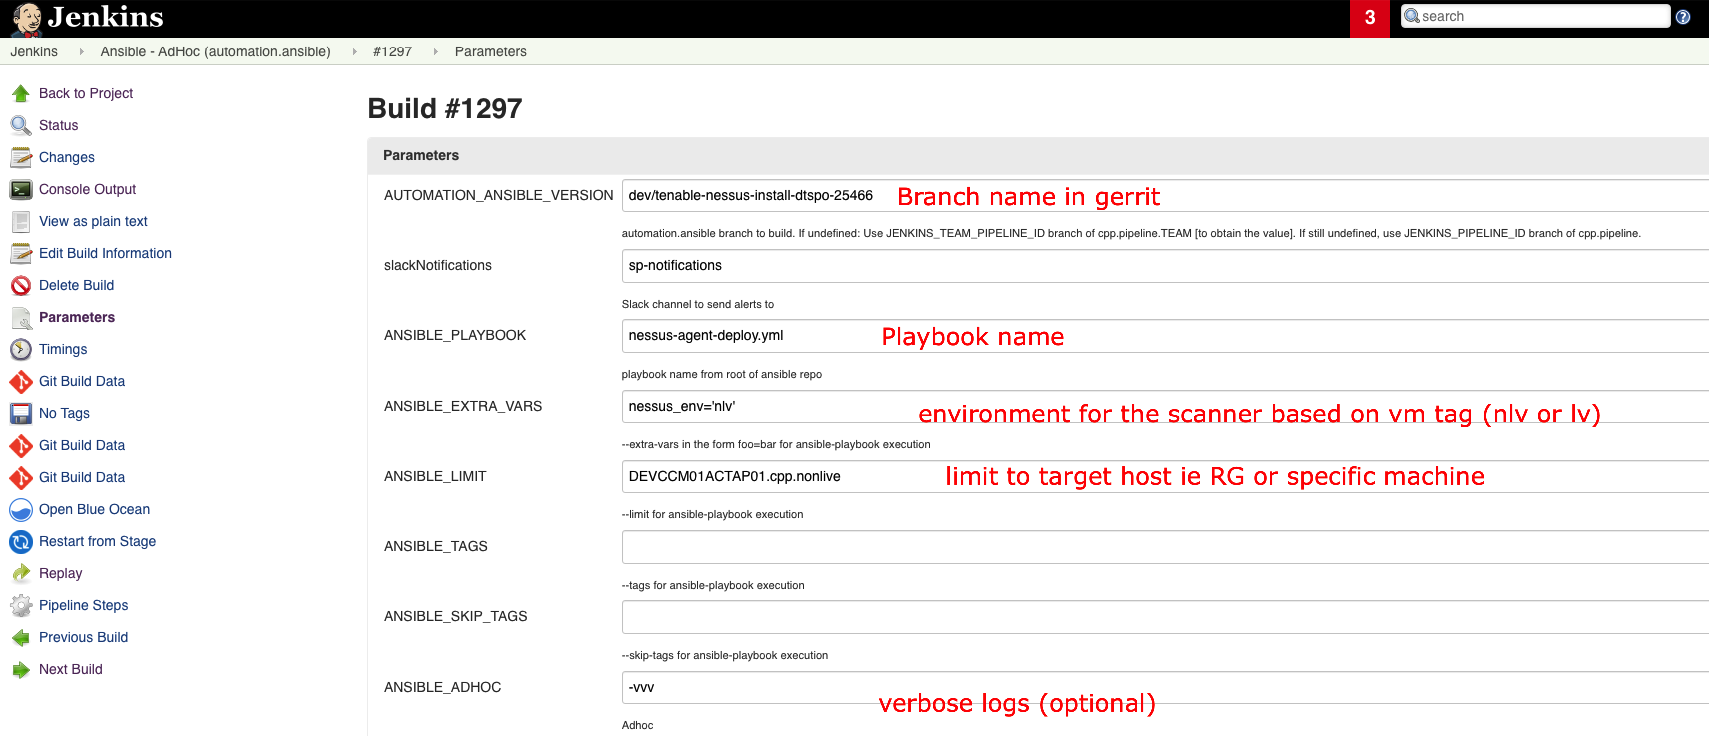
AUTOMATION_ANSIBLE_VERSION
A branch called dev/tenable-nessus-install-dtspo-25466 in the automation.ansible gerrit repo has been created to deploy the nessus-agent-deploy.yml playbook link(https://codereview.mdv.cpp.nonlive/admin/repos/automation.ansible,branches/q/filter:dev%252Ftenable-nessus-install-dtspo-25466) and should not be merged into master.
JENKINS_ANSIBLE_ENVIRONMENT
This is named strangely. This sets the stack to target. All stacks for the environment will be available in the dropdown.
This option must be chosen.
ANSIBLE_PLAYBOOK
Set this to nessus-agent-deploy.yml to run the playbook.
ANSIBLE_EXTRA_VARS
Set this to nessus_env=‘nlv’ for non-live or nessus_env=‘lv’ for live. This will set the Nessus scanner to connect to based on the tags on the VM.
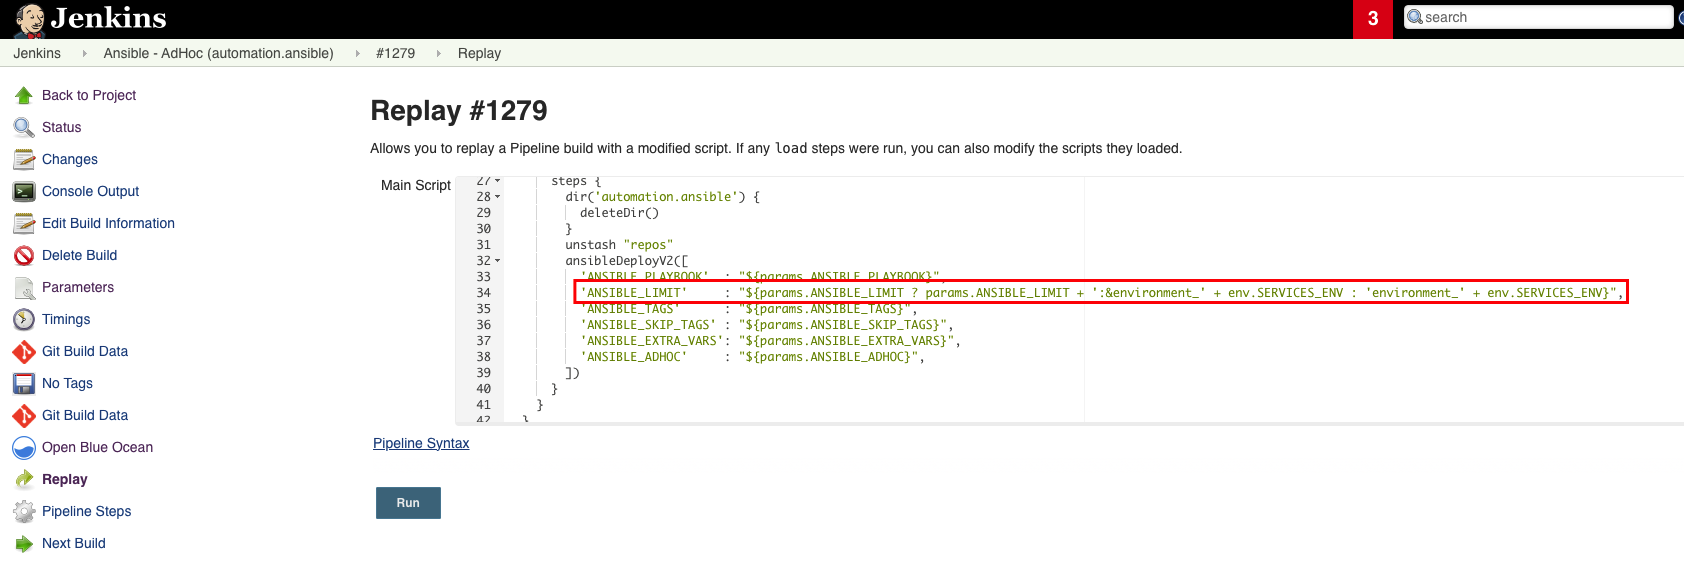
'ANSIBLE_LIMIT' : "${params.ANSIBLE_LIMIT ? params.ANSIBLE_LIMIT + ':&stack_'+ params.JENKINS_ANSIBLE_ENVIRONMENT : 'stack_' + params.JENKINS_ANSIBLE_ENVIRONMENT}"
The ANSIBLE_LIMIT provided in the box is combined with the stack that is chosen for JENKINS_ANSIBLE_ENVIRONMENT to form the true limit string that is fed to the ansible-playbook command.
An example of this where a single host is given as the limit:
DEVROT01AAPSV01.cpp.nonlive:&stack_devrot01:stack_devrot01
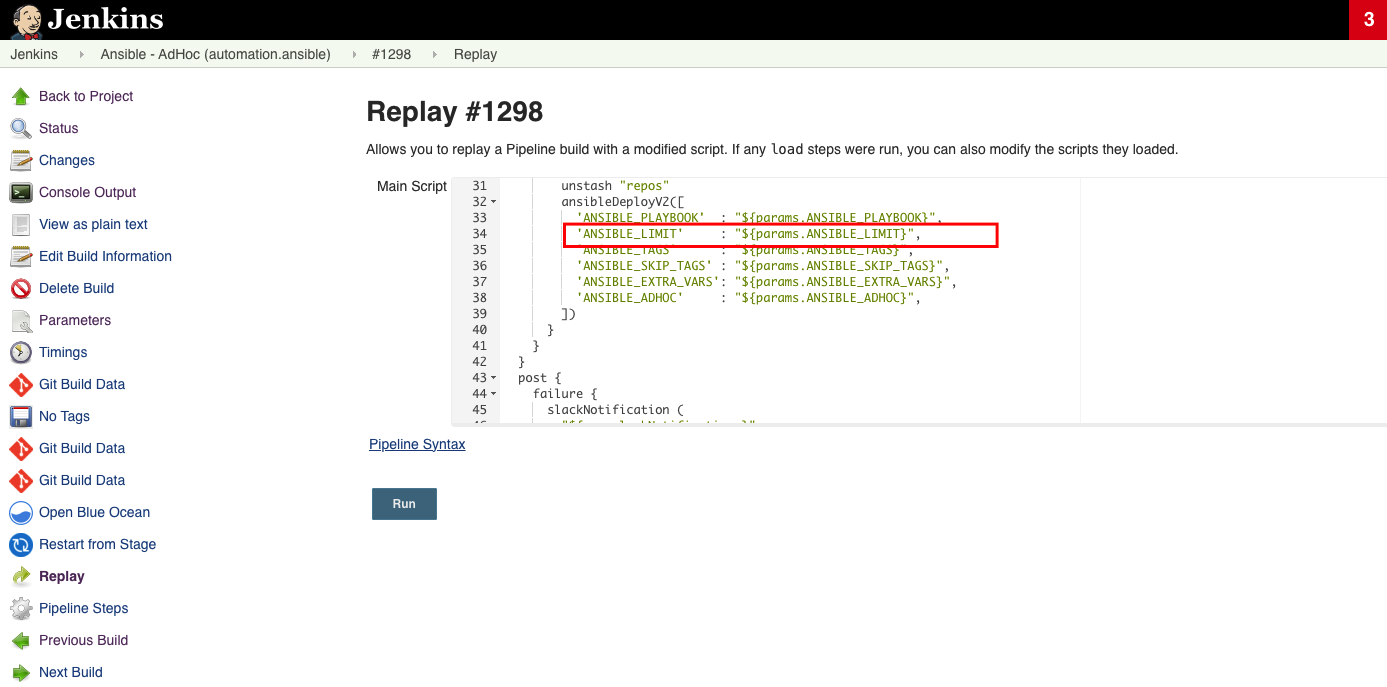
A pipeline may fail when the additional parameter are appended during the run and you may need to re-run the pipeline removing the additional parameters and be left with just the ‘ANSIBLE_LIMIT’ : “${params.ANSIBLE_LIMIT}” as per the example below.
The ANSIBLE_LIMIT provided in the box is combined with the stack that is chosen for JENKINS_ANSIBLE_ENVIRONMENT to form the true limit string that is fed to the ansible-playbook command.
An example of this where a single host is given as the limit:
DEVROT01AAPSV01.cpp.nonlive:&stack_devrot01:stack_devrot01
The reason for the stack being repeated twice is unclear, however there is probably an underlying reason. The duplication does not alter the end result of the limit.
The end result of the limit is the intersection of VMs given to ANSIBLE_LIMIT parameter and the stack that is chosen. So VMs that are targeted are those that are in both of the groups for example.
This underlying formulation of the true limit restricts the scope of VMs which can be targeted. This makes it much safer to run given the ANSIBLE_LIMIT parameter can be left empty or given the * character which acts as a wildcard for all. Without this the scope it would be possible to target all VMs in the Strategic subscription (Strategic non-live for .non-live Jenkins, Strategic live for .live Jenkins).
All Other Parameters
All other parameters should be left blank.
Azure Inventory Script & Determining ANSIBLE_LIMIT Param
Ansible in automation.ansible repo utilises a inventory script which dynamically queries Azure and fetches existing VMs including the vm tags to register the correct scanner and target the correct VMs.
It does this on a subscription level and groups the VMs in the following way:
- azure
- location
- resource_group
- security_group
- tag key_value
tag key_value groups by Azure tags. Each Azure tag key & value form its own group in the syntax:
key_value
e.g:
[environment_dev]
Host1
Host2
Host3
```--------
Information on Ansible limiting is available in the [official documentation](https://docs.ansible.com/archive/ansible/2.3/intro_patterns.html).
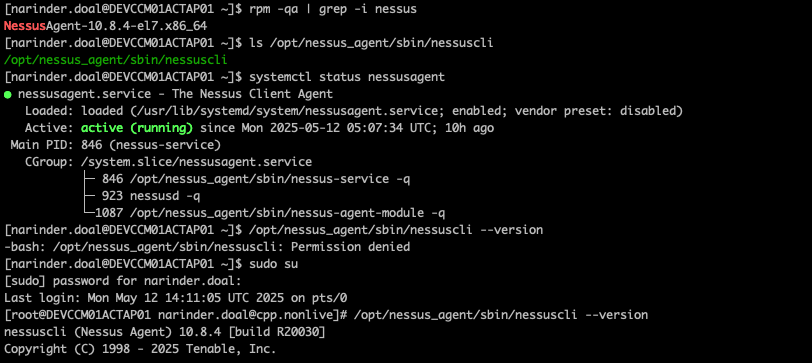
### Verify Nessus Installation
Verify installation of the Nessus agent by ssh on to the vm using the fqdn.
```bash
Verification on the VM itself.
```bash
rpm -qa | grep -i nessus
Ensure the nessus agent is running on the VM
systemctl status nessusagent
To check the Nessus agent version running on the VM
/opt/nessus_agent/sbin/nessuscli --version
Checks whether the CLI tool (nessuscli) for managing the agent exists
ls /opt/nessus_agent/sbin/nessuscli
Uninstall
If an uninstall is required for the Nessus agent then follow the below command after logging on to the VM in question.
Stop agent
systemctl stop nessusagent.service
Check system agent status
systemctl status nessusagent.service
Disable agent
systemctl disable nessusagent.service
Verify agent is installed
rpm -qa | grep -i nessus
If installed, run the rpm erase command
rpm -e NessusAgent
Check Nessus Agent has been removed
systemctl status nessusagent.service
Remove folders
sudo rm -rf /opt/nessus_agent
Add any further troubleshooting info here as needed:.