Atlassian Staging Build
This document covers the process that was undertaken to build out the new staging environment for the Atlassian apps (Jira, Confluence and Crowd).
For more general documentation on the new Atlassian setups, see Atlassian Infrastructure
How was staging built?
Staging was built to be a clone of production, including data, the previous “PRP” environment was found to be unreliable for testing and required more accurate data.
The atlassian production environment is deployed on the MOJ DCD Atlassian LVE subscription and the staging environment is deployed on the MOJ DCD Atlassian NLE subscription. so make sure you have access to these subscriptions as contributor.
Restores of the production servers were used to deploy the VMs on staging.
In order to restore VMs from the Backup and give them new names, the following script was used:
az account set --subscription 79898897-729c-41a0-a5ca-53c764839d95

TargetSubnetName=<TargetSubnetName> # eg "atlassian-int-subnet-dat"
TargetVmName=<TargetVmName> # eg "atlassian-nonprod-gluster-03"
ItemName=<ItemName> # eg"PRDATL01DGST03.cp.cjs.hmcts.net"

VaultName="BK-PRD-ATL-INT-01"
SourceResourceGroup="RG-PRD-ATL-INT-01"
SourceSubscription="79898897-729c-41a0-a5ca-53c764839d95"
TargetResouceGroup="atlassian-nonprod-rg"
TargetSubscription="b7d2bd5f-b744-4acc-9c73-e068cec2e8d8"
StorageAccountName="atlassiannonprod"
TargetVNetName="atlassian-int-nonprod-vnet"

# az backup container list --resource-group $SourceResourceGroup --vault-name $VaultName --backup-management-type AzureIaasVM --query '[].{Name:name, ItemName:properties.friendlyName}' -o table

ContainerName=$(az backup container list --resource-group $SourceResourceGroup --vault-name $VaultName --backup-management-type AzureIaasVM --query "[?properties.friendlyName=='$ItemName'].{Name:name}" -o tsv | head -n 1)

# az backup recoverypoint list --vault-name $VaultName --resource-group $SourceResourceGroup --container-name $ContainerName --item-name $ItemName --query '[].{Name:properties.recoveryPointTime, ID:name}' -o table

RecoverypointName=$(az backup recoverypoint list --vault-name $VaultName --resource-group $SourceResourceGroup --container-name $ContainerName --item-name $ItemName --query '[0].name' -o tsv | head -n 1)

echo $RecoverypointName

az backup restore restore-disks \
    --resource-group $SourceResourceGroup \
    --vault-name $VaultName \
    --item-name $ItemName \
    --rp-name $RecoverypointName \
    --storage-account $StorageAccountName \
    --restore-to-staging-storage-account true \
    --target-resource-group $TargetResouceGroup \
    --target-subscription-id $TargetSubscription \
    --target-vm-name $TargetVmName \
    --target-vnet-name $TargetVNetName \
    --target-subnet-name $TargetSubnetName \
    --target-vnet-resource-group $TargetResouceGroup \
    --container-name $ContainerName \
    --subscription $SourceSubscription \
    --storage-account-resource-group $TargetResouceGroup
Above script will trigger the restore of the VM from the backup and will create a new VM in the staging environment. You can able to see progress of the restore in the backup vault.
Please note that each backup is separate job so its fine to run restore for multiple VMs at the same time.
Set new public key for access
Once the VMs are restored, you need to set the public key for the access. You can use the following script to set the public key for the VMs:
TargetVmName=<TargetVmName> # eg "atlassian-nonprod-gluster-03"

az account set --subscription b7d2bd5f-b744-4acc-9c73-e068cec2e8d8
TargetSubscription="b7d2bd5f-b744-4acc-9c73-e068cec2e8d8"
KeyvaultName="atlasssian-nonprod-kv"
SecretName="public-key"
TargetResouceGroup="atlassian-nonprod-rg"

PublicKey=$(az keyvault secret show \
  --vault-name $KeyvaultName \
  --name $SecretName \
  --subscription $TargetSubscription \
  --query value -o tsv)

username="atlassian-admin"

az vm user update \
  --resource-group $TargetResouceGroup \
  --name $TargetVmName \
  --username $username \
  --ssh-key-value $PublicKey \
  --subscription $TargetSubscription
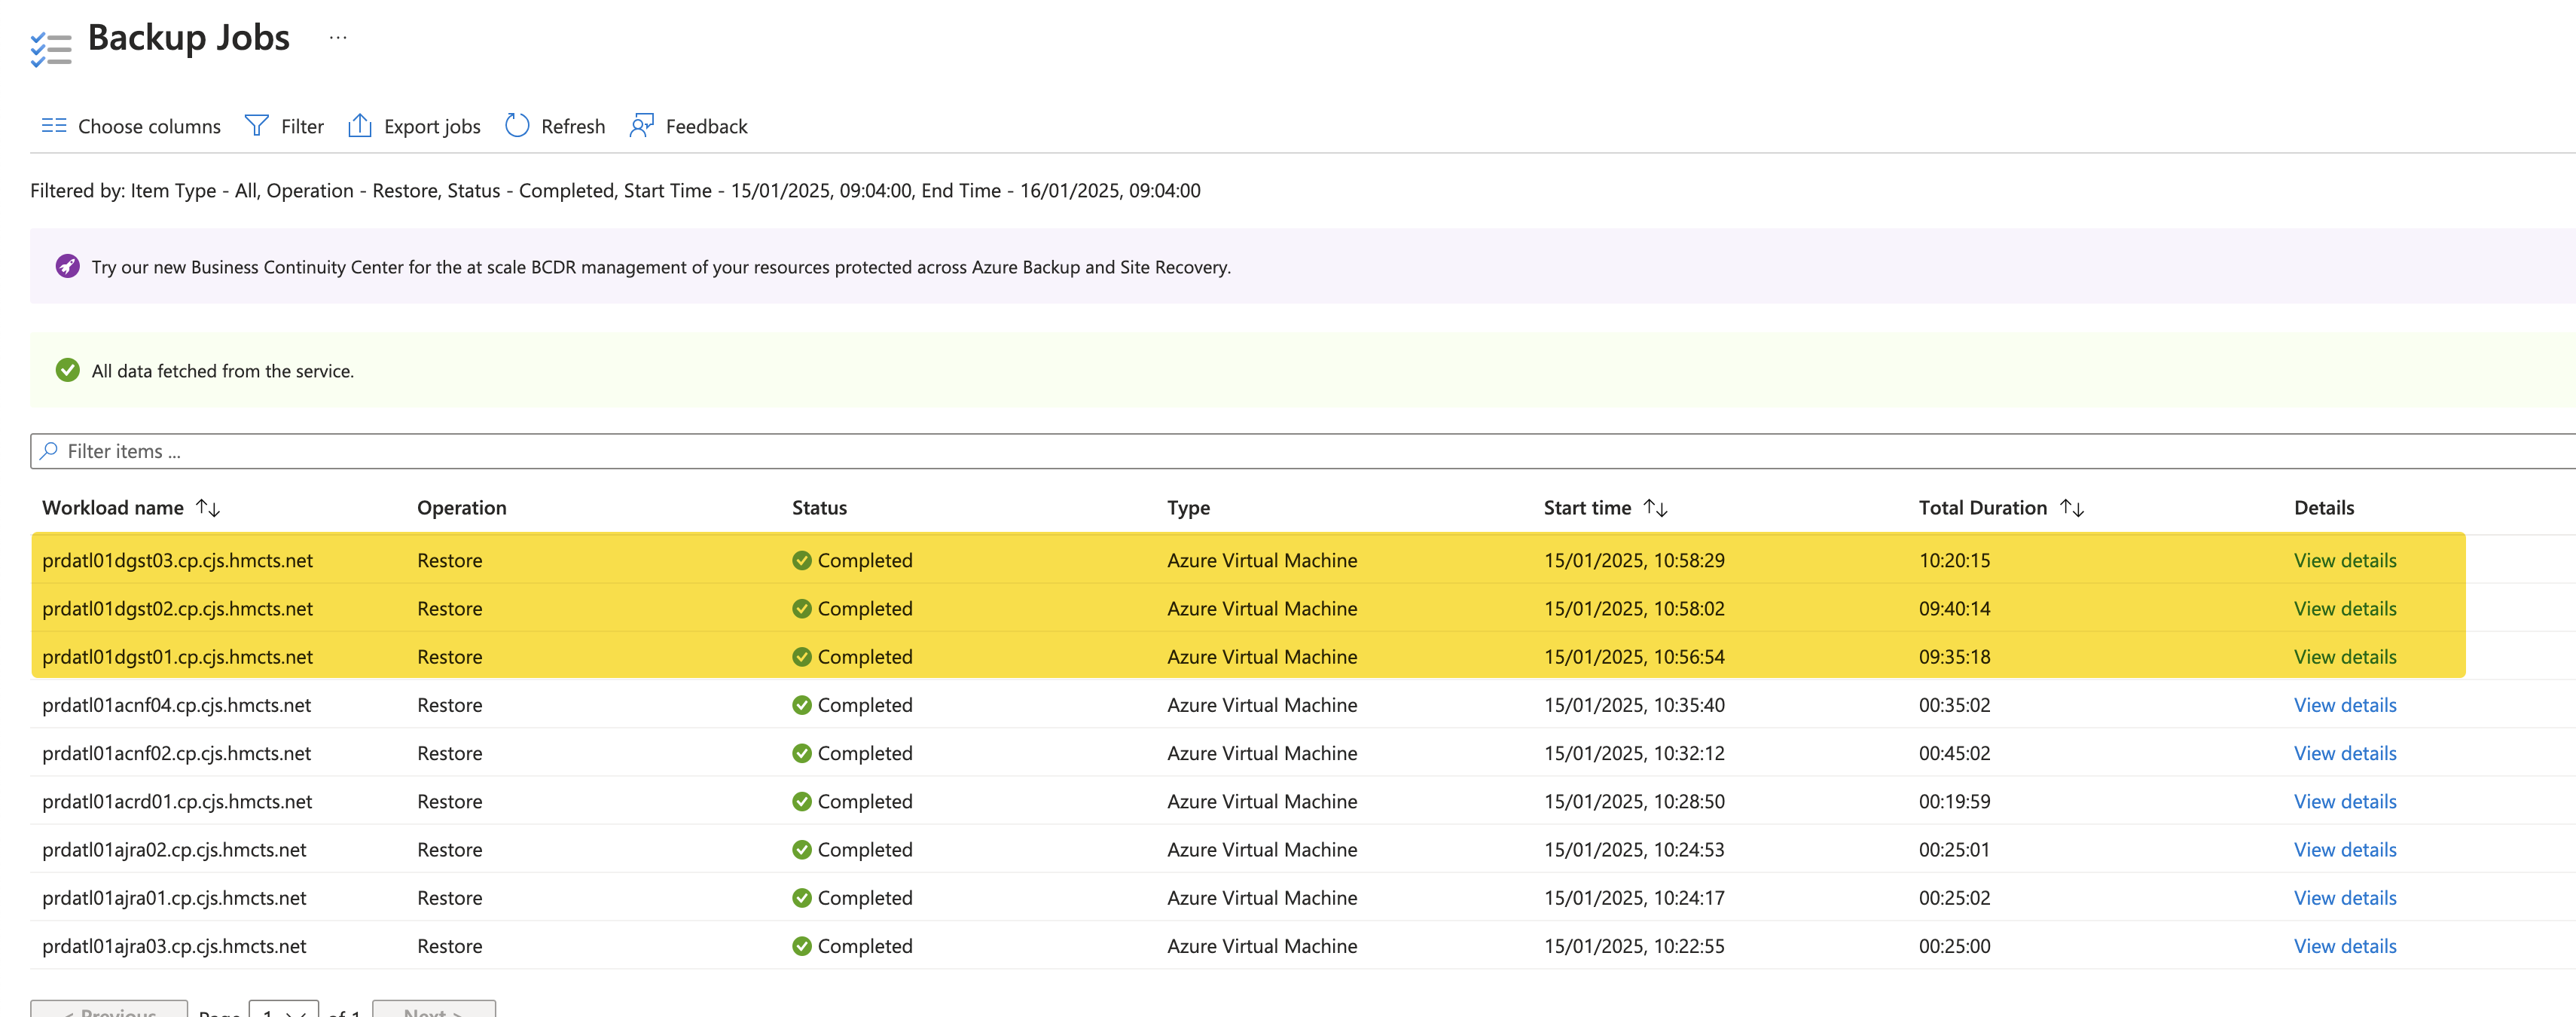
This is the time it has taken to restore the VMs last time when we did it:
Restore the databases
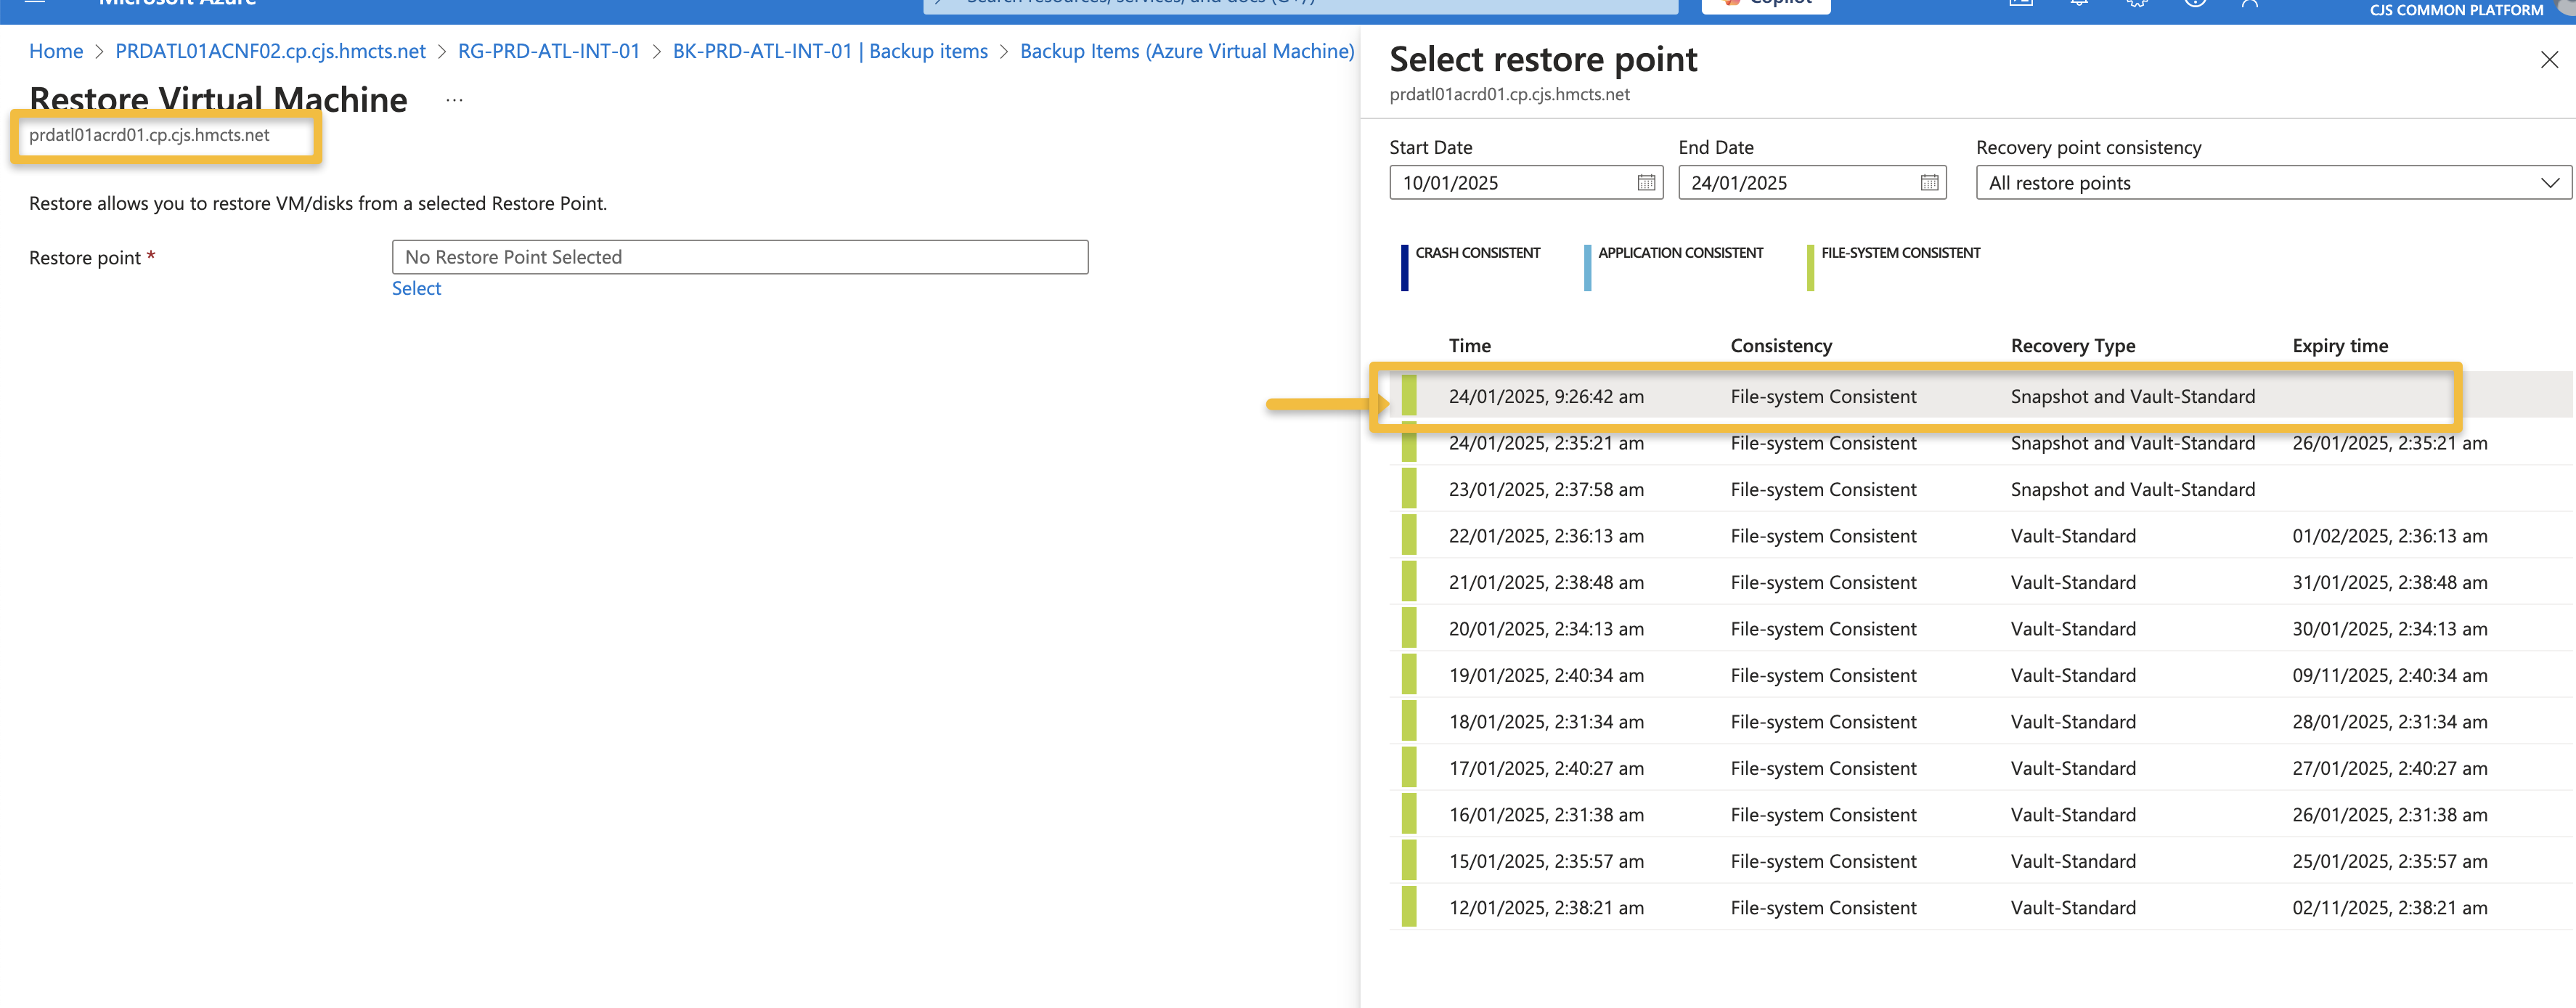
We then have to restore the databases from the production to the staging environment. We have used the backup and restore from vault feature within Azure
Backup Vault containing backups from prod
Restored the latest backup via the portal to target server atlassian-nonprod-server
Jobs can be viewed here
Crowd took 2min Confluence took 1hr30min Jira took 2hr5min
Import VM to the terraform
Once the VMs are restored and you have access to the VMs, you can import the VMs to the terraform. You can use the following PR to see what changes you may have to do to import the VMs to the terraform.
Terraform already has the automation script which would make config changes on the VMs. Please note that the script is only triggered when there is any change on the script so please make sure to make any change on the script to trigger the script.
Post Deployment Steps
1. Post merging PR above and having the automation script run, add the recovery admin password on crowd and make your account Admin account
2. Added password here - vi /opt/crowd/apache-tomcat/bin/setenv.sh –> append -Datlassian.recovery.password=<any password>
3. Login to crowd using recovery_admin username and above password and add yourself Administrator groups.
Your account then should sync with Jira and Confluence and you can then able to make any Administrative changes.
4. Change the Base URLs on all the apps to staging.tools.hmcts.net
5. Update affected macros to use the new base URL following step 4.
You can run the required query via Azure Data Studio by connecting to the F5 VPN and using the credentials stored in the atlassian-nonprod-kv keyvault
Username: NONPROD-POSTGRES-FLEX-SERVER-USER Password: NONPROD-POSTGRES-FLEX-SERVER-PASS
Ensure the correct database is selected before running the the query - ‘confluence-db-nonprod’
UPDATE BODYCONTENT
SET body = replace(body,'<ac:parameter ac:name="url">https://tools.hmcts.net','<ac:parameter ac:name="url">https://staging.tools.hmcts.net')
WHERE body LIKE '%<ac:parameter ac:name="url">https://tools.hmcts.net%';
This query will take a few minutes to complete.
This solution was determined from Atlassian support via Jira Gadgets fail to load in Confluence with a “Error rendering macro ‘gadget’” error
6. Change colours of the environment to differentiate between Live and Staging
Creating Manual Backups
When we are cutting over to the new production environment, we need to take manual backups of the VMs. We have used the following script to take the manual backups:
VaultName="BK-PRD-ATL-INT-01"
ResourceGroup="RG-PRD-ATL-INT-01"
Subscription="79898897-729c-41a0-a5ca-53c764839d95"

RetainUntil=$(date -v+3d '+%d-%m-%Y')

az account set --subscription $Subscription

# List of VM names
VMNames=(
  "PRDATL01ACNF02.cp.cjs.hmcts.net"
  "PRDATL01ACNF04.cp.cjs.hmcts.net"
  "PRDATL01ACRD01.cp.cjs.hmcts.net"
  "PRDATL01AJRA01.cp.cjs.hmcts.net"
  "PRDATL01AJRA02.cp.cjs.hmcts.net"
  "PRDATL01AJRA03.cp.cjs.hmcts.net"
  "PRDATL01DGST01.cp.cjs.hmcts.net"
  "PRDATL01DGST02.cp.cjs.hmcts.net"
  "PRDATL01DGST03.cp.cjs.hmcts.net"
)

# Loop through each VM name and execute the backup command
for VMName in "${VMNames[@]}"; do
  ContainerName=$(az backup container list --resource-group $ResourceGroup --vault-name $VaultName --backup-management-type AzureIaasVM --query "[?properties.friendlyName=='$VMName'].{Name:name}" -o tsv)
  az backup protection backup-now --container-name $ContainerName --item-name $VMName --resource-group $ResourceGroup --retain-until $RetainUntil --vault-name $VaultName --backup-management-type AzureIaasVM
done
Above script will take the backup of the VMs and will retain them for 3 days.
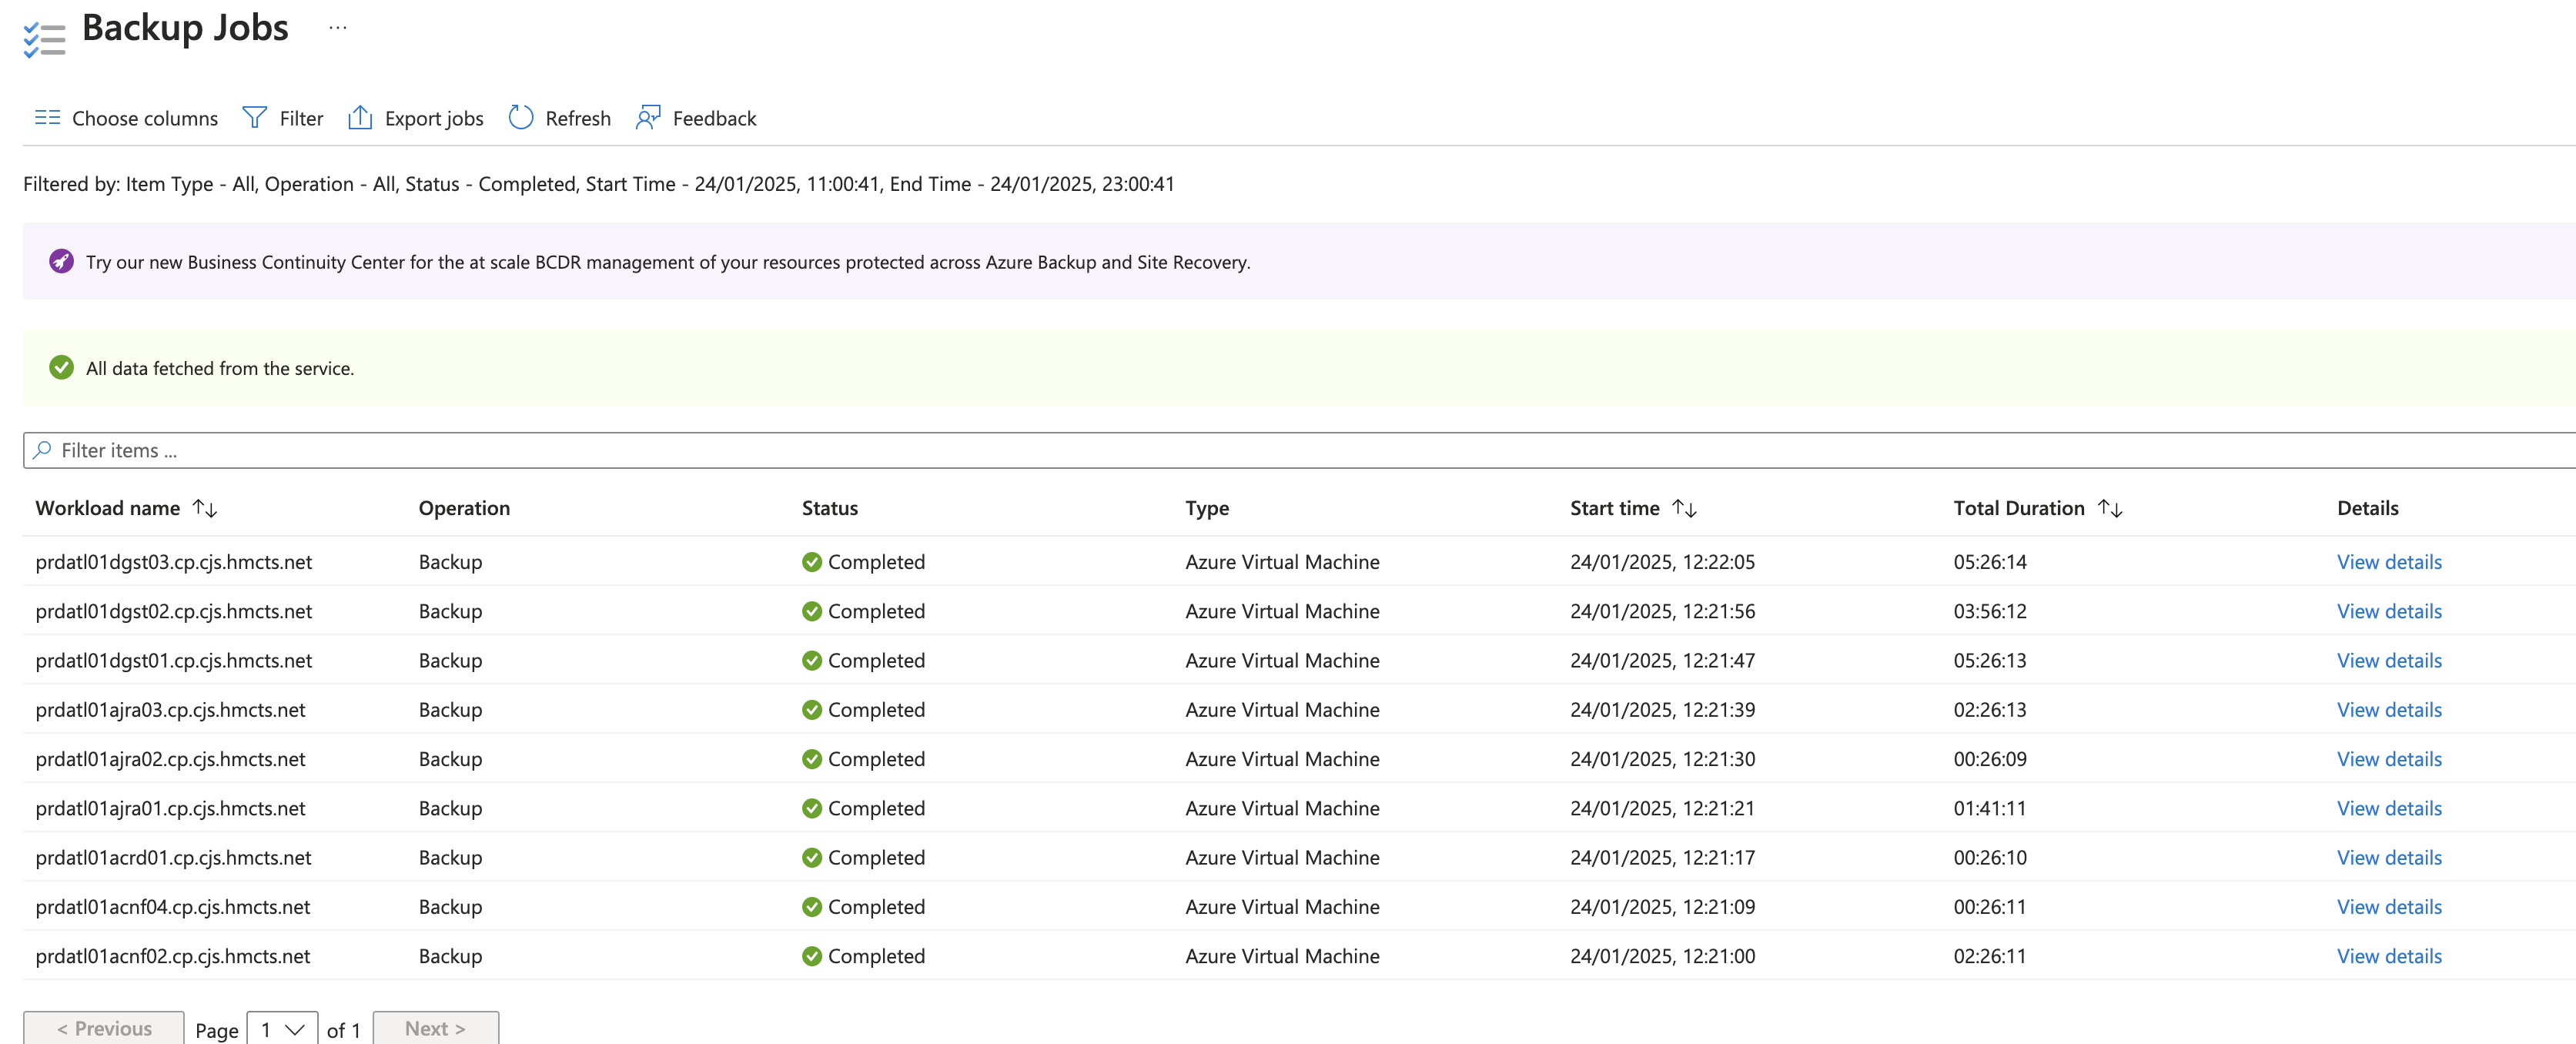
Below is the time it has taken to take the backups last time when we did it:
Once the VMs are backed up, we are then able to use the latest backup to restore the VMs to the new production environment.