Updating Palo Alto SNMP settings
Pre-Requisites
- Connected to the VPN
Checking the config in Panorama
Connect to Panorama.
Select the stack you want to work on i.e., nonprod or prod, by clicking on the dropdown box beside Template:

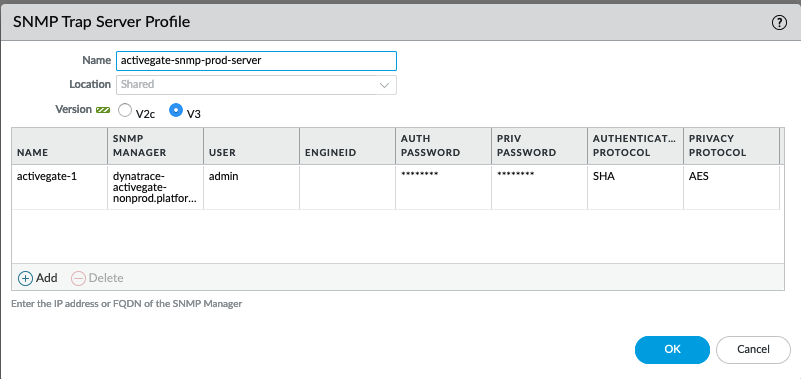
Click on Device and then Server Profiles and then `SNMP Trap.
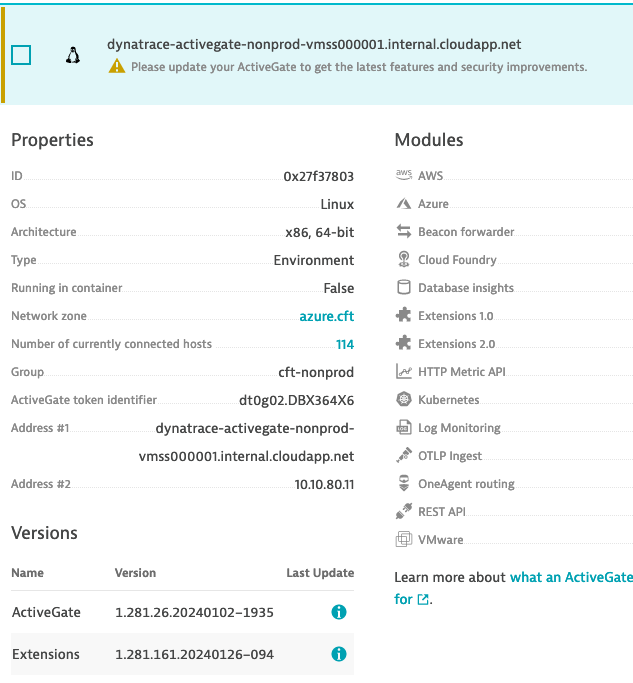
You will see an SNMP trap configured that will point to the Dynatrace ActiveGates.
Updating config
Configuration for the SNMP traps is managed via hub-panorama-terraform.
You can update this variable to add or remove SNMP log destinations as needed.
At present, the SNMP traps are being sent to a DNS name. More details on these can be found here.
If you need to switch the DNS to point to another instance in the scaleset, update the azure-private-dns repo.
There may be a brief pause in logs being received whilst the DNS updates.
Checking SNMP logs are being received in Dynatrace
There are dashboards in Dynatrace that show various metrics from the Palo Altos which you can check to confirm SNMP data is being received.
If the graphs are being refreshed with new data, the logs are flowing.
Dynatrace isn’t receiving any data
If the dynatrace dashboards are not receiving data, there are a couple of things you can check:
Are the DNS records pointing to the right instances?
Dynatrace ActiveGates are configured as a scaleset.
Our monitoring is configured to connect to the ActiveGates via a DNS name.
If logs are not showing in the portal, e.g. if SNMP data from the Palo Altos is missing, you may need to point the DNS to a different instance within the scaleset.
The relevant records can be found here.
Check the logs are flowing again after this change is made.
Is the dynatrace service running? You can check it by connecting to the activegates and running
service dynatracegateway statusAre the activegates in the correct group? The activegates must be in a group called
cft-nonprodorcft-prod, depending on the environment, in order for the SNMP logs to be received.
Adding an activegate to a group
This should be done automatically when the scale set instance is created but if you need to add an activegate to a group manually, you can.
Go to the dynatrace portal and select Deployment status from the left hand pane.
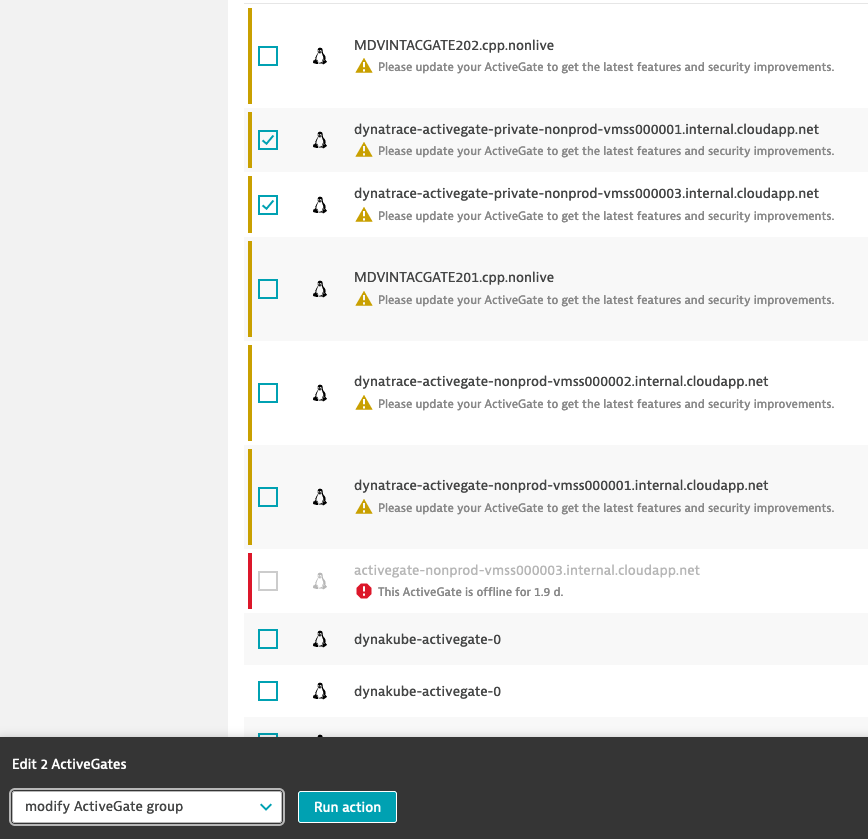
Click ActiveGates.
Select the activegates you want to put into the group and select Modify activegate group at the bottom of the screen and click Run Action.
Select the group and click Next.
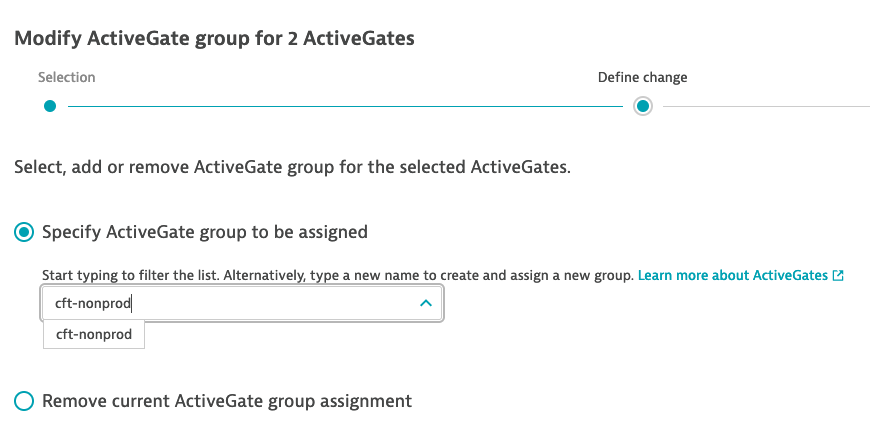
Once confirmed, the activegates should get moved into the group and the remote configuration will be updated.
You can confirm the group the activegate is in by clicking on the activegate and checking the Group value.