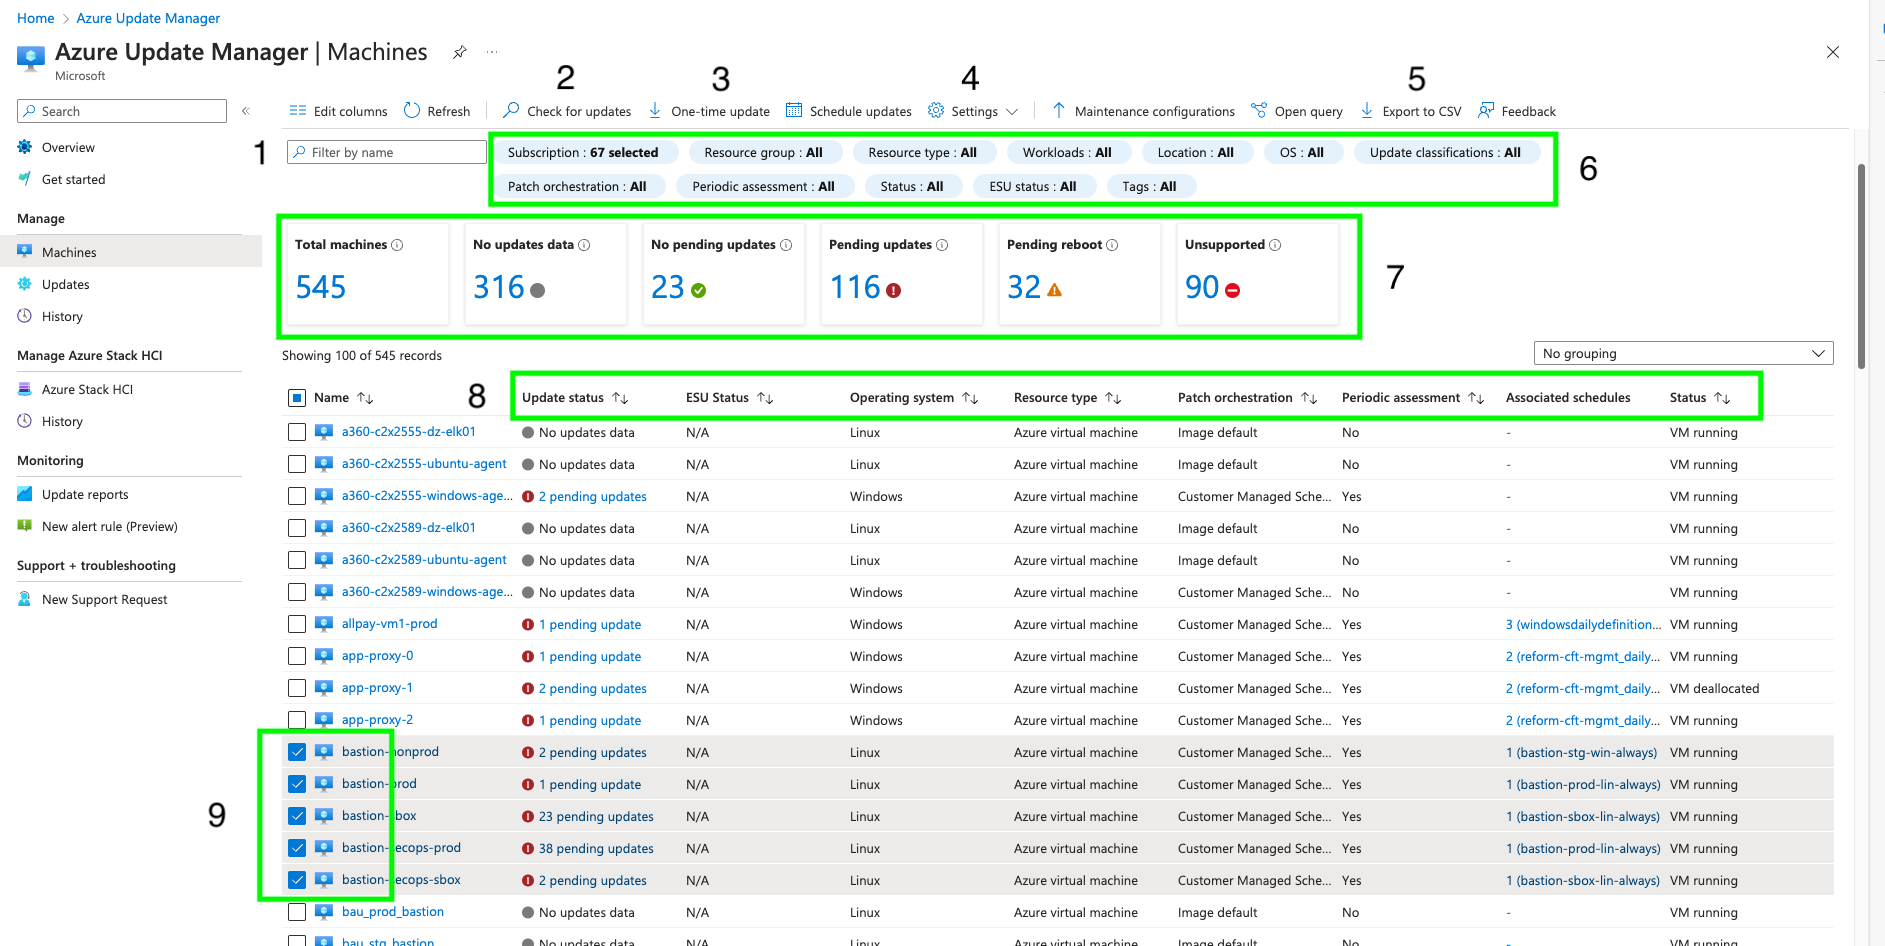
AUM - Multiple VM Operations
Ad Hoc Jobs For Multiple VMs
To manage multiple VMs, browse to the Azure Update Manager, Machines page
1 - Filter by Name
Filter by name (1 on diagram) enables searching for VMs by using either the specific name or just part of the name, such as proxy. In the diagram, ‘proxy’ would return change the view, to show just the 3 machines app-proxy-0, app-proxy-1 and app-proxy-3. Using ‘sbox’ would return ‘all’ 21 from 545 VMs, with sbox, within any part of their name.
2 - Check for Updates
By first selecting the target VMs using the check box (9 on diagram), a scan for missing updates can be triggered by clicking Check for Updates. (2 on diagram).
3 - One-time update
After selecting the target VMs, click One-time update (3 on diagram) to open the wizard. Select all the VMs to be updated and click Next.
A preview of the updates to be installed will be displayed. This can be modified using the Update selection options. Once the correct updates are displayed, click Next.
4 - Edit Update Setting
Azure policy should force the VMs update settings but sometimes they need to be changed. Select the target VMs and the click Settings (4 on diagram).
5 - Export to CSV
Azure Update manager holds data about the VMs which can be exported to a CSV file and processed by 3rd party applications like Excel. Use Export to CSV (5 on diagram).
6 - Filters
With over 500 VMs, the machines view can contain a lot of noise. The diagram shows app-proxy-1, which is deallocated. By click on Status within the view filers (6 on diagram), only running VMs could be shown. These filters are very powerful and time spent exploring them, with be rewarded.
7 - Fast Filters
The view of shown VMs can be quickly changed using these filters. Just click on Pending reboot (7 on diagram), to see only these 32 VMs.
8 - Column Order
By default, the view of VMs is sorted by the VMs name. This can be changed by selecting any column header (8 on diagram).
