F5 VPN Config
This document details the steps to configure routing to make internal apps available over the vpn.
Routing
- Connect to the VPN
Login to https://vpn.platform.hmcts.net/ or if this does not work look for the VM
mgmt-vpn-2-vmand use its public IP to login If you are accessing the F5 portal for the first time, submit a pull request to the user accounts file in this repo and ask someone with existing access to create your account. If you lose your login details, a person with existing access can provide you with new credentials.For making the changes to the ACL: click ‘Access → 'Access Control Lists’ → ‘User-defined ACLs’ → ‘acl_vpn_reform’, direct link
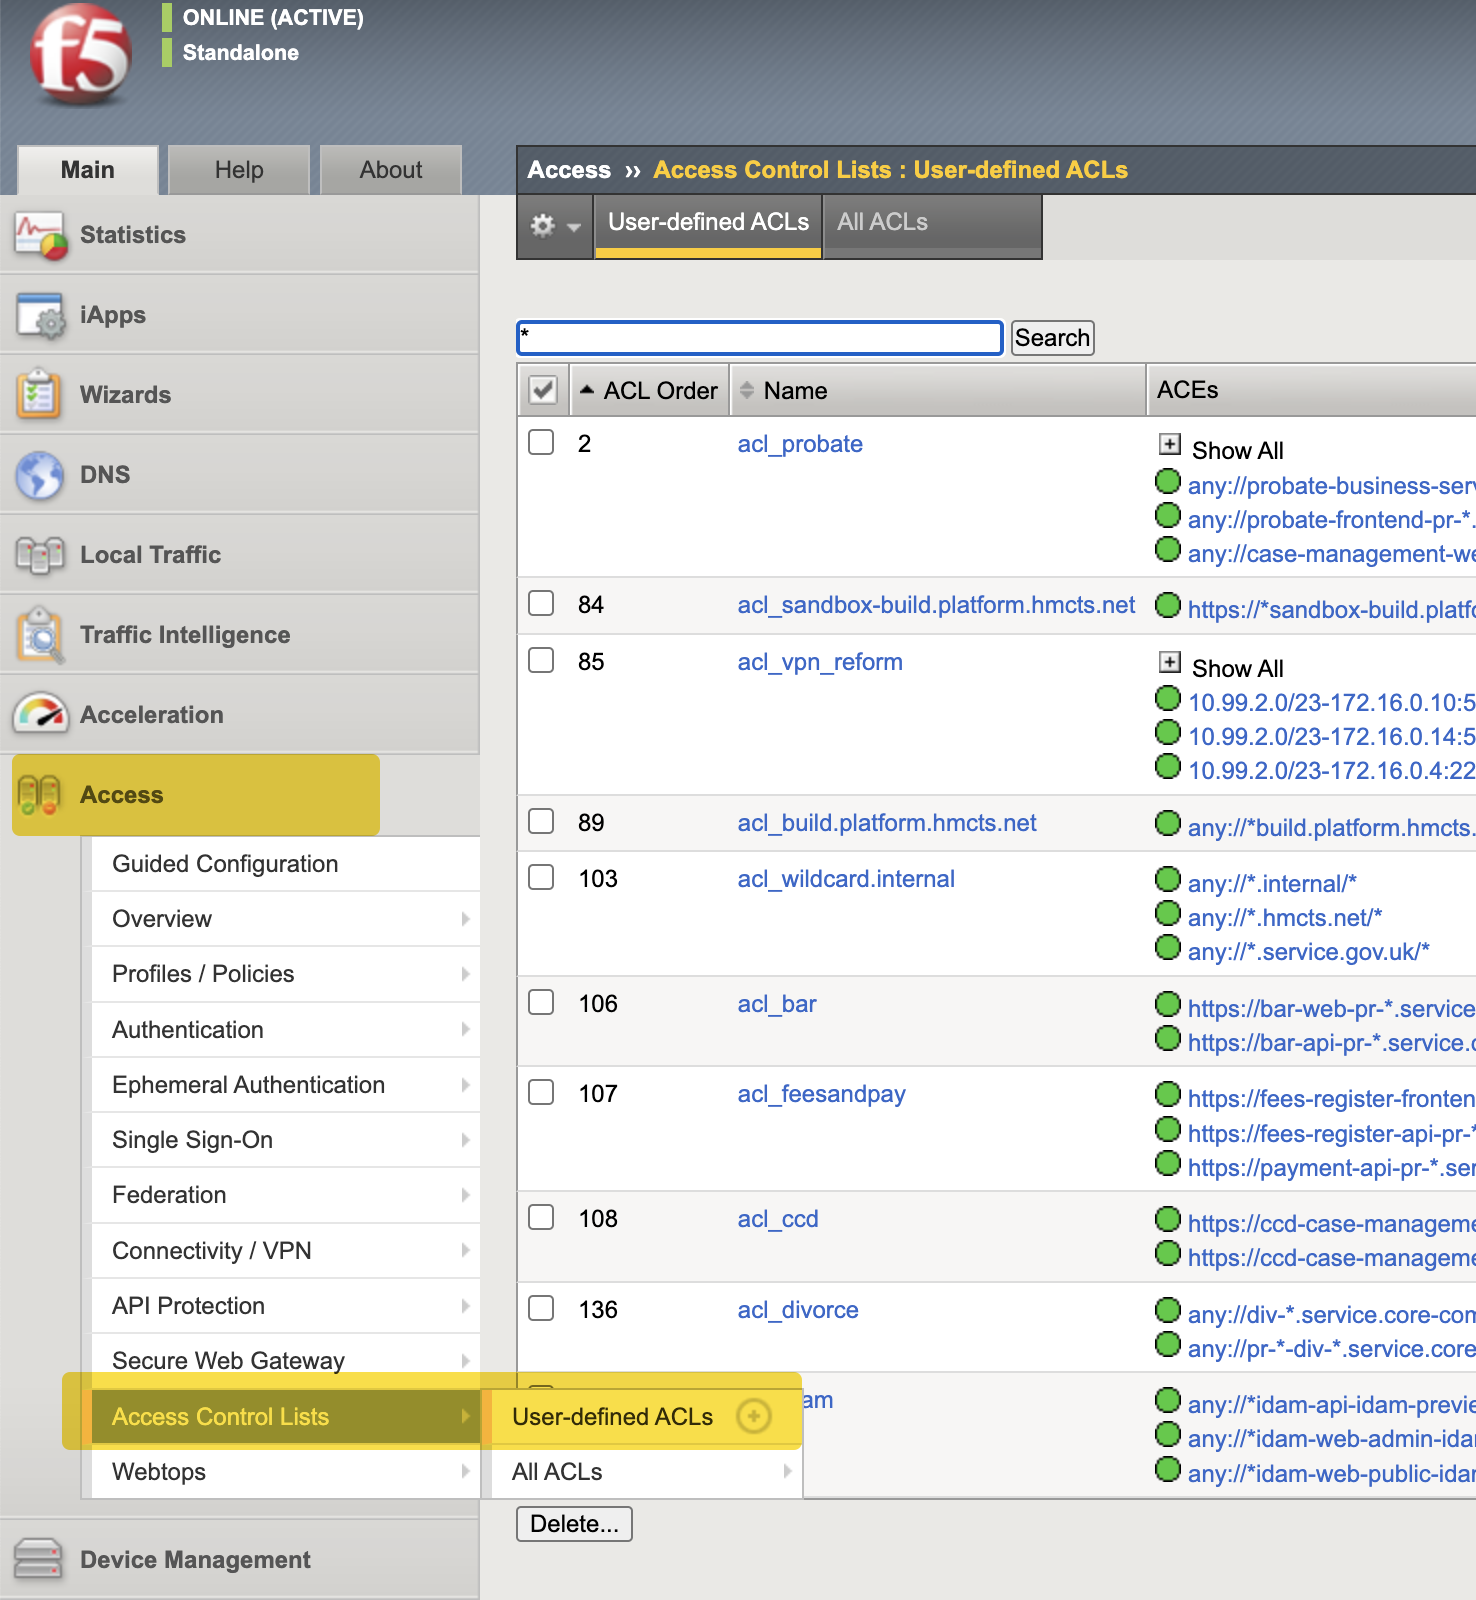
Make sure the range in question is NOT already added (If the range is already there and your app still not accessible through f5, see Common Issues section below)
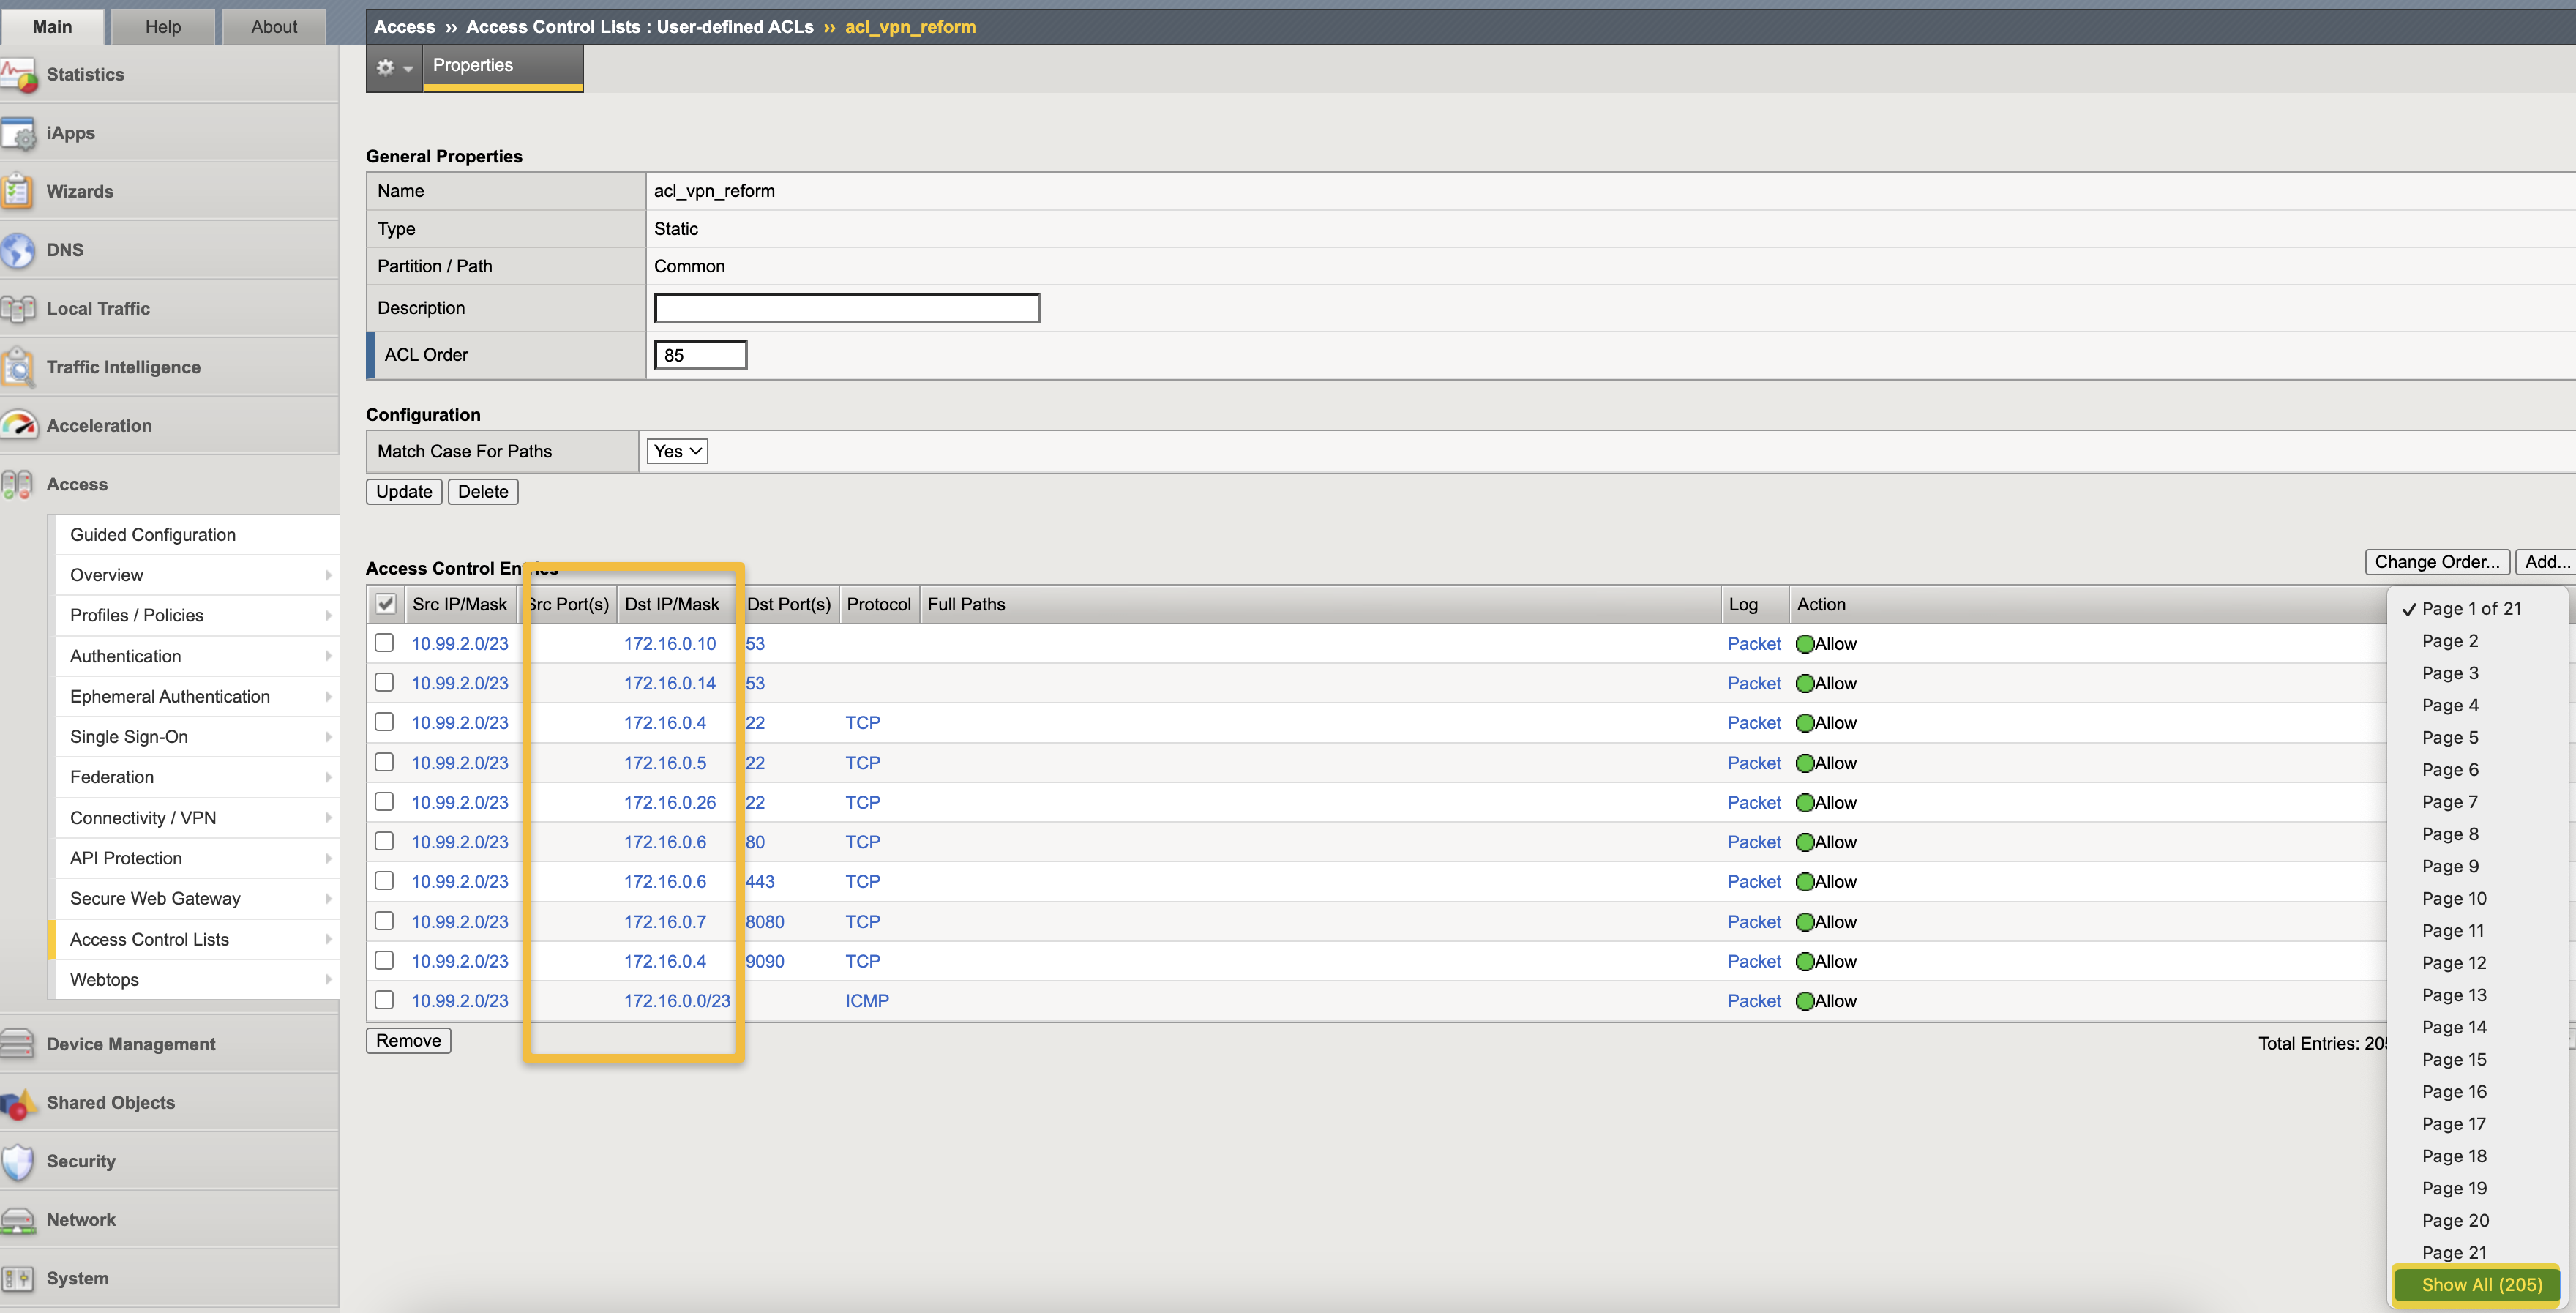
You will see a list of ACLs for all the entries. Open two tabs in your browser on the same page, open an existing one and then click ‘Add’ for your new one. Copy the required details from the existing one to the new one. Note: If using Firefox then the search function probably won’t find the IP address you type in.
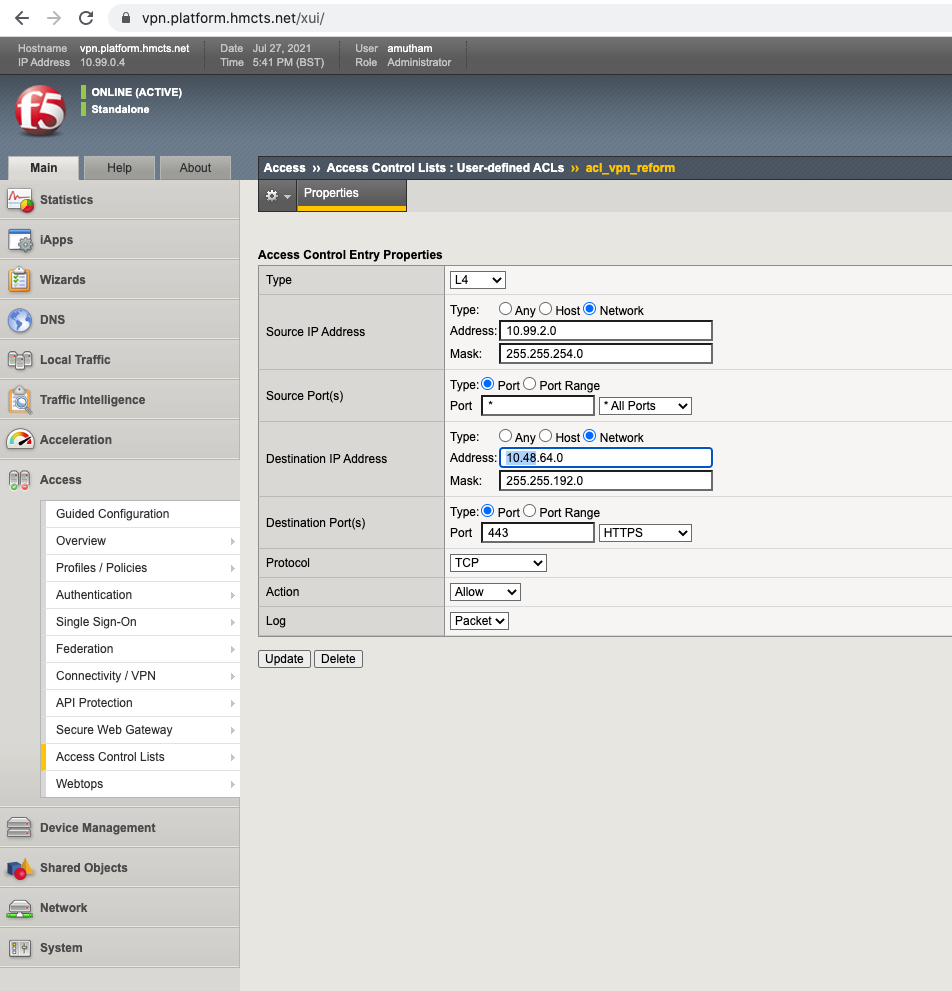
You will find 2 entries; HTTP and HTTPS. Change it to add new CIDR range, such as below:
Access Policy
Navigate to Connectivity profiles to make a corresponding change to the routing.\ Connectivity Profiles
Add the new CIDR range under IPV4 and IPV6 . After verification, click on the
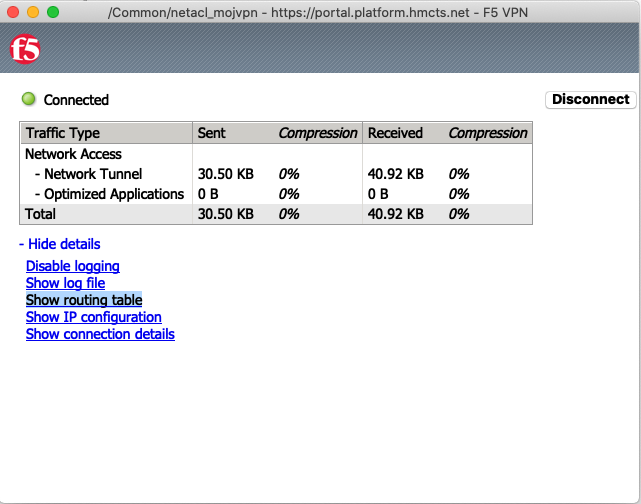
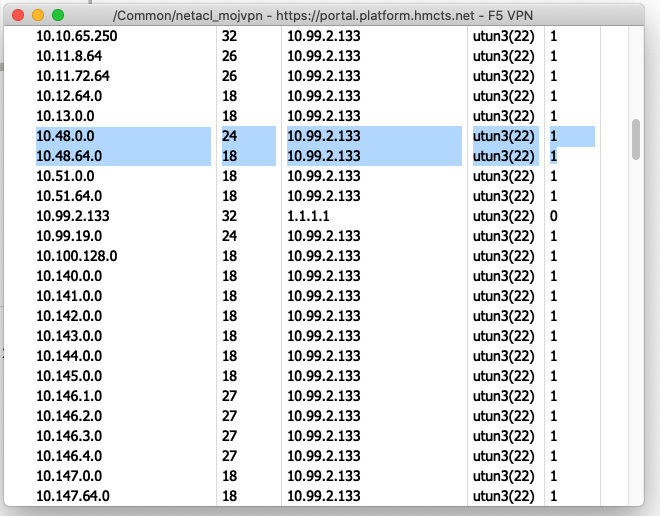
Apply Access policyon the top left corner of the portal to propagate the routing changes.\ VPN ACLLogout of your current F5 VPN session (https://portal.platform.hmcts.net) and log back in to validate if the routing table update has taken place for the new network address space as shown below:
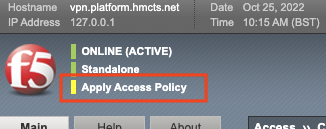
Apply Access Policy
Once you have made a change to F5, you are required to Apply Access Policy.
- When a change has been made, you need to Apply Access Policy before change is effective on F5. You will notice this in top left of the F5 Portal when you have made a change.
Select Apply Access Policy
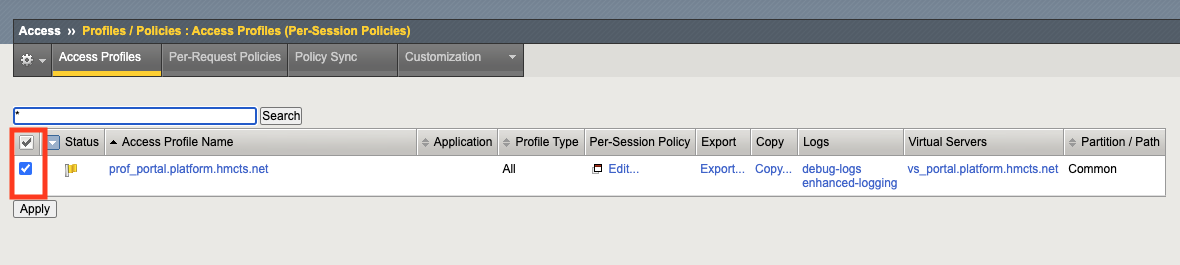
- Review Access profile & ensure option prof_portal.platform.hmcts.net is ticked
Select Apply
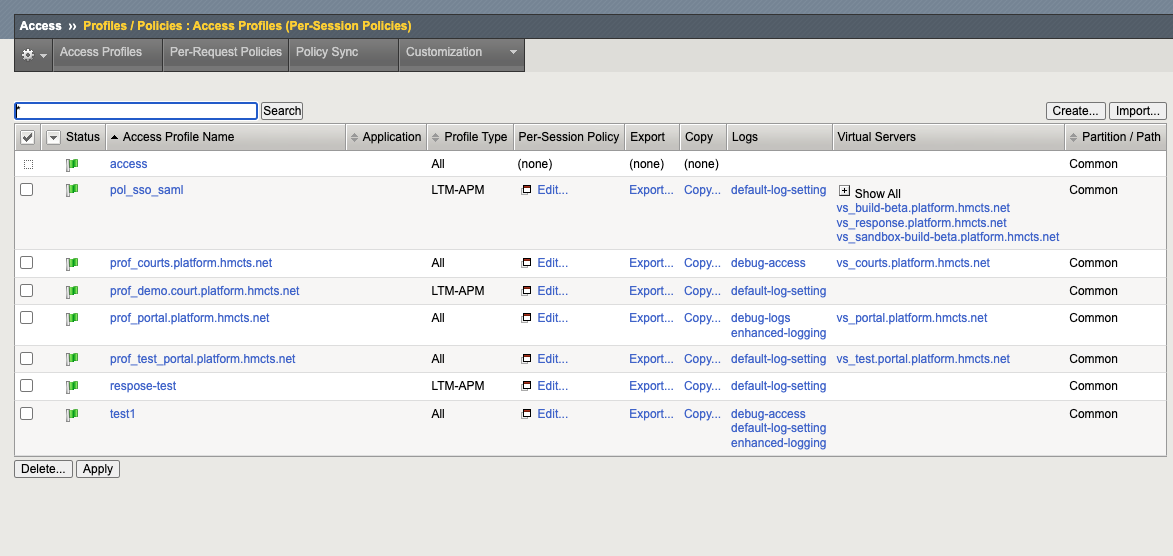
- Access profile policies are then shown, it should already be ticked for all.
Select Apply

- Once successful apply, all access profiles should be green
Common Issues
App not available through f5, after CIDR range added to ‘acl_vpn_reform’ Access Control Lists?
If your app is not available after adding CIDR range and you know that app is accessible internally (from internal pod etc.), and only not available through f5, check if the CIDR range or the DNS zone is missing in the network access lists. Please follow below.
- Click ‘Access → 'Connectivity/VPN’ → ‘Network Access(VPN)’ → ‘Network Access Lists’ and then select
netacl_mojvpnfrom the list
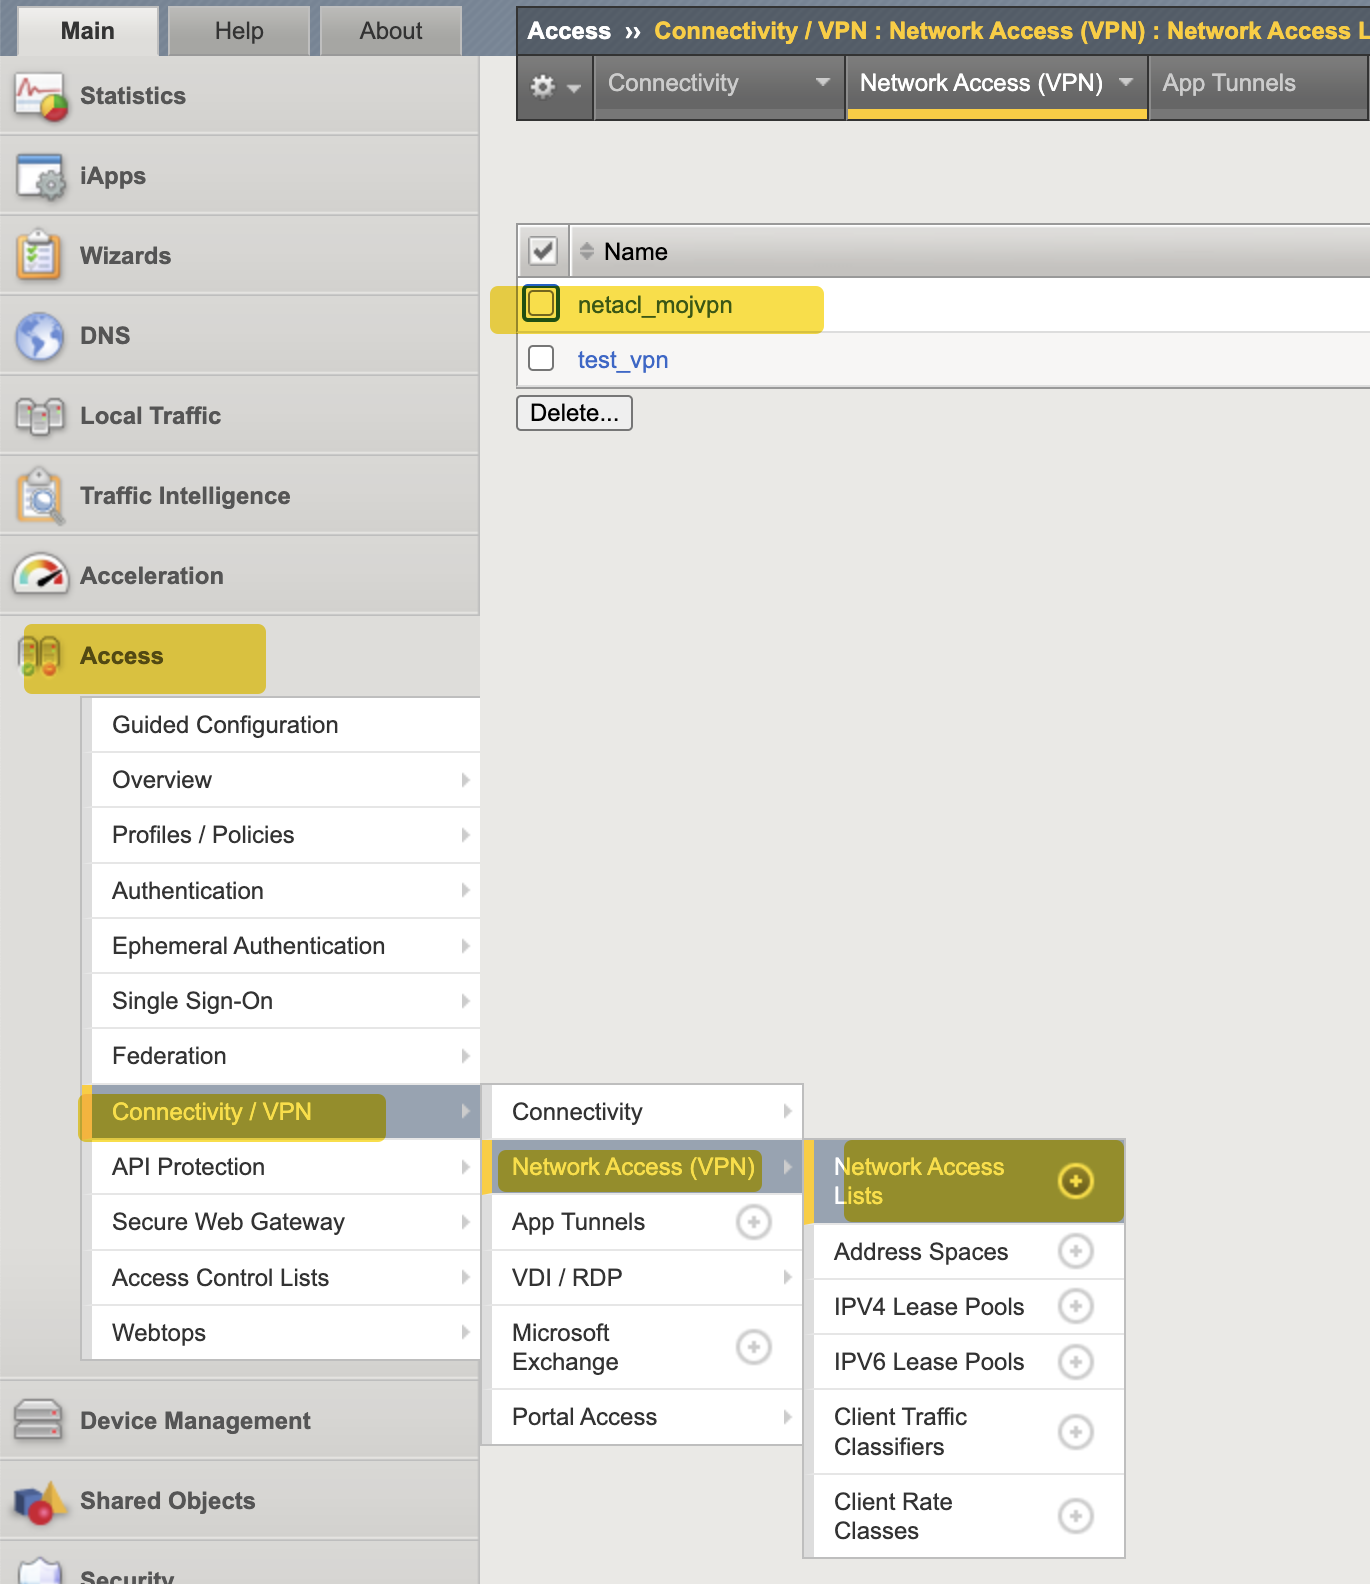
Click on Network Settings tab
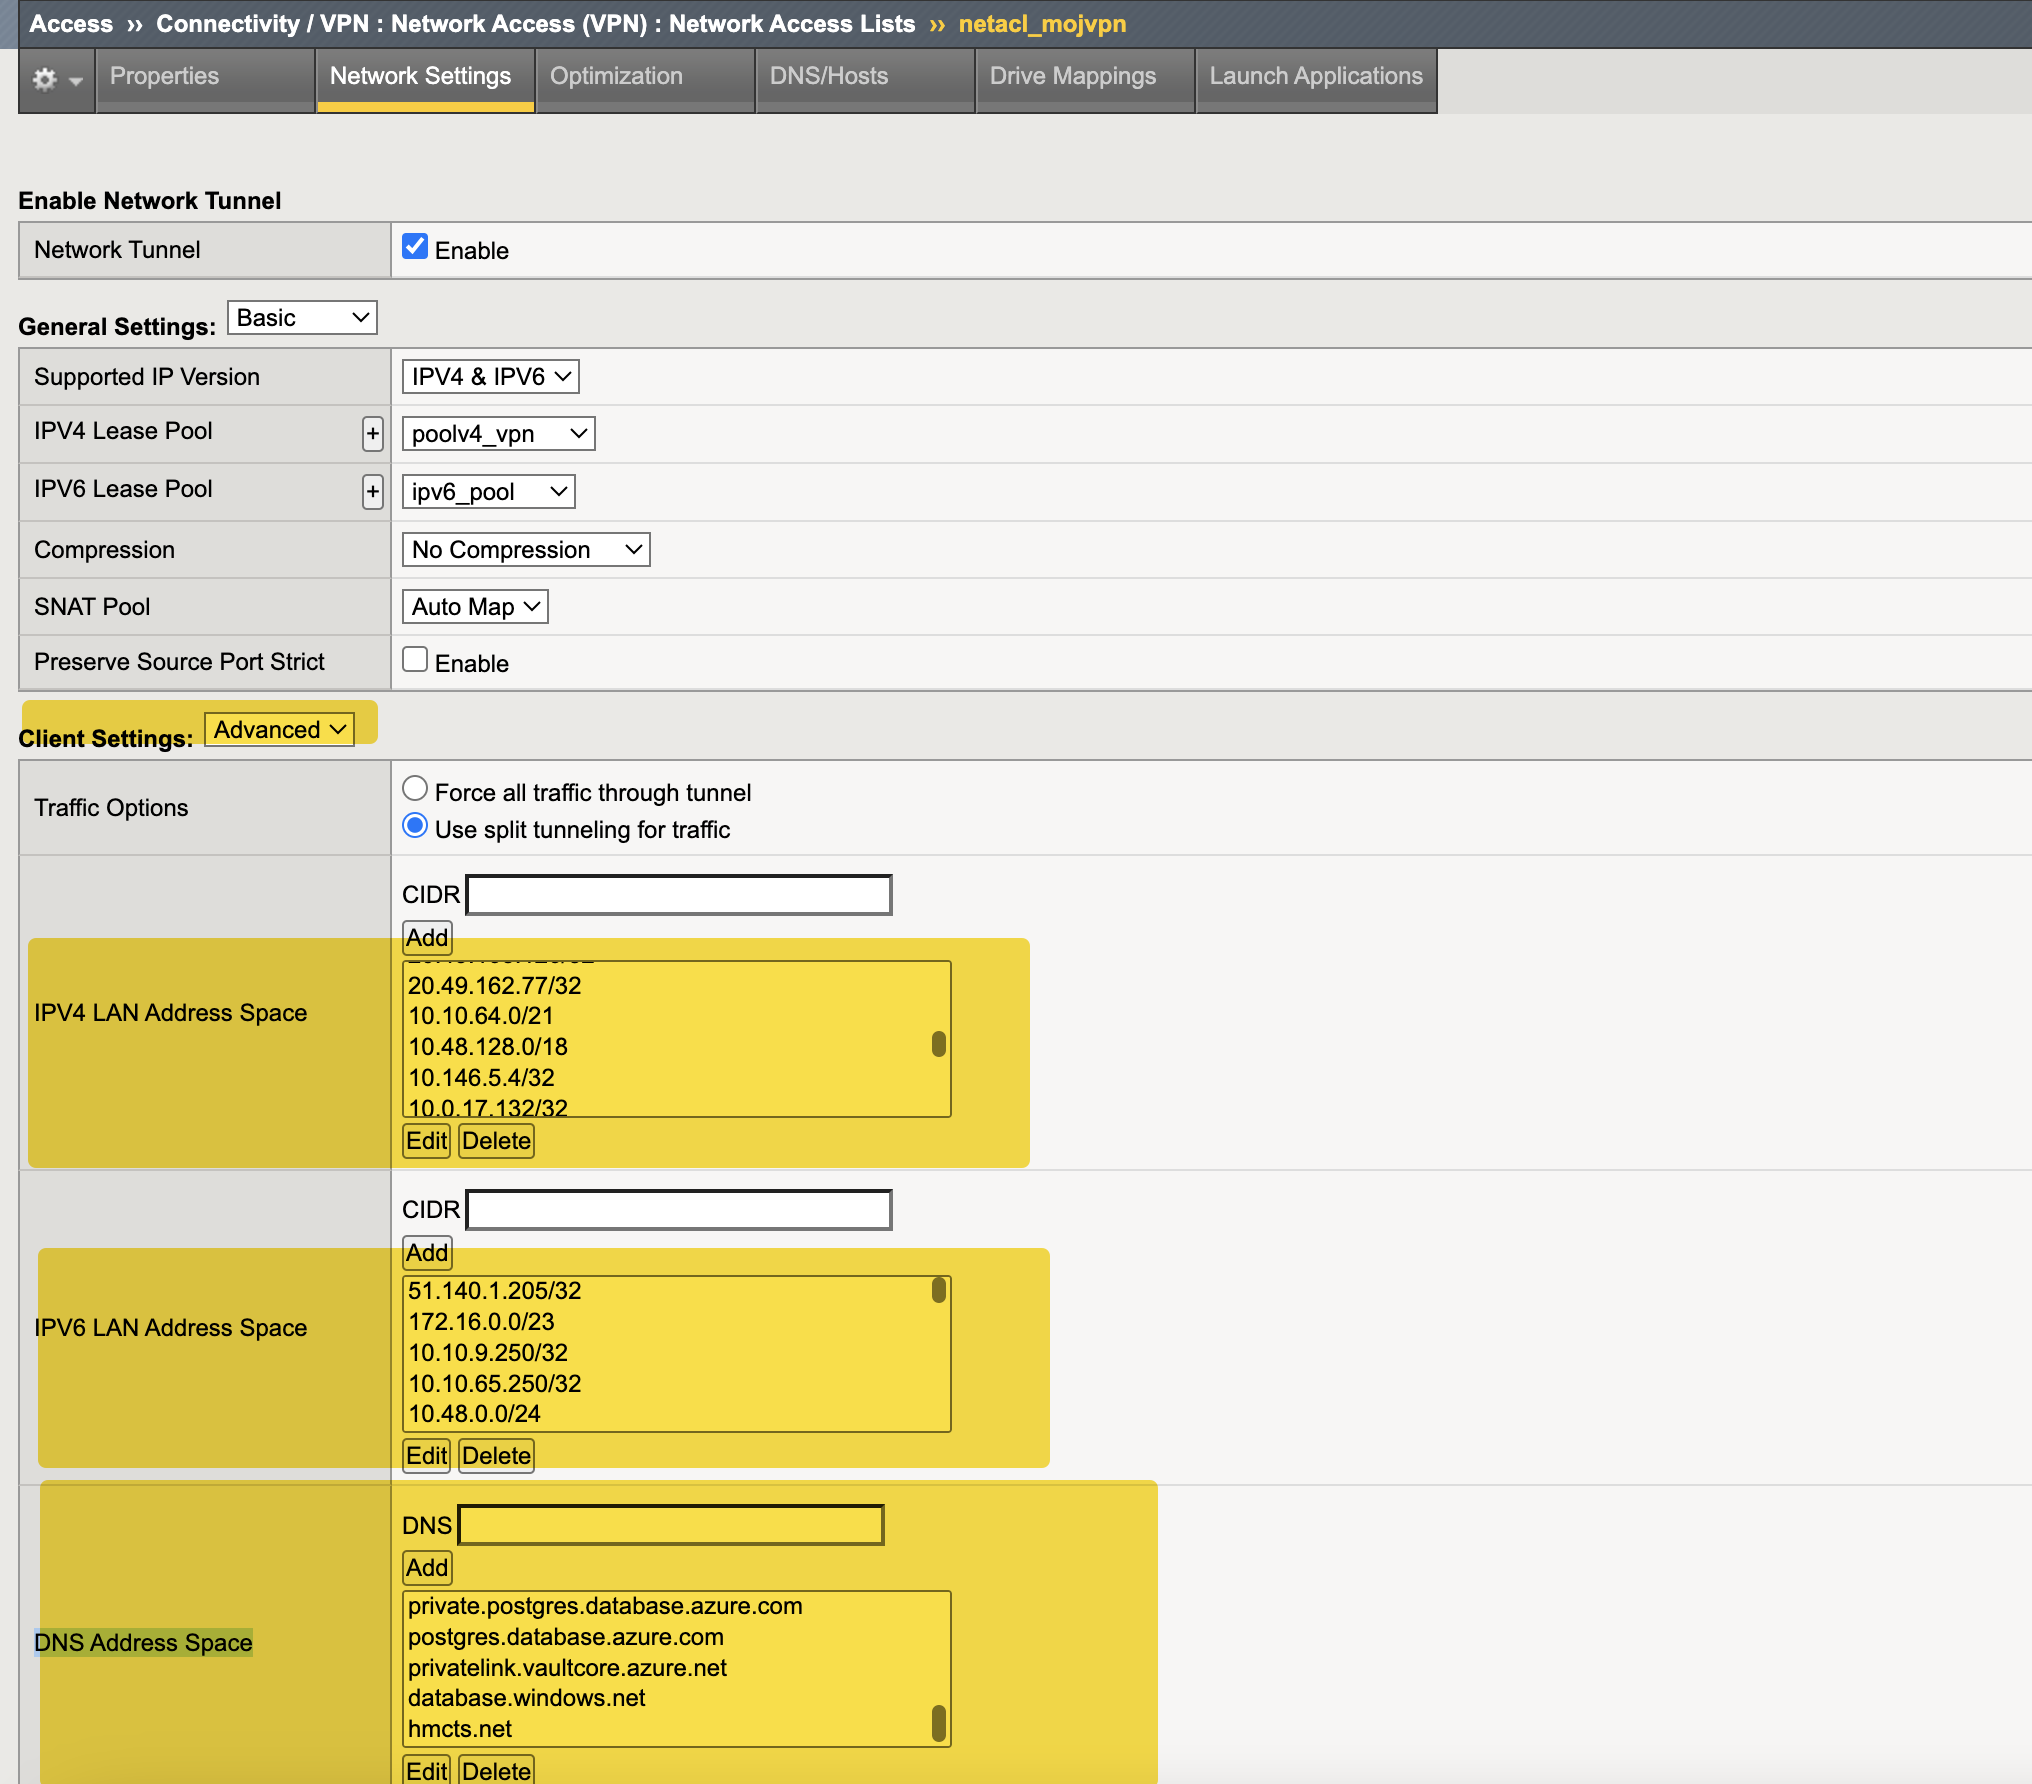
Change from
BasictoAdvancedin theClient SettingsAdd new CIDR range under IPV4 and IPV6 if its not there already
Make sure private dns zone has been added under DNS Address Space too
Other Common issue
- Failed HDD encryption check: Likely means that FileVault is turned off if it’s Mac, or some other whitelisted Full Disk encryption needs to be installed and used on a Windows/Ubuntu machine.
- User is not assigned to a role for the application: https://hmcts.github.io/onboarding/person/#person
- Failed to open tunnel, Tunnel server already launched: Find the svpn process id:
ps alx | grep svpn, on the result process ID use the kill command:kill -9 [the process id from the ps command], and or restart the machine.
If the issue persists or has no available solution, you may need to initiate a support request with F5. To do this you’ll need the F5 serial number / Registration key.
To get this, you need to access the command line by SSHing into the VPN
To ssh you will need an account on the F5 VPN admin site with terminal access set.
ssh from your local terminal session - for example ‘ssh willw@%public IP address%’ Your connection may be blocked by the NSG containing the F5.
There you can run this command: show sys license or tmsh show sys license.
The registration key will show in the output (last seven characters required) and you can then initiate the support request.
To raise a case you will need an account setup using your hmcts.net on my.f5.com (https://my.f5.com/manage/s/contactsupport). You can also call 0-800-404-9597
Further instructions on how to raise cases: https://my.f5.com/manage/s/article/K000135931